Revornix
What is Revornix
Revornix is an information management tool designed for the AI era, featuring built-in MCP support. It helps users efficiently consolidate all visible information and generates comprehensive reports at specified times.
Use cases
Use cases for Revornix include generating reports for business insights, consolidating research data for academic purposes, and managing project information for teams.
How to use
To use Revornix, clone the repository from GitHub, configure the necessary environment variables, and start the application using Docker. Access the front-end interface via http://localhost after all services are up.
Key features
Key features of Revornix include efficient information integration, comprehensive reporting capabilities, and built-in support for MCP, making it suitable for managing fragmented information in the AI era.
Where to use
Revornix can be used in various fields such as data analysis, project management, and any domain where information consolidation and reporting are crucial.
Clients Supporting MCP
The following are the main client software that supports the Model Context Protocol. Click the link to visit the official website for more information.


Overview
What is Revornix
Revornix is an information management tool designed for the AI era, featuring built-in MCP support. It helps users efficiently consolidate all visible information and generates comprehensive reports at specified times.
Use cases
Use cases for Revornix include generating reports for business insights, consolidating research data for academic purposes, and managing project information for teams.
How to use
To use Revornix, clone the repository from GitHub, configure the necessary environment variables, and start the application using Docker. Access the front-end interface via http://localhost after all services are up.
Key features
Key features of Revornix include efficient information integration, comprehensive reporting capabilities, and built-in support for MCP, making it suitable for managing fragmented information in the AI era.
Where to use
Revornix can be used in various fields such as data analysis, project management, and any domain where information consolidation and reporting are crucial.
Clients Supporting MCP
The following are the main client software that supports the Model Context Protocol. Click the link to visit the official website for more information.
Content
Revornix
When I came up with the name, I was inspired by the fragmented nature of this era and how one must evolve in it. Thus, I combined the meanings of “Rebirth” and “Vortex,” symbolizing a process of rebirth in the midst of fragmentation.
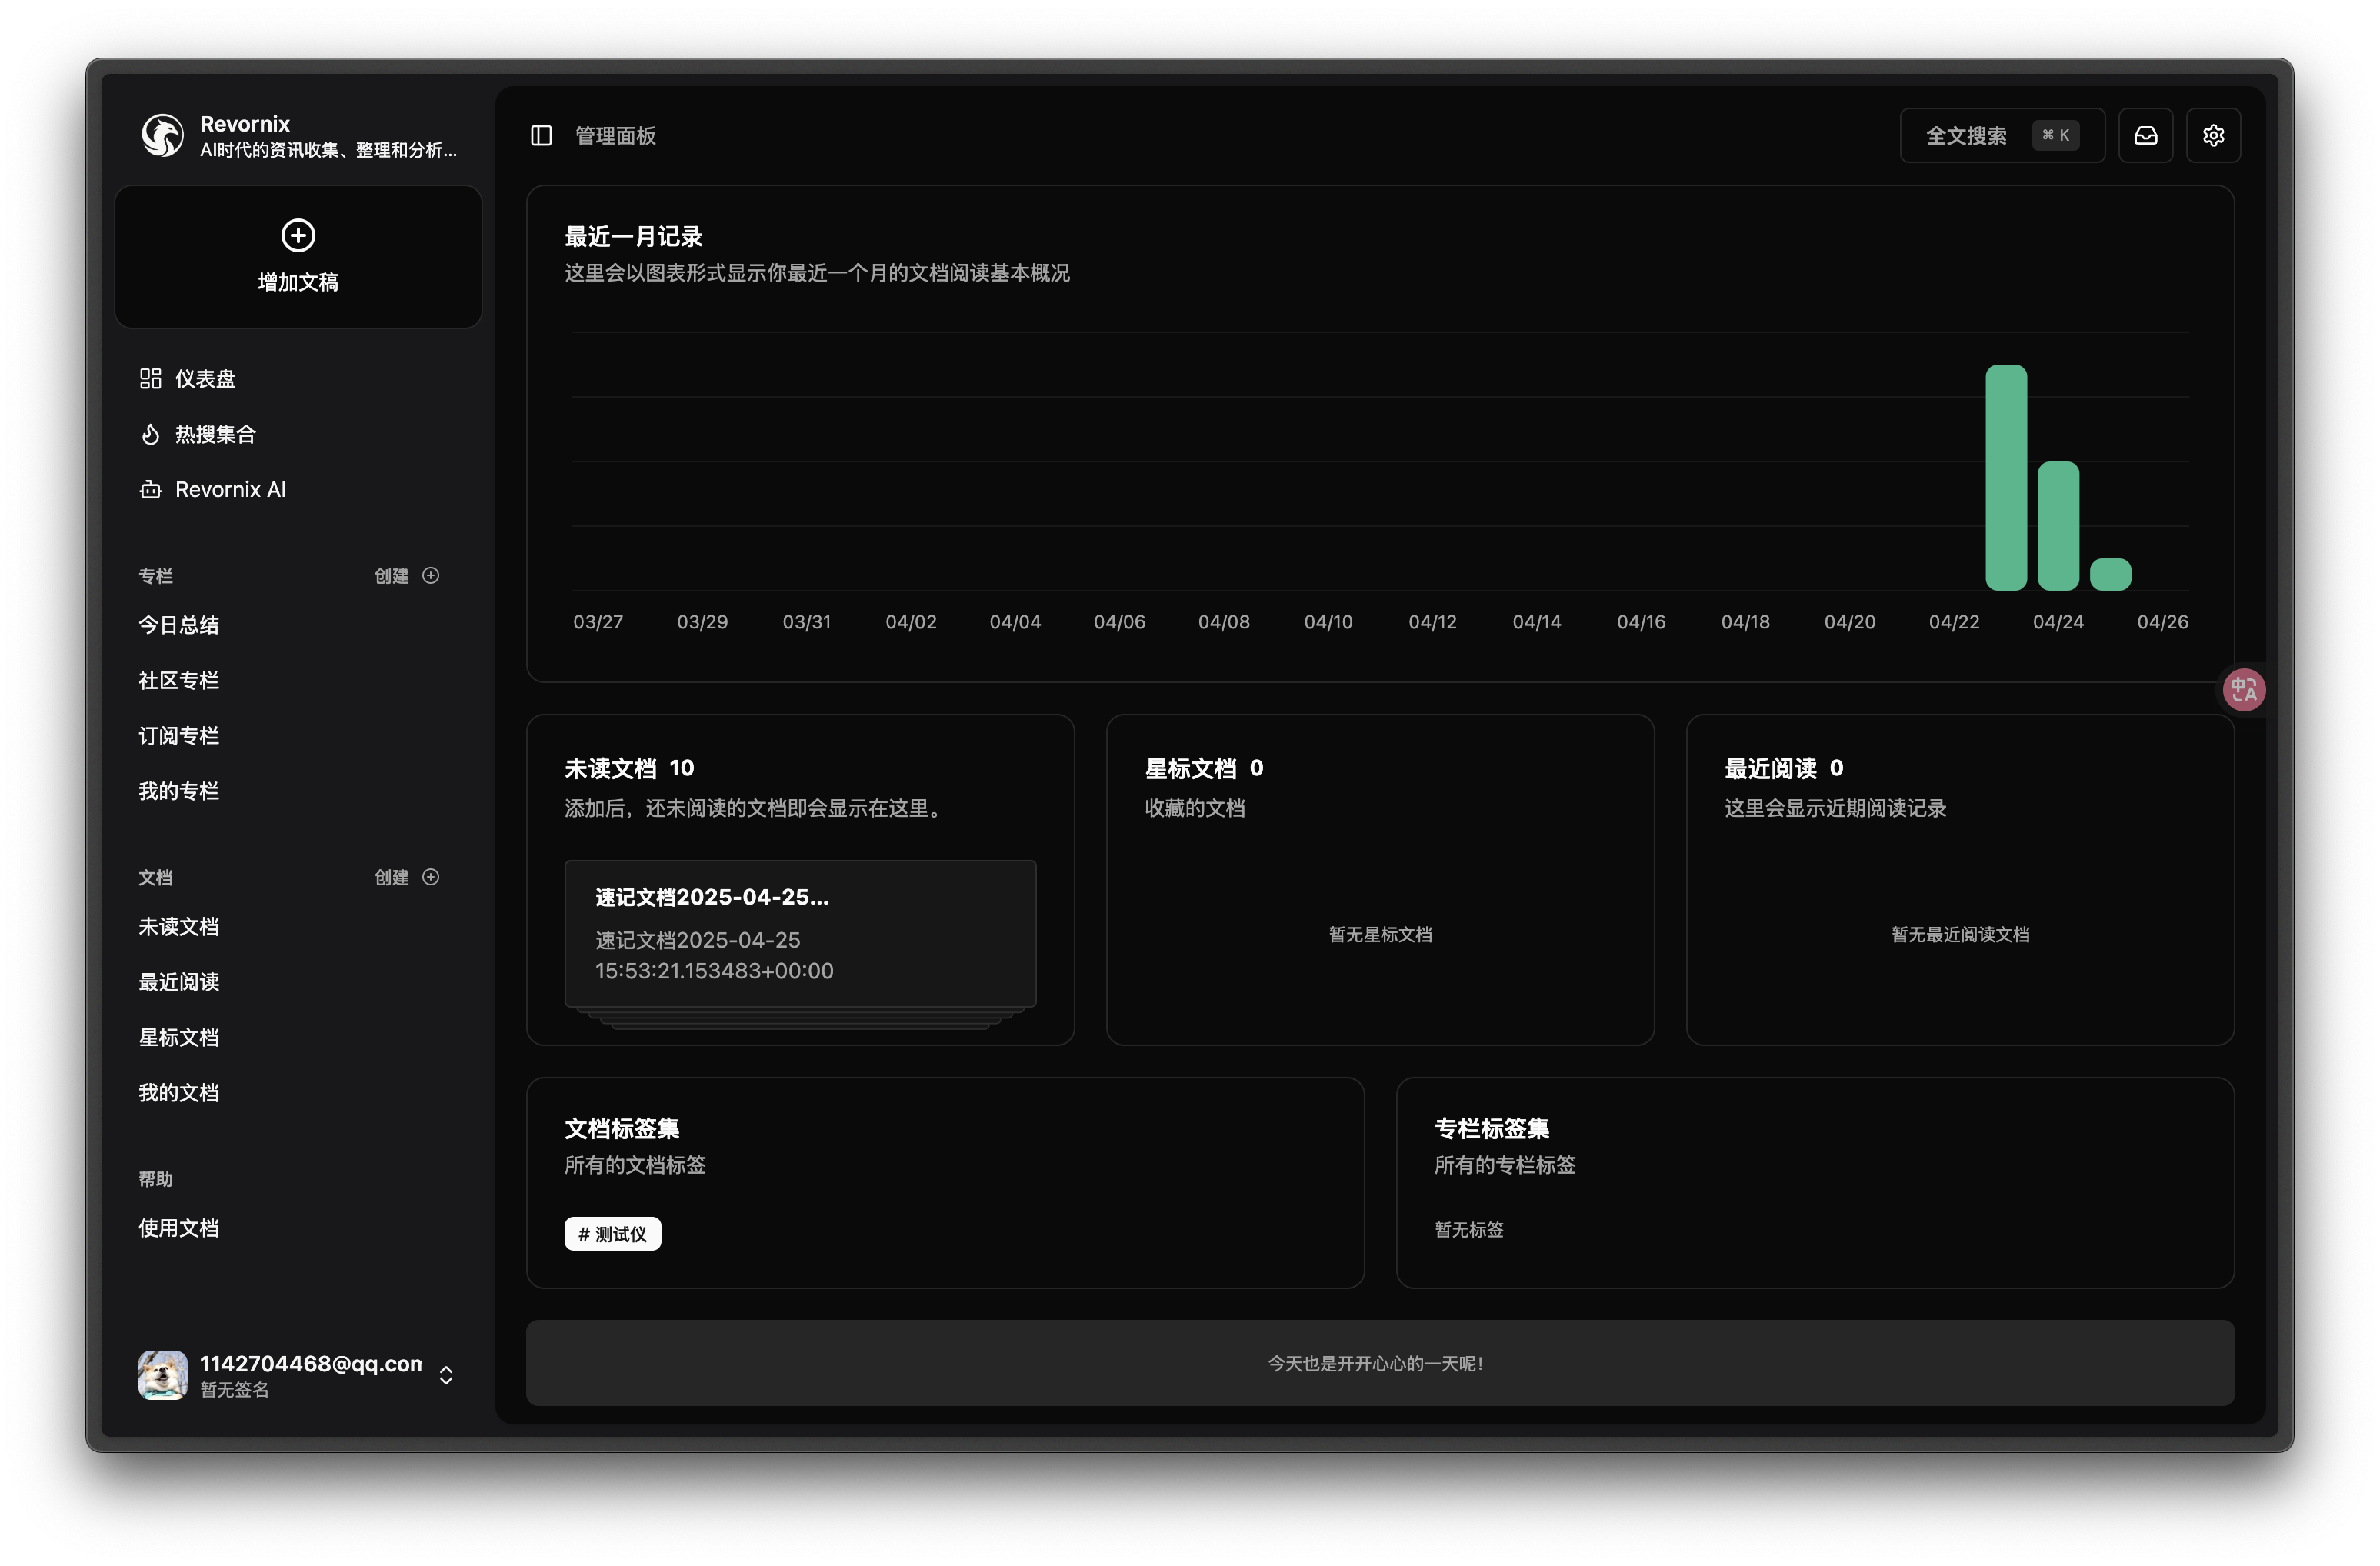
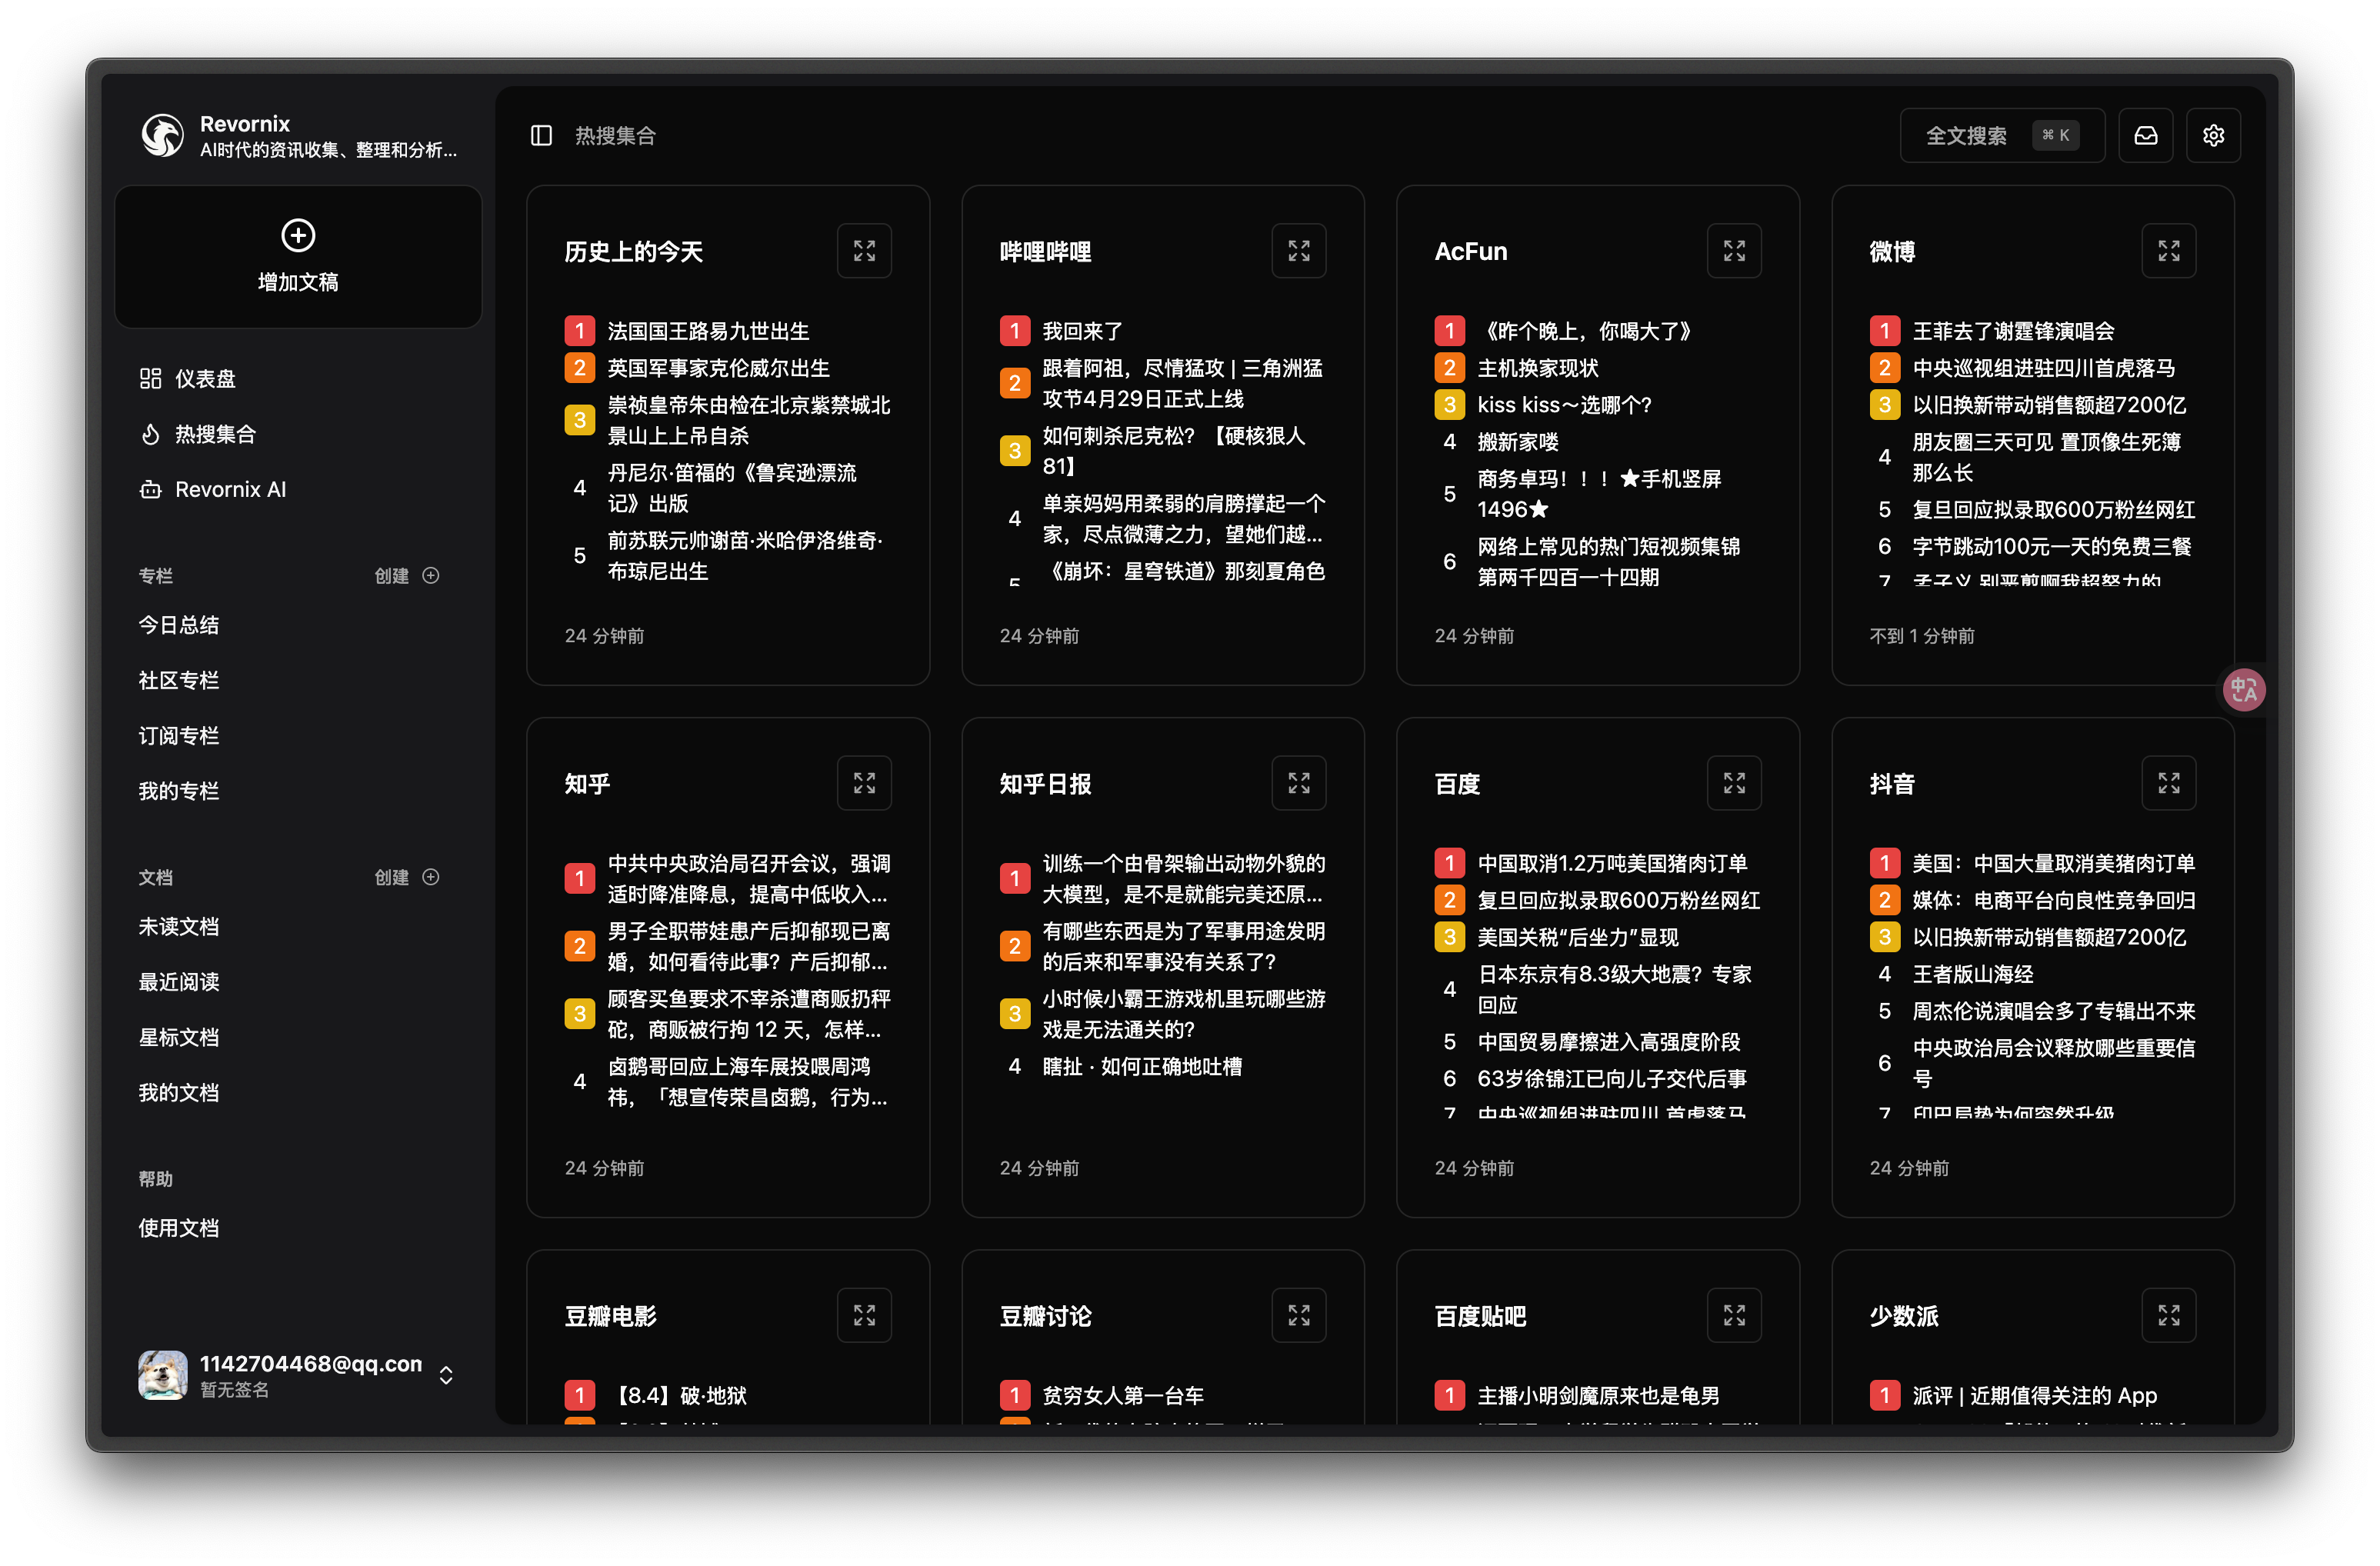
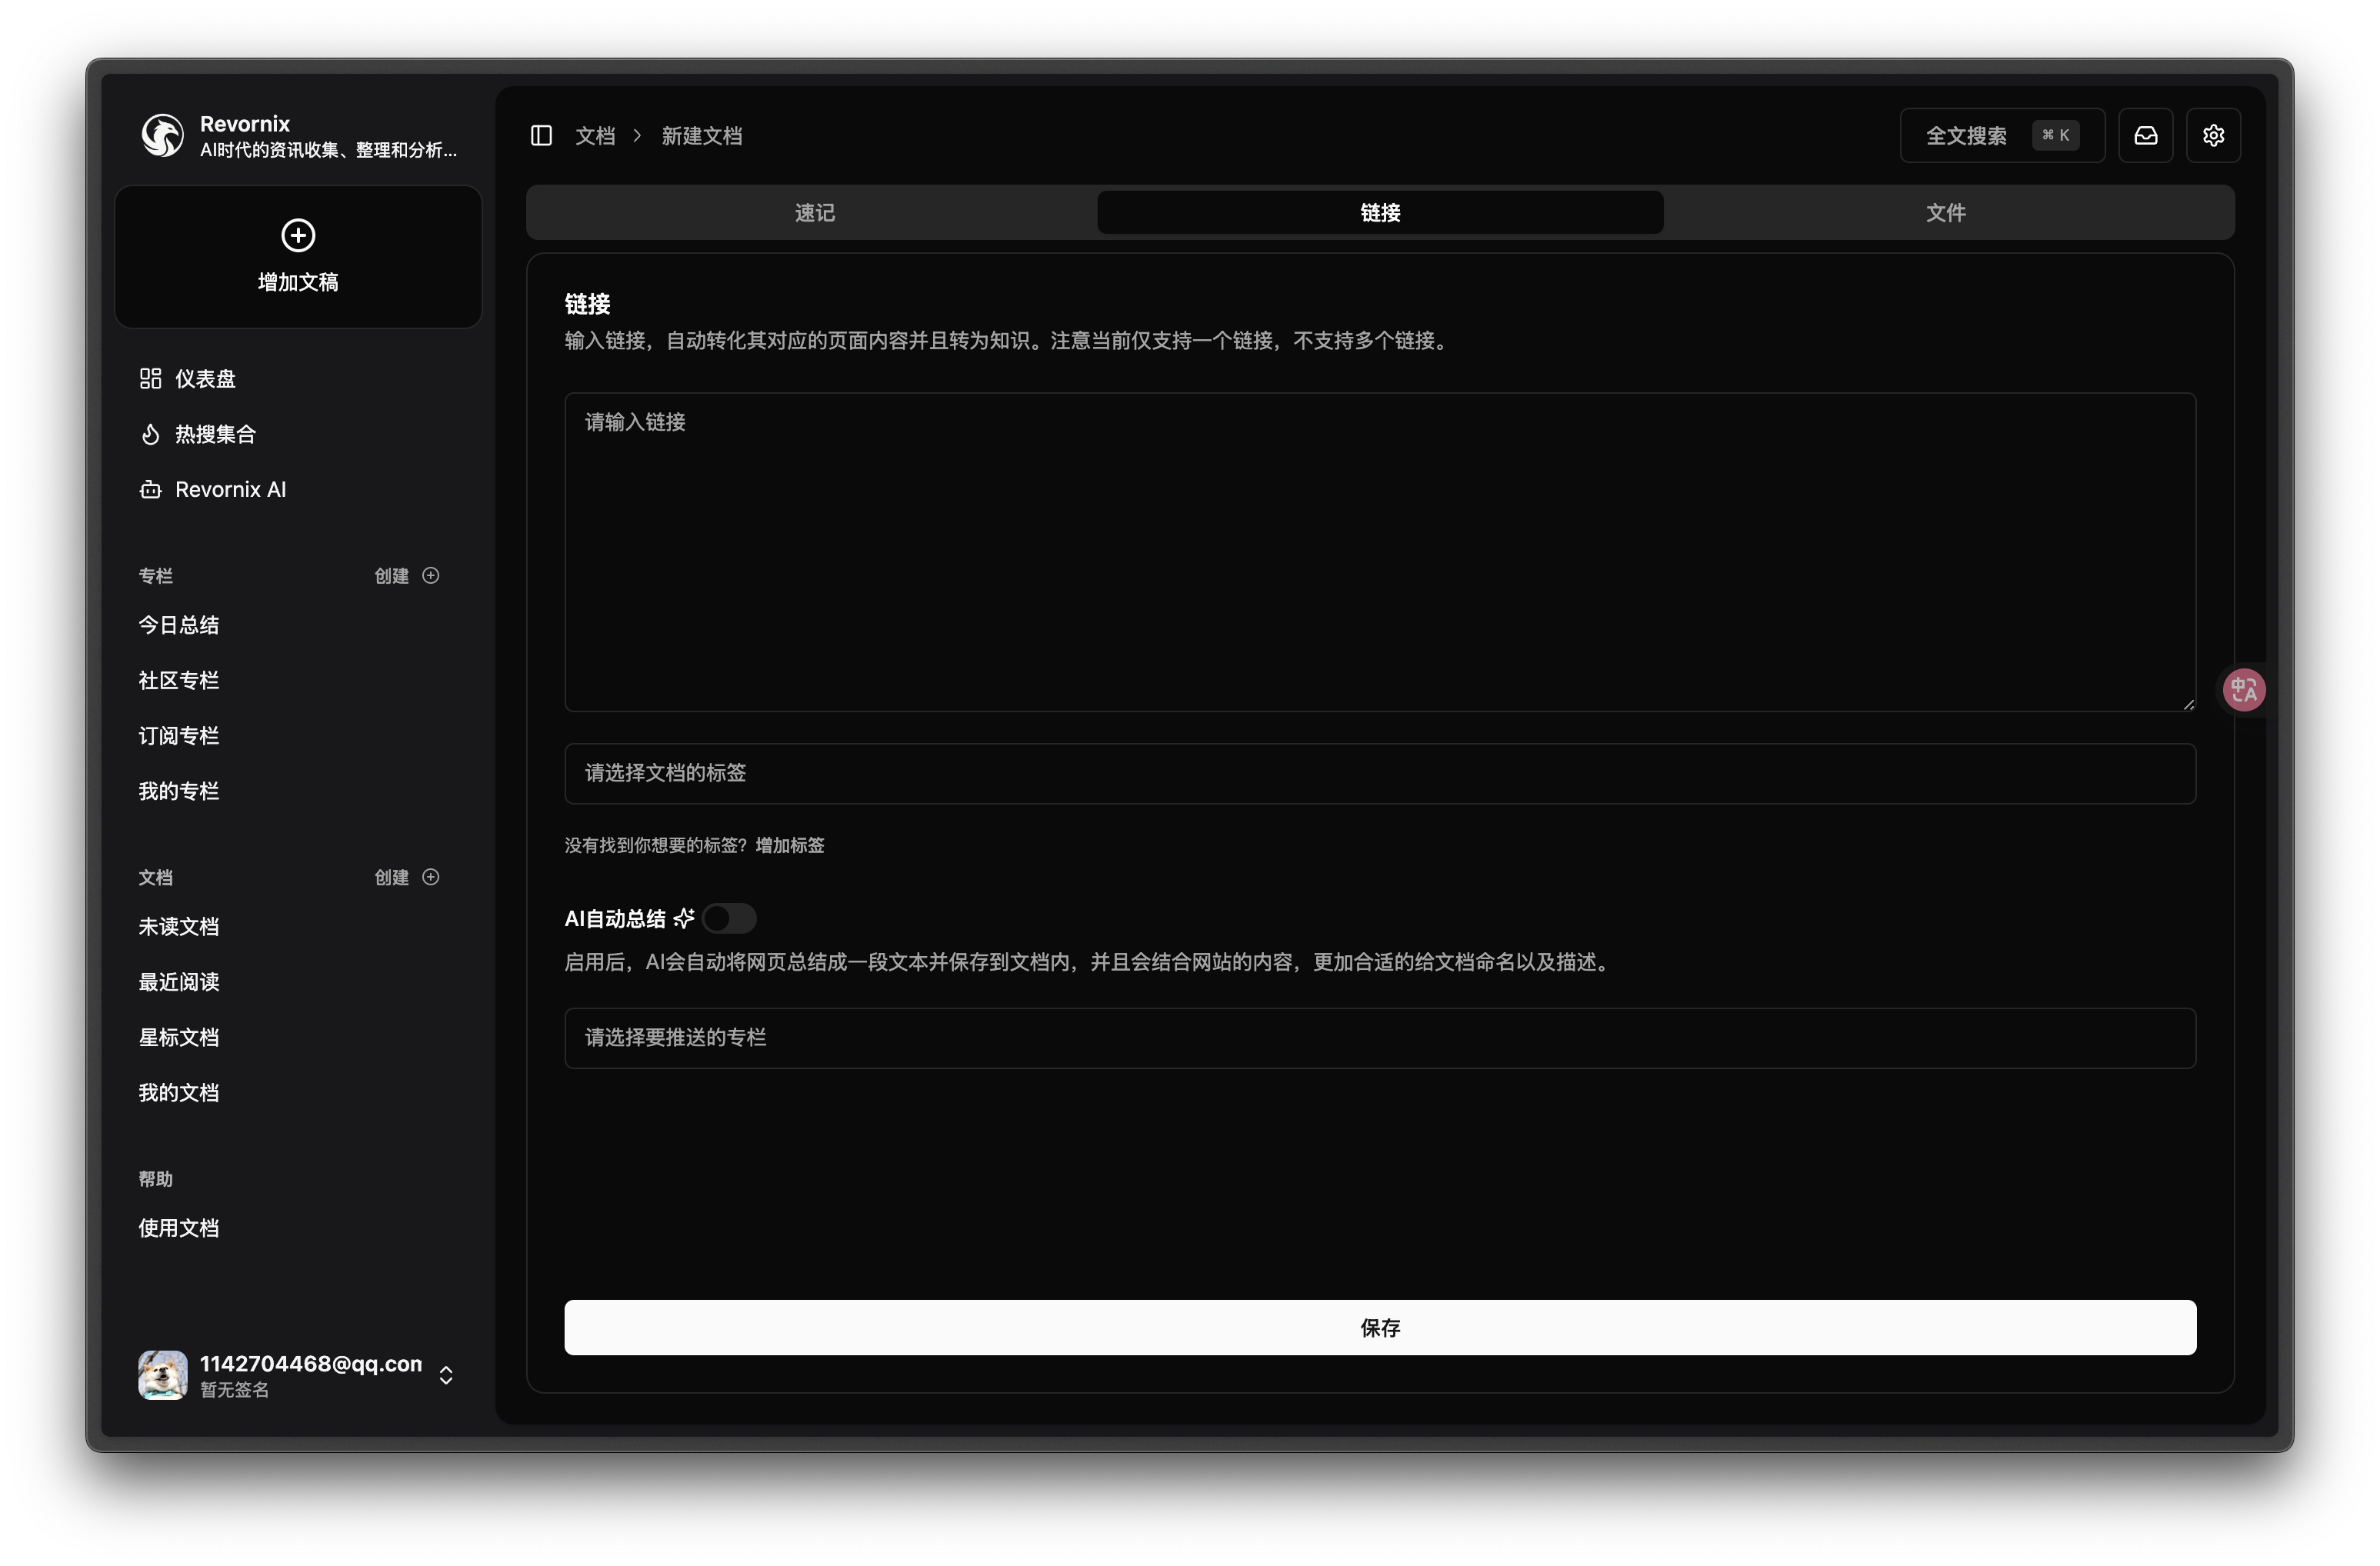
Revornix is an information management tool for the AI era. It helps you conveniently integrate all visible information and provides you with a comprehensive report at a specific time.
Quick Start
Docker Method (Recommended)
Clone the Repository Locally
git clone [email protected]:Qingyon-AI/Revornix.git
cd Revornix
Environment Variables Configuration
cp ./envs/.api.env.example ./envs/.api.env
cp ./envs/.file.env.example ./envs/.file.env
cp ./envs/.celery.env.example ./envs/.celery.env
cp ./envs/.hot.env.example ./envs/.hot.env
cp ./envs/.mcp.env.example ./envs/.mcp.env
Go to the corresponding environment variable files and configure them. For details, refer to Environment Variables Configuration.
In the web subdirectory, add the following file to configure the front-end environment variables:
NEXT_PUBLIC_API_PREFIX='http://localhost/api/main-service'
NEXT_PUBLIC_NOTIFICATION_WS_API_PREFIX='ws://localhost/api/main-service/notification/'
NEXT_PUBLIC_FILE_API_PREFIX='http://localhost/api/file-service'
NEXT_PUBLIC_DAILY_HOT_API_PREFIX='http://localhost/api/daily-hot-service'
Pull Necessary Repositories and Start with Docker
docker compose up -d
Once all services are started, you can visit http://localhost to view the front-end page. Note that due to the back-end services taking longer to start, the front-end may need to wait for some time (usually around 3-5 minutes) before it can make successful requests. You can check the core back-end service status with docker compose logs api.
Manual Deployment Method
This method is not recommended unless you need to modify the source code for custom features, as it can be more complex.
[!WARNING]
It is strongly recommended to create separate Python virtual environments for each service using conda, as there may be dependency conflicts between services. However, if you have another Python environment management tool, you may use that as well.
Clone the Repository Locally
git clone [email protected]:Qingyon-AI/Revornix.git
cd Revornix
Environment Variables Configuration
cp ./envs/.api.env.example ./api/.env
cp ./envs/.file.env.example ./file-backend/.env
cp ./envs/.celery.env.example ./celery-worker/.env
cp ./envs/.hot.env.example ./daily-hot/.env
cp ./envs/.mcp.env.example ./mcp-server/.env
In the ./api/.env and ./file-backend/.env files, add the following content:
ENV=dev
In the web subdirectory, add the following file to configure the front-end environment variables:
NEXT_PUBLIC_API_PREFIX='http://localhost/api/main-service'
NEXT_PUBLIC_NOTIFICATION_WS_API_PREFIX='ws://localhost/api/main-service/notification/'
NEXT_PUBLIC_FILE_API_PREFIX='http://localhost/api/file-service'
NEXT_PUBLIC_DAILY_HOT_API_PREFIX='http://localhost/api/daily-hot-service'
Go to the corresponding environment variable files for configuration. For details, refer to the Environment Variables Configuration.
Initialize Necessary Data
cd api
python -m script.init_vector_base_data
python -m script.init_sql_base_data
Install and Start Core Services
[!NOTE]
If you have not installed MySQL, Redis, and Milvus, you will need to install these services manually and modify the corresponding parameters in the environment variable files.
To simplify this, I have provided a docker-compose-local.yaml file, which you can use to download and start these services.
[!WARNING]
If you already have some of these services installed locally, make sure to disable the corresponding service configurations in the docker-compose-local.yaml file to avoid conflicts.
docker compose -f ./docker-compose-local.yaml up -d
Start MCP Server
cd mcp-server
pip install -r ./requirements.txt
fastapi run --port 8003
Start Core Back-End Services
cd api
conda create -n api python=3.11 -y
pip install -r ./requirements.txt
fastapi run --port 8001
Start Hot Search Aggregation Service
cd daily-hot
pnpm i
pnpm dev
Start File Back-End Service
cd file-backend
conda create -n file-backend python=3.11 -y
pip install -r ./requirements.txt
fastapi run --port 8002
Start Celery Task Queue
cd celery-worker
conda create -n celery-worker python=3.11 -y
pip install -r ./requirements.txt
celery -A common.celery.app.celery_app worker --loglevel=info --pool threads
Start Front-End Service
cd web
pnpm i
pnpm dev
Once all services are started, you can visit http://localhost:3000 to view the front-end page.
Dev Tools Supporting MCP
The following are the main code editors that support the Model Context Protocol. Click the link to visit the official website for more information.


