Aichat
What is Aichat
AIChat is a customizable AI chat application powered by Flet, designed to facilitate interactions using various AI models.
Use cases
Use cases for AIChat include automated customer service bots, interactive educational tools, content generation assistants, and personal virtual assistants.
How to use
To use AIChat, install the necessary dependencies using ‘uv sync’, configure your API keys in a ‘.env’ file, and adjust settings in ‘aichat/config.py’ as needed.
Key features
Key features include support for diverse models from major LLM providers, local model support, integration with MCP servers, easy customization, and availability as both a desktop and web application.
Where to use
AIChat can be used in various fields including customer support, education, content creation, and personal assistance, leveraging AI for enhanced communication.
Clients Supporting MCP
The following are the main client software that supports the Model Context Protocol. Click the link to visit the official website for more information.


Overview
What is Aichat
AIChat is a customizable AI chat application powered by Flet, designed to facilitate interactions using various AI models.
Use cases
Use cases for AIChat include automated customer service bots, interactive educational tools, content generation assistants, and personal virtual assistants.
How to use
To use AIChat, install the necessary dependencies using ‘uv sync’, configure your API keys in a ‘.env’ file, and adjust settings in ‘aichat/config.py’ as needed.
Key features
Key features include support for diverse models from major LLM providers, local model support, integration with MCP servers, easy customization, and availability as both a desktop and web application.
Where to use
AIChat can be used in various fields including customer support, education, content creation, and personal assistance, leveraging AI for enhanced communication.
Clients Supporting MCP
The following are the main client software that supports the Model Context Protocol. Click the link to visit the official website for more information.
Content
AIChat
A customizable AI chat application powered by Flet.
Features
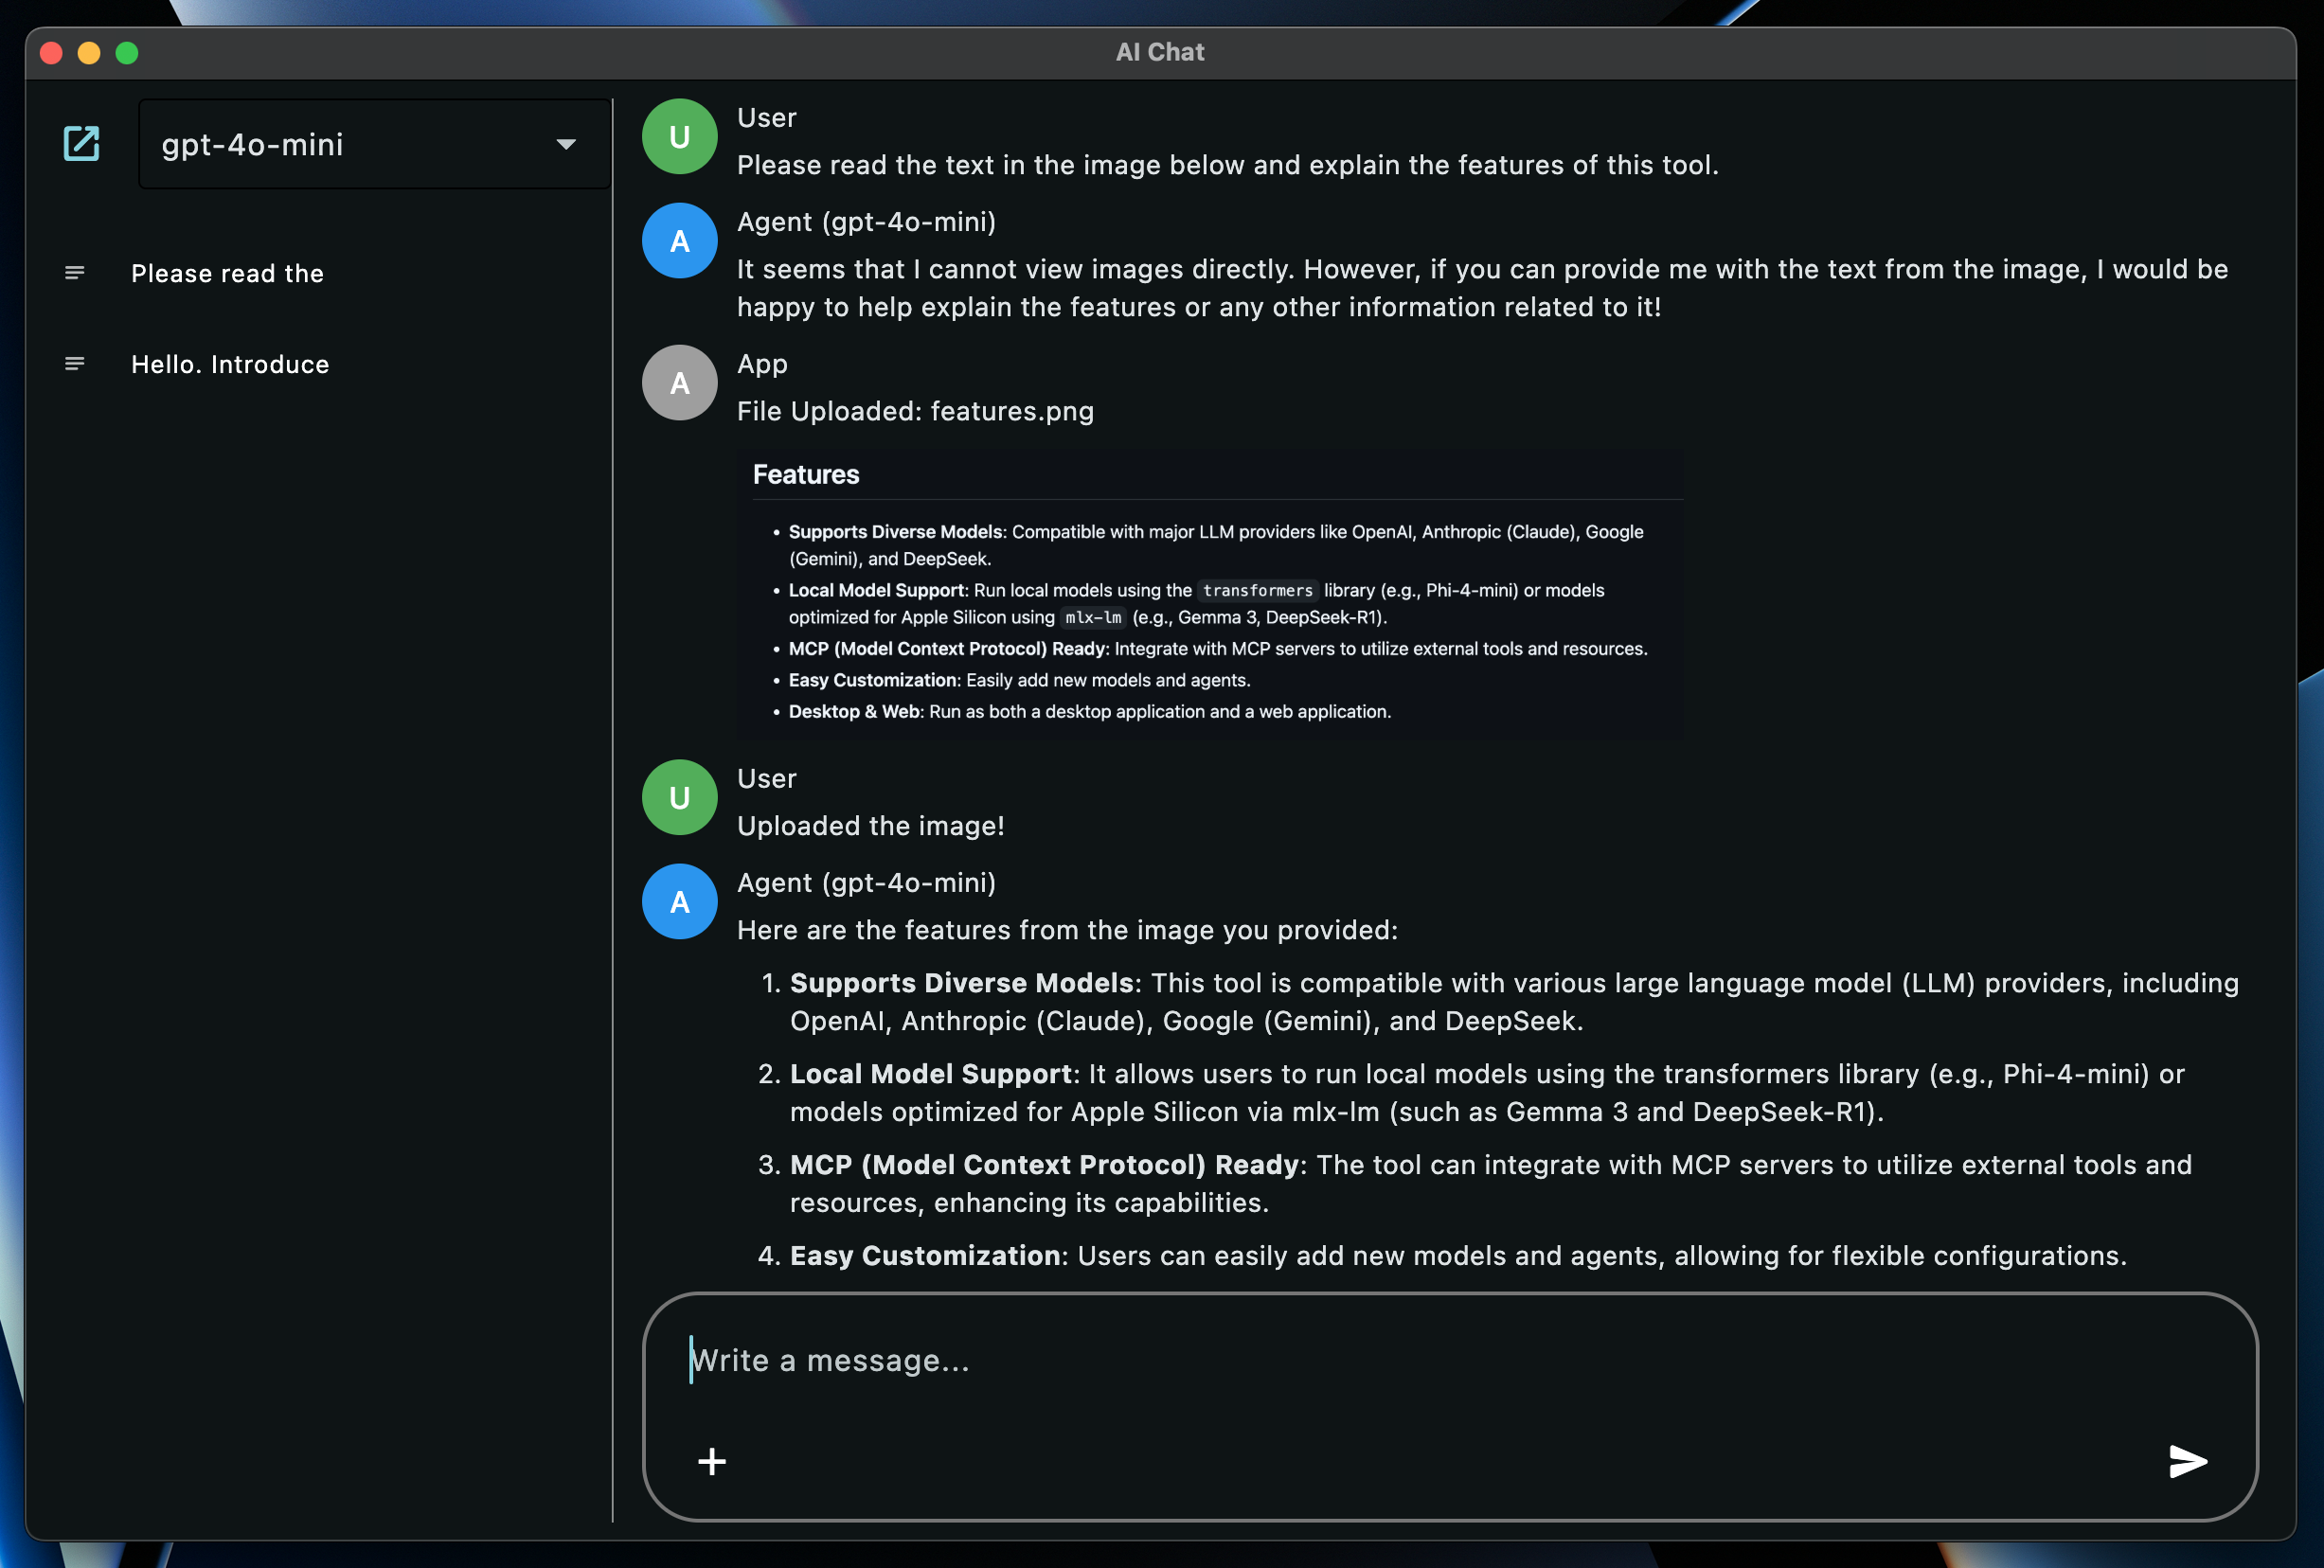
- Supports Diverse Models: Compatible with major LLM providers like OpenAI, Anthropic (Claude), Google (Gemini), and DeepSeek.
- Local Model Support: Run local models using the
transformerslibrary (e.g., Phi-4-mini) or models optimized for Apple Silicon usingmlx-lm(e.g., Gemma 3, DeepSeek-R1). - MCP (Model Context Protocol) Ready: Integrate with MCP servers to utilize external tools and resources.
- Easy Customization: Easily add new models and agents.
- Desktop & Web: Run as both a desktop application and a web application.
Setup
-
Install Dependencies:
uv sync- This command installs all necessary dependencies, including those for local models (
transformers,mlx-lmbased).
- This command installs all necessary dependencies, including those for local models (
-
Configure API Keys:
Set the following environment variables according to the models you want to use. You can also manage these in a.envfile.# Example .env file OPENAI_API_KEY="your_openai_api_key" ANTHROPIC_API_KEY="your_anthropic_api_key" GEMINI_API_KEY="your_gemini_api_key" DEEPSEEK_API_KEY="your_deepseek_api_key" MISTRAL_API_KEY="your_mistral_api_key" # Required if USE_MISTRAL_OCR is True
Configuration
You can adjust various application settings directly within the aichat/config.py file:
IS_DEBUG(bool): Enable or disable debug mode. This affects things like the database file used (DEBUG_DB_NAMEvsDB_NAME).USE_MISTRAL_OCR(bool): Enable or disable OCR functionality using Mistral. Requires a Mistral API key configured in your environment.DB_NAME(str): The filename for the main application database.DEBUG_DB_NAME(str): The filename for the database used whenIS_DEBUGisTrue.USER_NAME(str),USER_AVATAR_COLOR(ft.Colors): Customize the display name and avatar color for the user.AGENT_NAME(str),AGENT_AVATAR_COLOR(ft.Colors): Customize the base display name and avatar color for the AI agent. The specific model name is usually appended to this.APP_ROLE_NAME(str),APP_ROLE_AVATAR_COLOR(ft.Colors): Customize the display name and avatar color for application messages (e.g., errors).MAX_REQUEST_COUNT(int): The maximum number of chained requests allowed during tool use interactions before stopping.
How to Run
Launch the application using the following commands:
# Run as a desktop app
uv run flet run -d aichat/main.py

# Run as a web app
uv run flet run -w aichat/main.py
Supported Models
The following models are supported by default (Model names are the Enum names defined in the Agent files):
- OpenAI (Requires
OPENAI_API_KEY):GPT4OMINI(gpt-4o-mini)GPT4O(gpt-4o)O1(o1)O3MINI(o3-mini)GPT45PREVIEW(gpt-4.5-preview)
- Anthropic (Requires
ANTHROPIC_API_KEY):CALUDE35HAIKU(claude-3-5-haiku-latest)CLAUDE37SONNET(claude-3-7-sonnet-latest)
- Google (Requires
GEMINI_API_KEY):GEMINI2FLASHLITE(gemini-2.0-flash-lite)GEMINI2FLASH(gemini-2.0-flash)GEMINI25PRO(gemini-2.5-pro-exp-03-25)
- DeepSeek (Requires
DEEPSEEK_API_KEY):DEEPSEEKCHAT(deepseek-chat)DEEPSEEKREASONER(deepseek-reasoner)
- Local (Transformers):
PHI4MINI(microsoft/Phi-4-mini-instruct)
- Local (MLX) (Apple Silicon Mac):
GEMMA3_27B_4BIT(mlx-community/gemma-3-27b-it-4bit)DEEPSEEK_R1_32B_4BIT(mlx-community/DeepSeek-R1-Distill-Qwen-32B-4bit)QWEN3_30B_4BIT(mlx-community/Qwen3-30B-A3B-4bit)
- Dummy: A dummy model for testing purposes.
How to Add New Models
To add a new model, you primarily need to modify two files:
-
Create an Agent:
Create an Agent class for the model you want to use. Refer to existing Agent files (e.g.,aichat/agents/openai_agent.py) for examples. UseMcpHandlerif you need to utilize MCP tools.# Example: aichat/agents/your_agent.py from enum import StrEnum from typing import Any, AsyncGenerator from .agent import Agent from .mcp_handler import McpHandler # If using MCP import config from models.role import Role from models.message import Message class YourModel(StrEnum): MODEL_A = "model-a" MODEL_B = "model-b" class YourAgent(Agent): # Inherit from Agent def __init__(self, model: YourModel, mcp_handler: McpHandler | None = None): # Accept MCP handler (optional) super().__init__(model, mcp_handler) # Initialize parent class self.model = model self.role = Role(f"{config.AGENT_NAME} ({self.model})", config.AGENT_AVATAR_COLOR) self.streamable = True # Streaming support flag # self.client = ... # Initialize API client, etc. def _construct_request(self, message: Message) -> dict[str, Any]: # Convert to model-specific request format # ... pass async def request(self, messages: list[Message]) -> list[str]: # Handle standard request # ... pass async def request_streaming(self, messages: list[Message]) -> AsyncGenerator[str, None]: # Handle streaming request (if self.streamable is True) # ... pass -
Register the Agent:
Register the created Model and Agent inaichat/agents/__init__.py.# aichat/agents/__init__.py # ... (other imports) from .your_agent import YourAgent, YourModel # Import your created Agent and Model all_models = list( itertools.chain.from_iterable( [ OpenAIModel, GeminiModel, ClaudeModel, DeepSeekModel, LocalModel, MLXModel, YourModel, # Add your model DummyModel, ] ) ) # ... (definition of _mcp_handler_instance) def get_agent_by_model(model: StrEnum) -> Agent: """Gets an agent instance based on the model enum.""" if model in OpenAIModel: return OpenAIAgent(model, mcp_handler=_mcp_handler_instance) # ... (branches for other models) elif model in YourModel: # Add your model return YourAgent(model, mcp_handler=_mcp_handler_instance) # Pass handler if using MCP elif model in DummyModel: return DummyAgent(model) else: raise ValueError(f"Invalid model: {model}")
MCP (Model Context Protocol)
Utilize MCP servers to integrate with external functionalities like file operations or web browsing.
- Configuration: Create
aichat/agents/servers.jsonbased onaichat/agents/servers.json.sampleand describe the MCP servers you want to use. - Usage: Call
self.mcp_handler.use_tool(...)within an Agent to use MCP server functionalities. Refer toaichat/agents/mcp_handler.pyfor details.
Contributing
Please report bugs or suggest features via Issues, and submit code improvements via Pull Requests.
License
Dev Tools Supporting MCP
The following are the main code editors that support the Model Context Protocol. Click the link to visit the official website for more information.


