Claude Talk To Figma Mcp
What is Claude Talk To Figma Mcp
claude-talk-to-figma-mcp is a Model Context Protocol (MCP) plugin that enables Claude Desktop to directly interact with Figma, providing AI-assisted design capabilities.
Use cases
Use cases include automating design tasks, enhancing creative workflows, real-time collaboration in design projects, and efficiently managing text elements within Figma documents.
How to use
To use claude-talk-to-figma-mcp, install Claude Desktop and Figma, then clone the repository, install dependencies, build the project, and configure the MCP in Claude Desktop.
Key features
Key features include native Claude integration, powerful commands for manipulating Figma objects, bidirectional real-time communication, a fluid design experience with AI assistance, and text scanning capabilities.
Where to use
claude-talk-to-figma-mcp can be used in design fields such as UI/UX design, graphic design, and any area that requires collaboration between AI and design tools.
Clients Supporting MCP
The following are the main client software that supports the Model Context Protocol. Click the link to visit the official website for more information.


Overview
What is Claude Talk To Figma Mcp
claude-talk-to-figma-mcp is a Model Context Protocol (MCP) plugin that enables Claude Desktop to directly interact with Figma, providing AI-assisted design capabilities.
Use cases
Use cases include automating design tasks, enhancing creative workflows, real-time collaboration in design projects, and efficiently managing text elements within Figma documents.
How to use
To use claude-talk-to-figma-mcp, install Claude Desktop and Figma, then clone the repository, install dependencies, build the project, and configure the MCP in Claude Desktop.
Key features
Key features include native Claude integration, powerful commands for manipulating Figma objects, bidirectional real-time communication, a fluid design experience with AI assistance, and text scanning capabilities.
Where to use
claude-talk-to-figma-mcp can be used in design fields such as UI/UX design, graphic design, and any area that requires collaboration between AI and design tools.
Clients Supporting MCP
The following are the main client software that supports the Model Context Protocol. Click the link to visit the official website for more information.
Content
Claude Talk to Figma MCP
A Model Context Protocol (MCP) plugin that allows Claude Desktop and other AI tools (GitHub Copilot, Cursor, etc.) to interact directly with Figma, enabling powerful AI-assisted design capabilities.
Important: This project is based on cursor-talk-to-figma-mcp by Sonny Lazuardi. It has been adapted to work with Claude Desktop instead of Cursor and the modification tools have been expanded. The original implementation and main credit belongs to Sonny Lazuardi ❤️
🚀 Features
- Native Claude Integration: Allows Claude to communicate with Figma through the Model Context Protocol (MCP)
- Powerful Commands: Manipulate objects in Figma, get information, create and modify elements
- Advanced Text & Font Control: Comprehensive text styling capabilities including font selection, spacing, and text effects
- Bidirectional Communication: Real-time WebSocket channel between Claude and Figma
- Fluid Experience: Design with AI as your assistant, accelerating creative workflows
- Text Scanning: Identify and manipulate text nodes within Figma documents
- Remote Components: Access and utilize components from team libraries
- Modular Architecture: Clean separation of concerns with specialized tool modules
- Enhanced Error Handling: Robust timeout and error recovery mechanisms
- Performance Optimizations: Improved handling of complex operations with chunking and batching
📋 Prerequisites
- Claude Desktop installed
- Figma Desktop installed
- Figma account
- Bun v1.0.0 or higher
- Linux macOS
curl -fsSL https://bun.sh/install | bash - Windows
powershell -c "irm bun.sh/install.ps1 | iex"
- Linux macOS
⚙️ Installation
-
Clone this repository:
git clone https://github.com/arinspunk/claude-talk-to-figma-mcp.git cd claude-talk-to-figma-mcp -
Install dependencies:
bun install -
Build the project:
bun run build -
Configure the MCP in Claude Desktop:
bun run configure-claudeRestart Claude Desktop if it was open.
Note: This script does the following:
- Locates the Claude Desktop configuration file:
- On macOS:
~/Library/Application Support/Claude/claude_desktop_config.json - On Windows:
%APPDATA%\Claude\claude_desktop_config.json
- On macOS:
- Creates a backup of the existing configuration file
- Modifies or creates the configuration file to include “ClaudeTalkToFigma” in the list of MCPs
- Configures the command that Claude Desktop should execute to start the MCP
- Locates the Claude Desktop configuration file:
-
Install the Figma plugin:
Note: This project uses a custom Figma plugin located in the
src/claude_mcp_pluginfolder.- Open Figma
- Go to Menu > Plugins > Development
- Select “Import plugin from manifest”
- Navigate and select the
src/claude_mcp_plugin/src/claude_mcp_plugin/manifest.jsonfile from this repository
The plugin will appear in your development plugins list and you can use it like any other plugin.
🚀 Usage
🔌 Starting Up
Once installed, you just need to start it:
-
Start the WebSocket server:
bun socketVerify it’s running with
http://localhost:3055/statusNote: if for any reason you need to stop the server, press
Ctrl+Cin the terminal. -
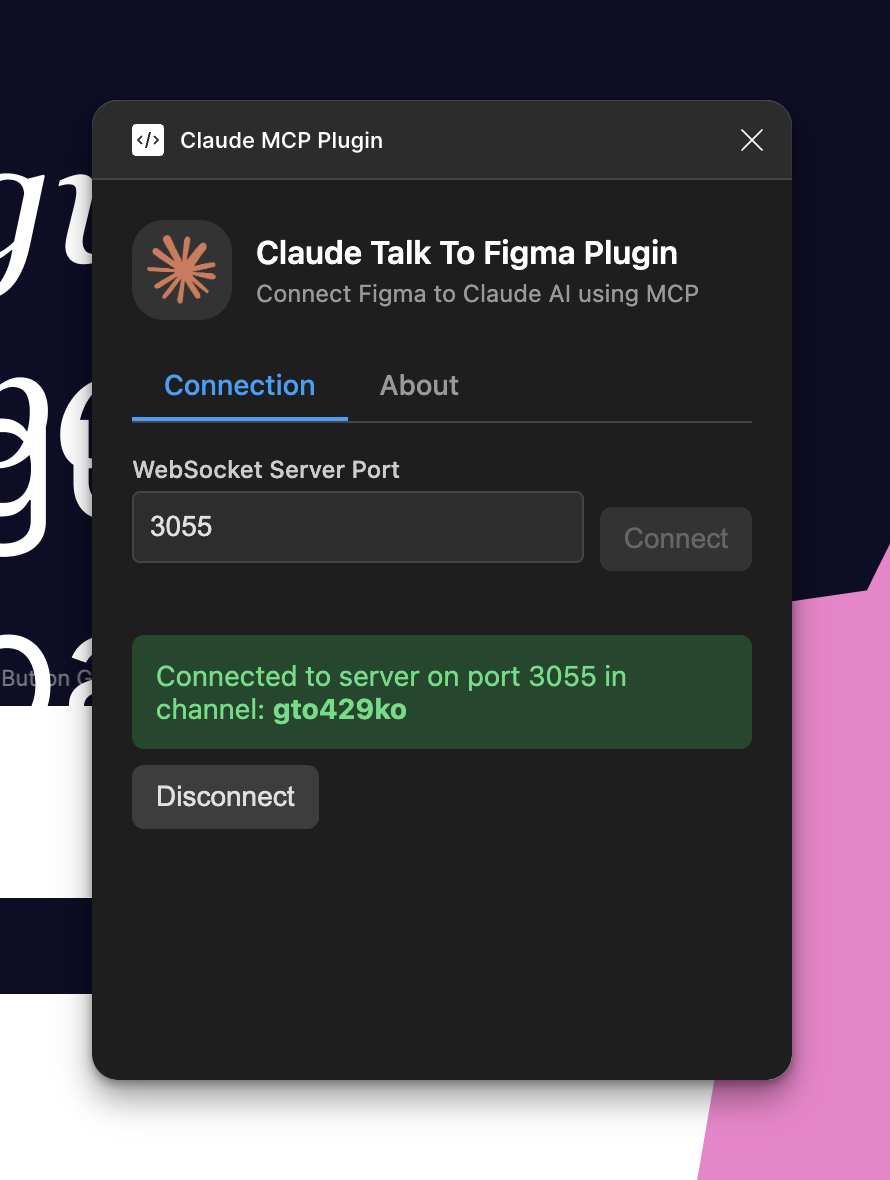
Connect the plugin to the server:
Open the Claude MCP Plugin in Figma and copy the channel ID generated to provide it to Claude.
-
Claude Desktop:
Open Claude Desktop and confirm that “ClaudeTalkToFigma” appears in the MCPs selector.
-
Ready to use!
Now you can send commands to Figma from Claude.
🧠 Prompting
-
Before you start designing with Claude, make it an expert in UX/UI 🎨
-
Now tell Claude to connect to your Figma project:
Talk to Figma, channel {channel-ID}
🏛️ Architecture
+----------------+     +-------+     +---------------+     +---------------+
|                |     |       |     |               |     |               |
| Claude Desktop |<--->|  MCP  |<--->| WebSocket Srv |<--->| Figma Plugin  |
|   (AI Agent)   |     |       |     |  (Port 3055)  |     |  (UI Plugin)  |
|                |     |       |     |               |     |               |
+----------------+     +-------+     +---------------+     +---------------+
Design Principles
The system follows a clear separation of concerns:
- MCP Server: Handles business logic, validation, and default values
- WebSocket Server: Routes messages between components
- Figma Plugin: Pure translator that executes commands in Figma
This approach ensures that each layer has a single responsibility, making the system more reliable and easier to maintain.
Project Structure
src/
  talk_to_figma_mcp/     # MCP Server implementation
    server.ts            # Main entry point
    config/              # Server configuration
    tools/               # Tool categories by function
      index.ts           # Tool registration
      document-tools.ts  # Document interaction tools
      creation-tools.ts  # Shape and element creation tools
      modification-tools.ts # Property modification tools
      text-tools.ts      # Text manipulation tools
      component-tools.ts # Component handling tools
    utils/               # Shared utilities and helpers
      defaults.ts        # Safe default value handling
      websocket.ts       # WebSocket communication
      logger.ts          # Logging system
      figma-helpers.ts   # Figma-specific helpers
    types/               # TypeScript type definitions
      color.ts           # Color type definitions
  claude_mcp_plugin/     # Figma plugin
    code.js              # Plugin implementation
    manifest.json        # Plugin configuration
    ui.html              # Plugin UI
Benefits of this structure:
- Clear ownership: Each component has well-defined responsibilities
- Easy testing: Components can be tested in isolation
- Maintainable: Changes to one layer don’t affect others
🛠️ Available Commands
As Claude is connected to our MCP, it already knows the list of tools to manipulate Figma. But if you want, you can mention them in your prompts:
Document Tools
get_document_info: Get detailed information about the current Figma documentget_selection: Get information about the current selection in Figmaget_node_info: Get detailed information about a specific node in Figmaget_nodes_info: Get detailed information about multiple nodes in Figmaget_styles: Get all styles from the current Figma documentget_local_components: Get all local components from the Figma documentget_remote_components: Get available components from team libraries in Figmascan_text_nodes: Scan all text nodes in the selected Figma nodejoin_channel: Join a specific channel to communicate with Figmaexport_node_as_image: Export a node as an image from Figma
Creation Tools
create_rectangle: Create a new rectangle in Figmacreate_frame: Create a new frame in Figmacreate_text: Create a new text element in Figmacreate_ellipse: Create a new ellipse or circle in Figmacreate_polygon: Create a new polygon with customizable sides in Figmacreate_star: Create a new star with customizable points in Figmacreate_vector: Create a new vector shape in Figmacreate_line: Create a new line in Figmagroup_nodes: Group multiple nodes together in Figmaungroup_nodes: Ungroup nodes in Figmaclone_node: Clone an existing node in Figmainsert_child: Insert a child node inside a parent node in Figmaflatten_node: Flatten a node in Figma (e.g., for boolean operations)
Modification Tools
set_fill_color: Set the fill color of a node in Figmaset_stroke_color: Set the stroke color of a node in Figmamove_node: Move a node to a new position in Figmaresize_node: Resize a node in Figmadelete_node: Delete a node from Figmaset_corner_radius: Set the corner radius of a node in Figmaset_auto_layout: Configure auto layout properties for a node in Figmaset_effects: Set visual effects (shadows, blurs) for a node in Figmaset_effect_style_id: Apply an effect style to a node in Figma
Text Tools
set_text_content: Set the text content of an existing text node in Figmaset_multiple_text_contents: Set multiple text contents parallelly in a nodeset_font_name: Set the font name and style of a text node in Figmaset_font_size: Set the font size of a text node in Figmaset_font_weight: Set the font weight of a text node in Figmaset_letter_spacing: Set the letter spacing of a text node in Figmaset_line_height: Set the line height of a text node in Figmaset_paragraph_spacing: Set the paragraph spacing of a text node in Figmaset_text_case: Set the text case of a text node in Figmaset_text_decoration: Set the text decoration of a text node in Figmaget_styled_text_segments: Get text segments with specific styling in a text nodeload_font_async: Load a font asynchronously in Figma
Component Tools
create_component_instance: Create an instance of a component in Figma
📝 CHANGELOG
See CHANGELOG.md for a detailed history of changes.
Current version: 0.5.2
- Critical Bug Fixes: Fixed opacity and stroke weight handling in
set_stroke_colorwhere falsy values were incorrectly converted - Architectural Improvements: Extended safe defaults pattern across all color operations with consistent MCP/Plugin separation
- Enhanced Testing: Comprehensive test coverage for stroke operations and edge cases
- Code Quality: Improved type safety, validation, and error handling throughout the system
For more details about previous and complete changes, check the CHANGELOG.md.
🐛 Troubleshooting
If you encounter problems, check the following common issues:
Common Issues
- Connection Error: Make sure the WebSocket server is running with
bun socket - Plugin Not Appearing: Verify that you’ve correctly linked the plugin folder in Figma Development settings
- Claude Can’t Find the MCP: Make sure you’ve run
bun run configure-claudeand restarted Claude Desktop - Claude Not Responding: Confirm you’ve selected “ClaudeTalkToFigma” in the MCPs menu
- Execution Errors: Check the Figma development console for detailed messages
- Font Loading Issues: Some fonts might not be available in Figma. Use
load_font_asyncto verify font availability - Remote Components Error: Team libraries might require proper permissions in Figma. Ensure you have access to the libraries you’re trying to use
🧪 Testing
The project includes two complementary testing approaches:
Automated Tests
For unit and component integration tests:
bun run test            # Run all automated tests
bun run test:watch      # Run tests in watch mode
bun run test:coverage   # Run tests with coverage report
Manual Integration Tests
For end-to-end functionality testing between Claude, WebSocket server, and Figma:
bun run test:integration
This script guides you through testing the complete integration workflow.
For more comprehensive testing documentation, see TESTING.md.
🤝 Contributions
Contributions are welcome. Please follow these steps:
- Fork the repository
- Create a branch for your feature (
git checkout -b feature/amazing-feature) - Commit your changes (
git commit -m 'Add some amazing feature') - Push to the branch (
git push origin feature/amazing-feature) - Open a Pull Request
Contributors
- Taylor Smits - Fixed opacity handling in color functions and added automated tests (PR #13, PR #14)
📄 License
This project is under the MIT License - see the LICENSE file for details.
👥 Authors
🙏 Acknowledgments
- Anthropic team for Claude and the Model Context Protocol
- Figma community for their excellent plugin API
- Sonny Lazuardi for the original Cursor Talk to Figma MCP implementation
- Bun team for providing a fast JavaScript runtime
Dev Tools Supporting MCP
The following are the main code editors that support the Model Context Protocol. Click the link to visit the official website for more information.


