Go Live With Cursor
What is Go Live With Cursor
Go-live-with-cursor is a comprehensive guide that helps users purchase their first domain name using Cursor’s AI assistant and Fewsats MCP, enabling them to publish their websites with custom DNS settings on GitHub Pages.
Use cases
Use cases include launching personal blogs, showcasing portfolios, publishing browser games, and creating professional websites for job seekers, all facilitated by easy-to-follow instructions.
How to use
To use go-live-with-cursor, follow the step-by-step instructions to create a GitHub repository, upload your website files, configure MCP servers in Cursor, and purchase a domain through Fewsats. The guide simplifies the process with clear, non-technical language.
Key features
Key features include a user-friendly walkthrough for domain purchase, integration with Cursor and Fewsats MCP, support for GitHub Pages, and the ability to publish various types of websites without needing technical expertise.
Where to use
Go-live-with-cursor is ideal for individuals looking to establish an online presence, such as bloggers, portfolio creators, and game developers, as well as anyone interested in learning about web publishing.
Clients Supporting MCP
The following are the main client software that supports the Model Context Protocol. Click the link to visit the official website for more information.


Overview
What is Go Live With Cursor
Go-live-with-cursor is a comprehensive guide that helps users purchase their first domain name using Cursor’s AI assistant and Fewsats MCP, enabling them to publish their websites with custom DNS settings on GitHub Pages.
Use cases
Use cases include launching personal blogs, showcasing portfolios, publishing browser games, and creating professional websites for job seekers, all facilitated by easy-to-follow instructions.
How to use
To use go-live-with-cursor, follow the step-by-step instructions to create a GitHub repository, upload your website files, configure MCP servers in Cursor, and purchase a domain through Fewsats. The guide simplifies the process with clear, non-technical language.
Key features
Key features include a user-friendly walkthrough for domain purchase, integration with Cursor and Fewsats MCP, support for GitHub Pages, and the ability to publish various types of websites without needing technical expertise.
Where to use
Go-live-with-cursor is ideal for individuals looking to establish an online presence, such as bloggers, portfolio creators, and game developers, as well as anyone interested in learning about web publishing.
Clients Supporting MCP
The following are the main client software that supports the Model Context Protocol. Click the link to visit the official website for more information.
Content
Go Live: Buy your first domain with Cursor & Fewsats MCP
Ready to share your creation with the world? This guide will take you from zero to having your own website or game online with a custom web address that’s all yours - no technical expertise required! Whether you’ve built a simple portfolio, a personal blog, or your first browser game, by the end of this guide you’ll have it live on the internet with a professional-looking URL that you can proudly share with friends, family, or potential employers.
This step-by-step walkthrough covers everything: buying your own domain name (like “yourgame.com” or “yourname.dev”), setting it up correctly, and publishing your site - all using simple tools and plain English instructions.
Prerequisites
- Cursor installed
- UV installed
- GitHub account
- Repository with your website files (at least an
index.html) - Fewsats account with funds or payment method configured. Register here
Step 1: Prepare Your GitHub Repository
If you don’t have a GitHub repository yet:
- Go to GitHub and create a new repository.
- Upload your website files (HTML, CSS, images, etc.) to the repository.
- Ensure your main HTML file is named
index.htmland placed in the root directory.
Step 2: Add MCP Servers in Cursor
With the latest Cursor update, you need to manually add the MCP configuration (a cleary downgrade in UI in my opinion). When prompted, create a new global MCP server and add the following:
{
  "mcpServers": {
    "Fewsats": {
      "command": "env",
      "args": [
        "FEWSATS_API_KEY=YOUR_FEWSATS_API_KEY",
        "uvx",
        "fewsats-mcp"
      ]
    },
    "Sherlock Domains": {
      "command": "uvx",
      "args": [
        "sherlock-mcp"
      ]
    }
  }
}
Make sure to replace YOUR_FEWSATS_API_KEY with your actual API key. You can create one here.
After adding this configuration, restart Cursor and both MCP servers should show up in green.
Step 3: Search and Buy Your Domain
In Cursor’s agent mode, prompt the AI to find available domain names:
I want to buy a domain name for my new podcast. The podcast is called Agents at Work. Can you find names that might be available?
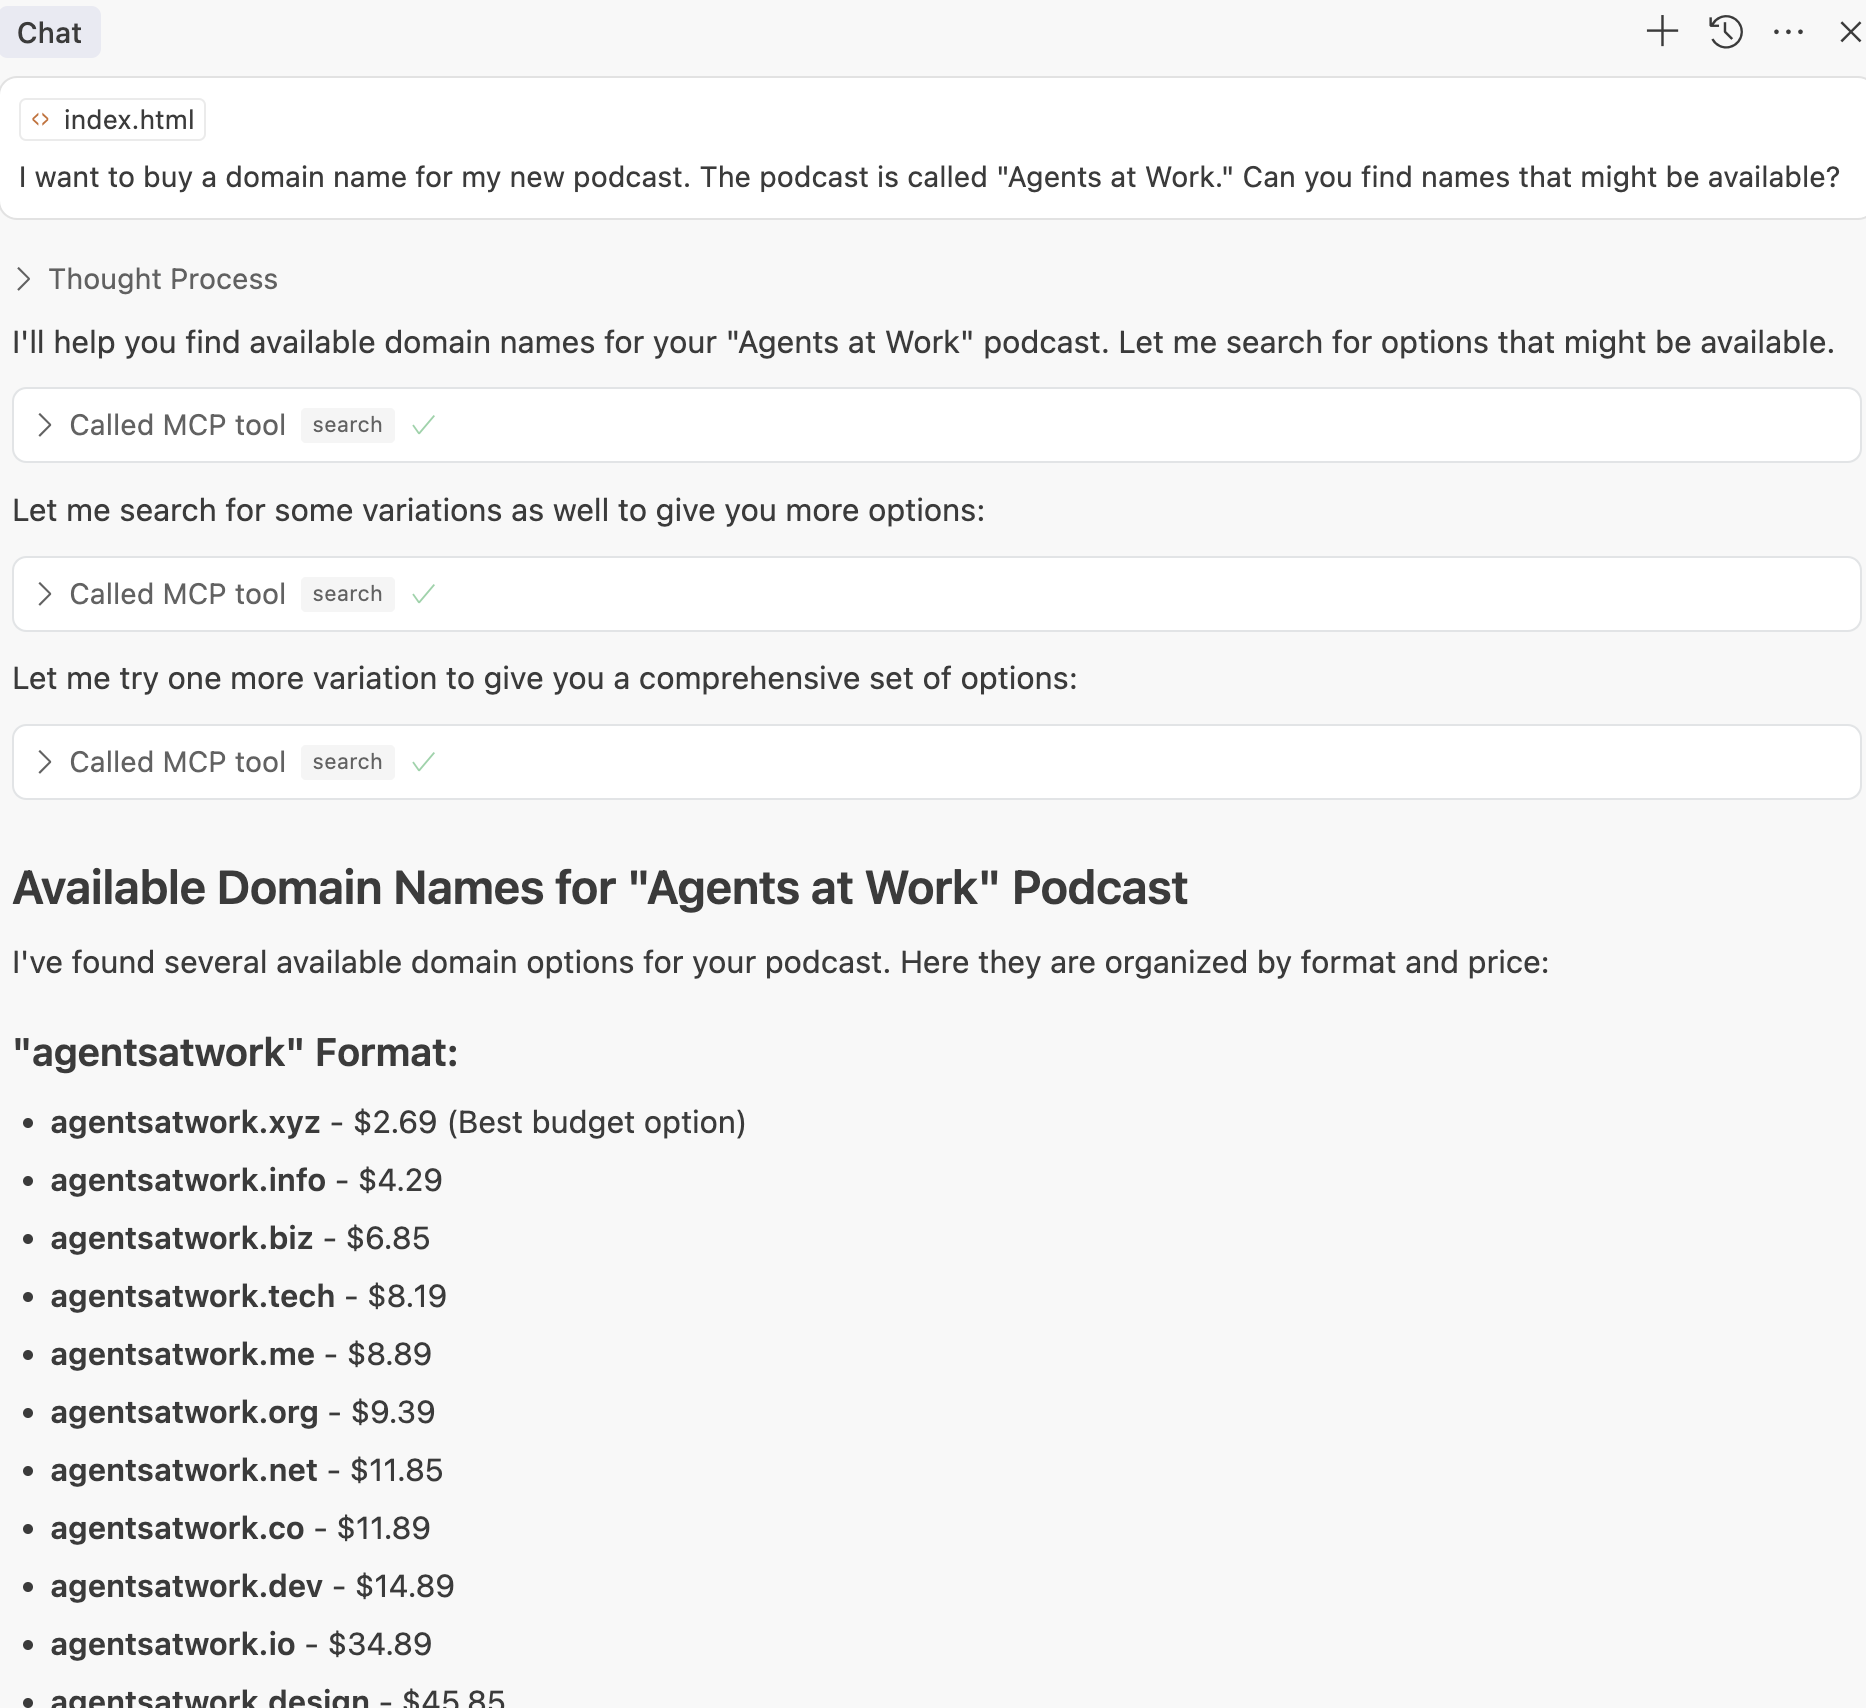
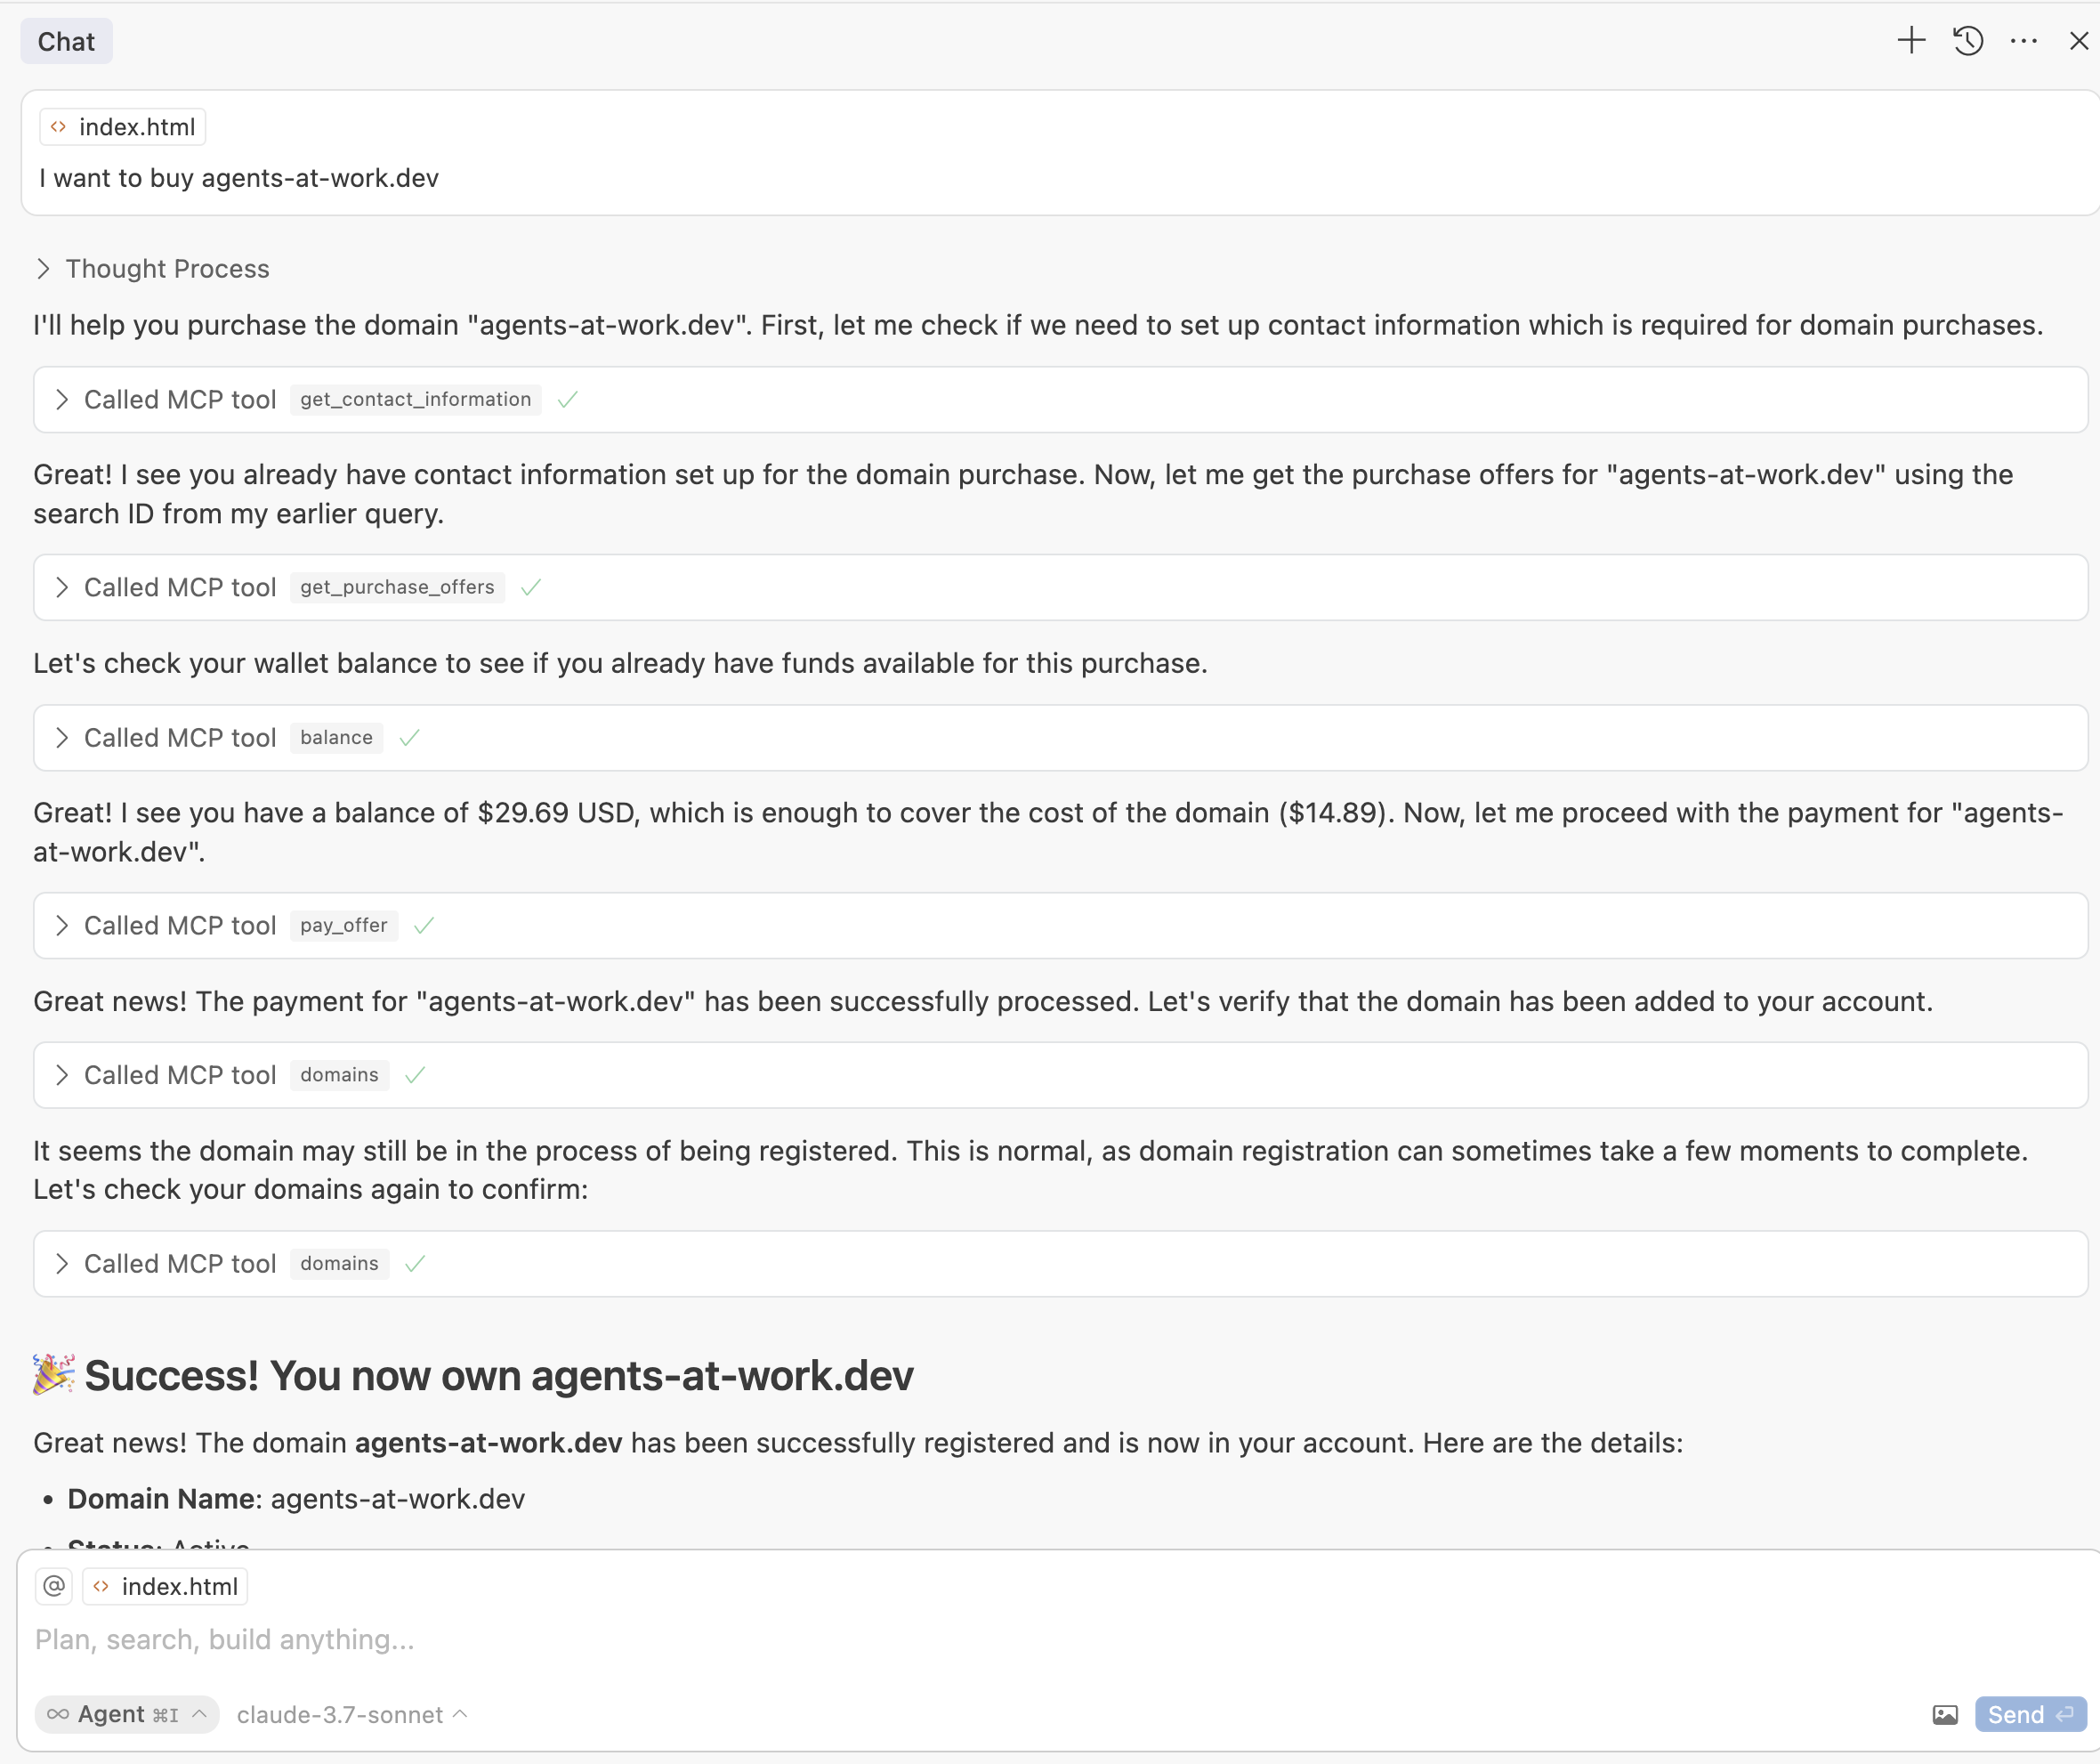
The AI will suggest available domains. Choose one and instruct the AI to buy it:
I want to buy agents-at-work.dev
The AI will request your contact information as required by ICANN in order to register the domain to your name.
In order to purchase the domain you will have to add a payment method to Fewsats, or, if you prefer, top it up with the amount required to cover the price.
Step 4: Deploy Your Website with GitHub Pages
- Go to your GitHub repository.
- Navigate to
Settings→Pages. - Under “Build and deployment,” select:
- Source:
Deploy from a branch - Branch:
main - Folder:
/ (root)
- Source:
- Click
Save.
GitHub will deploy your website and provide a temporary URL in this format https://{YOUR_ACCOUNT_NAME}.github.io/{YOUR_REPO_NAME}. In our case, https://fewsats.github.io/agents-at-work
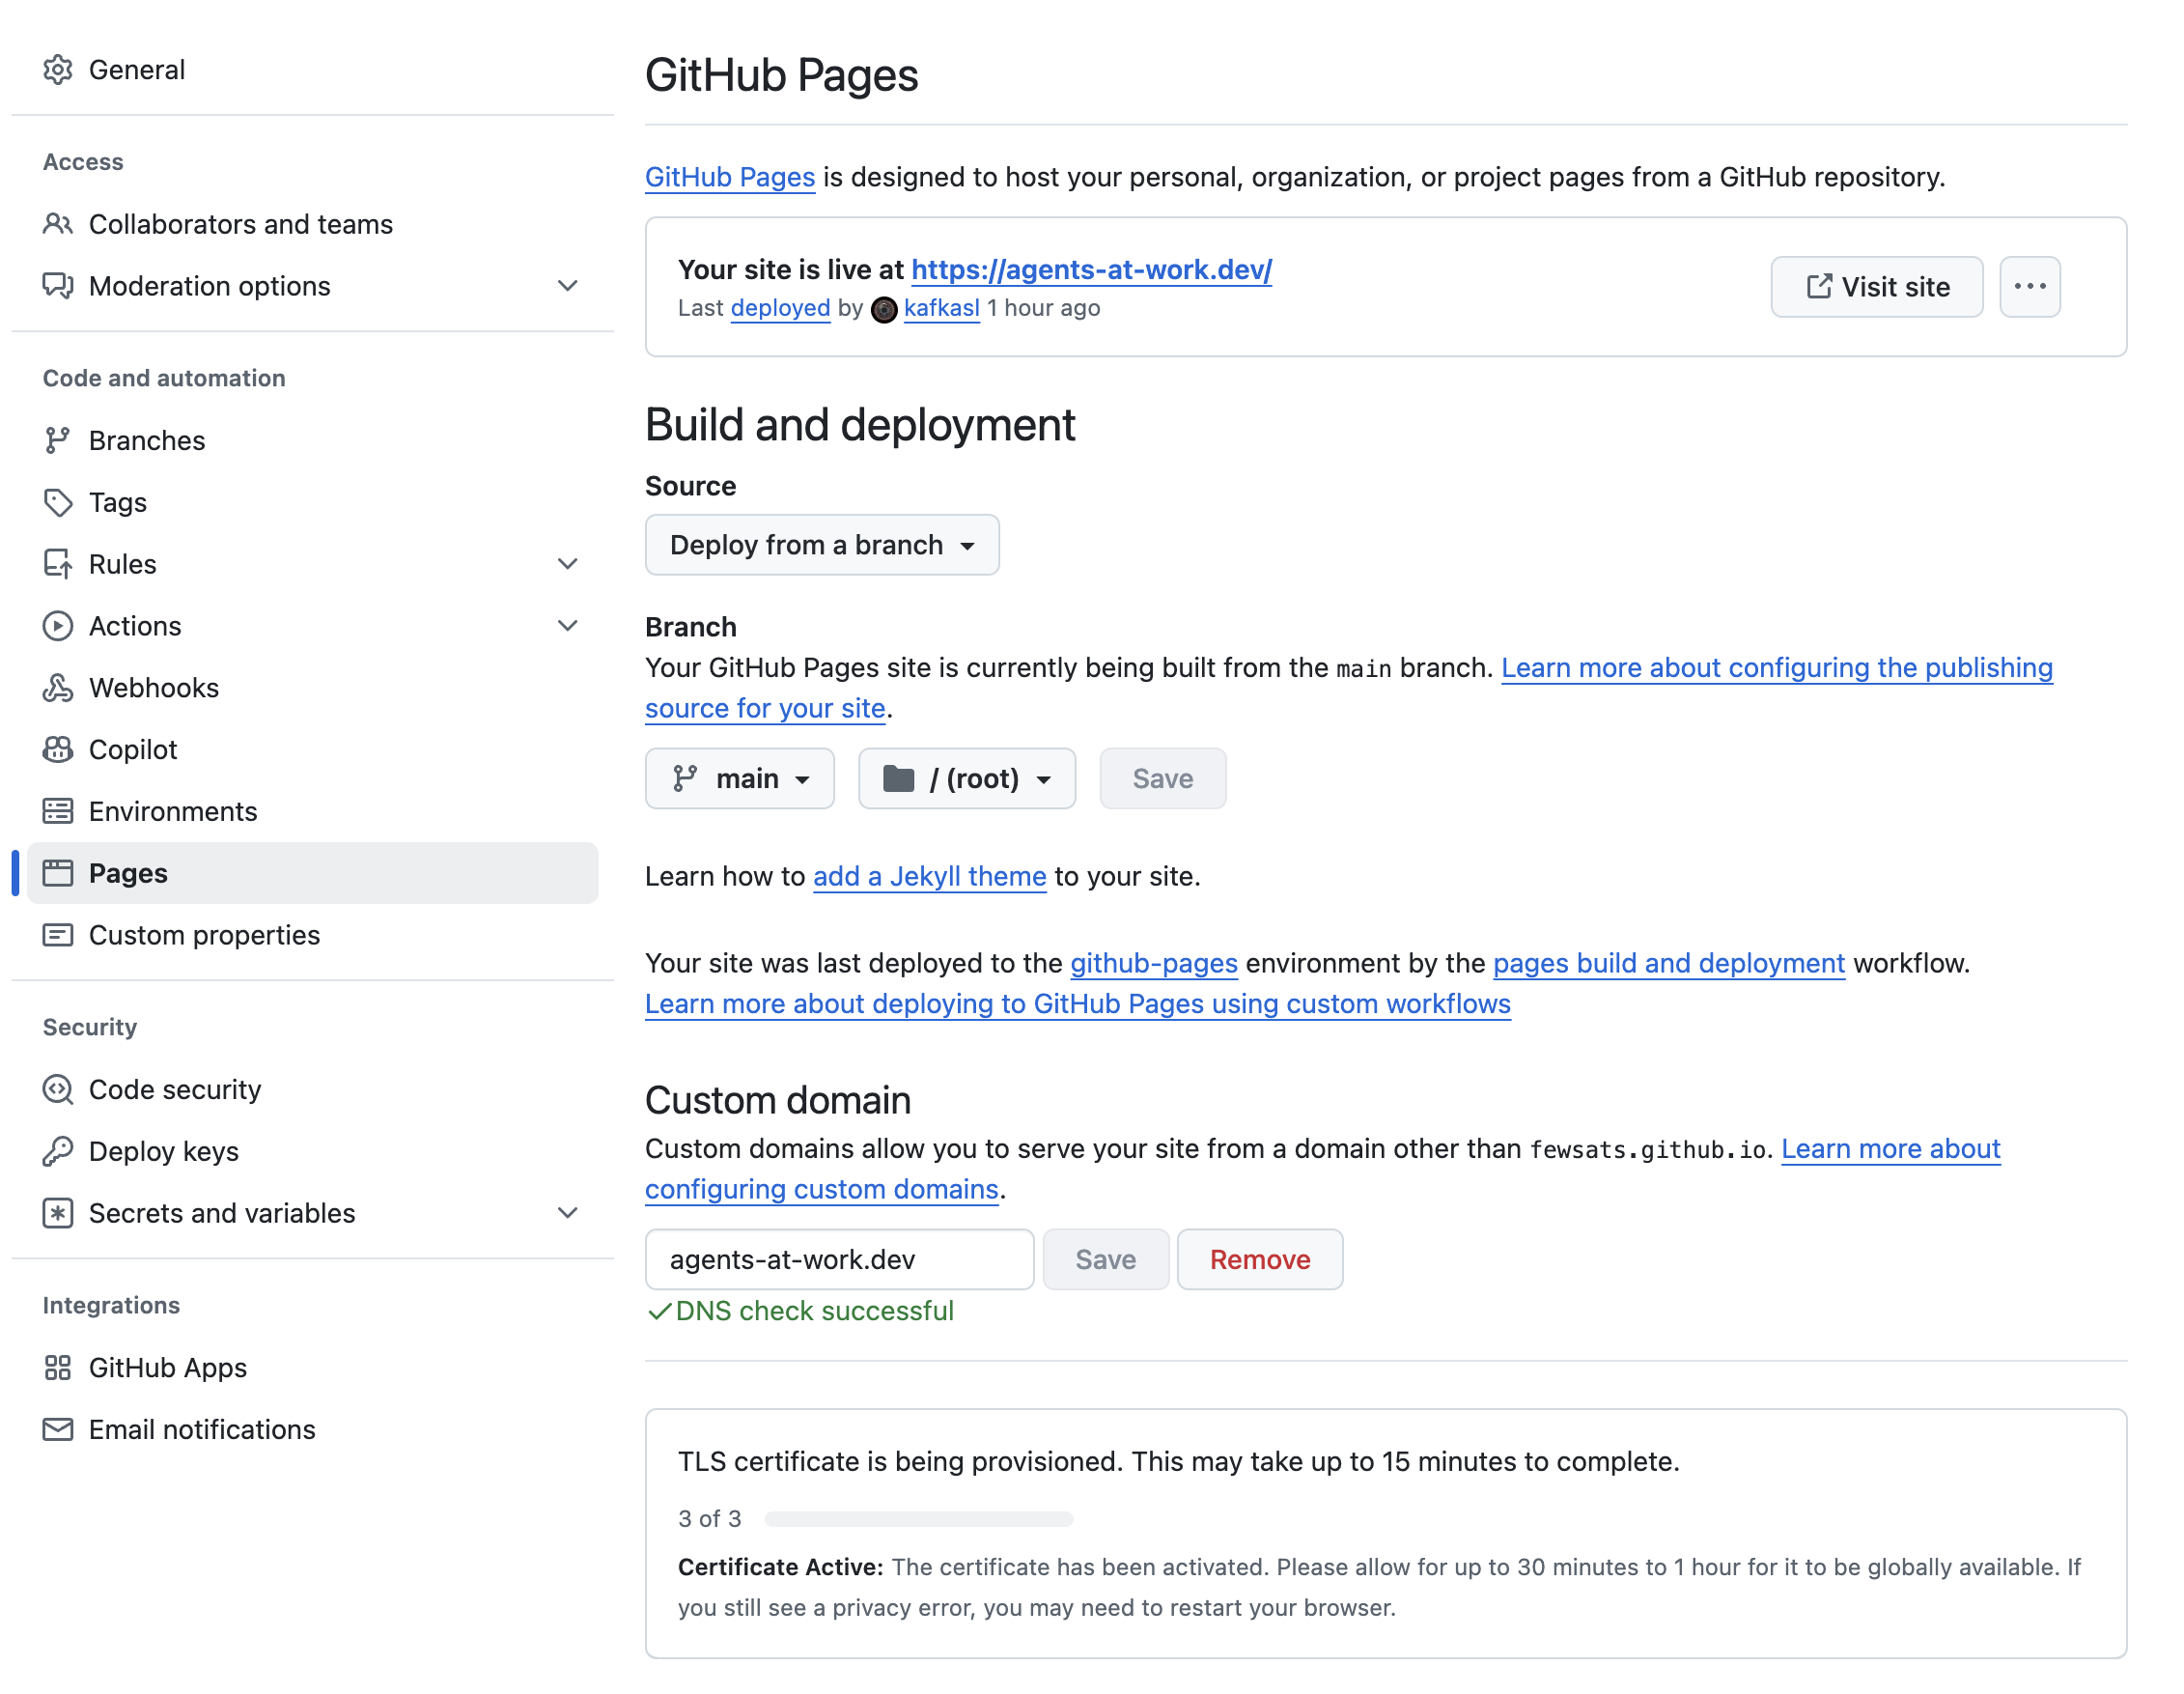
Step 5: Configure DNS for GitHub Pages
In GitHub Pages settings, add your custom domain (e.g., agents-at-work.dev) and save.
GitHub will prompt you to configure DNS records. Provide these instructions to Cursor’s agent mode:
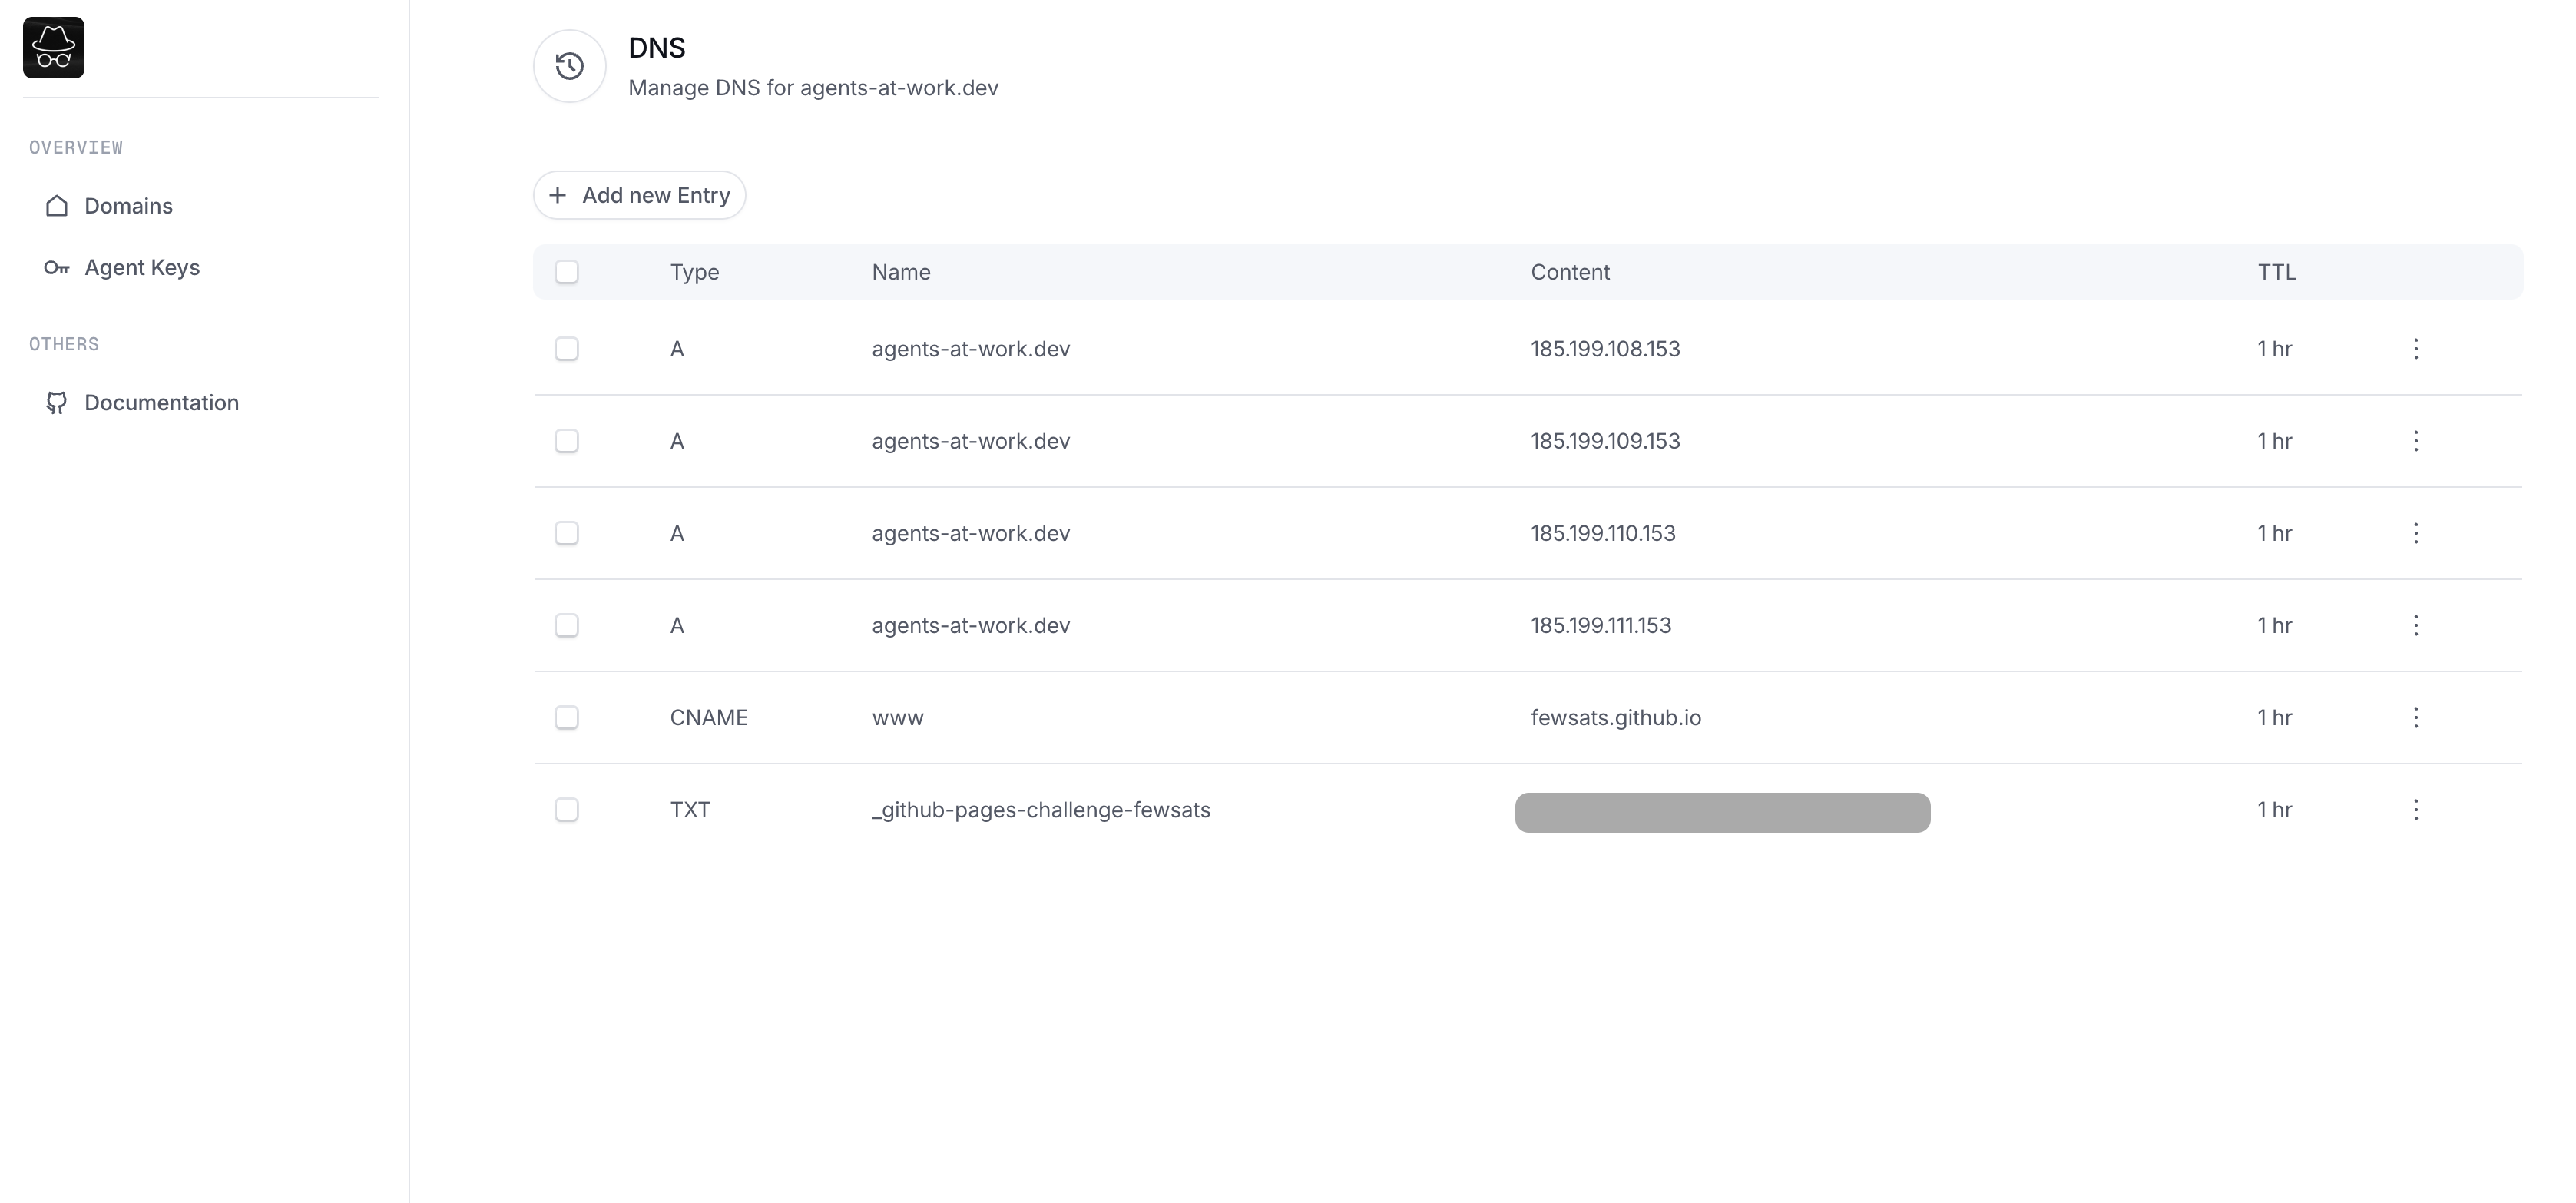
Make sure there are no DNS entries before adding new ones. Then point the domain we just bought to the IP addresses for GitHub Pages:

185.199.108.153
185.199.109.153
185.199.110.153
185.199.111.153

Also add a CNAME record that points the www subdomain to your GitHub Pages URL (e.g., fewsats.github.io).
The AI will clear existing DNS records and set up the new ones.
Once the DNS propagates, your github pages should look like this:
Step 6: Verify Domain Ownership (Optional but Recommended)
GitHub recommends verifying domain ownership. To do so:
- Go to
https://github.com/settings/pages - Add your domain name ->
agents-at-work.dev - Click
Copy Instructionsand give them to Cursor. - Provide the instructions to Cursor’s agent mode (they should look like below)
Verify the domain ownership with these instructions:

1. Create a TXT record in your DNS configuration for the following hostname: _github-pages-challenge-xyz.yourdomain.dev
2. Use this code for the value of the TXT record: YOUR_VERIFICATION_CODE
The AI will handle the DNS verification setup.
Step 7: Enforce HTTPS (Recommended)
Once DNS propagation is complete (may take a few minutes to hours):
- Go back to GitHub Pages settings.
- Enable “Enforce HTTPS” to secure your website.
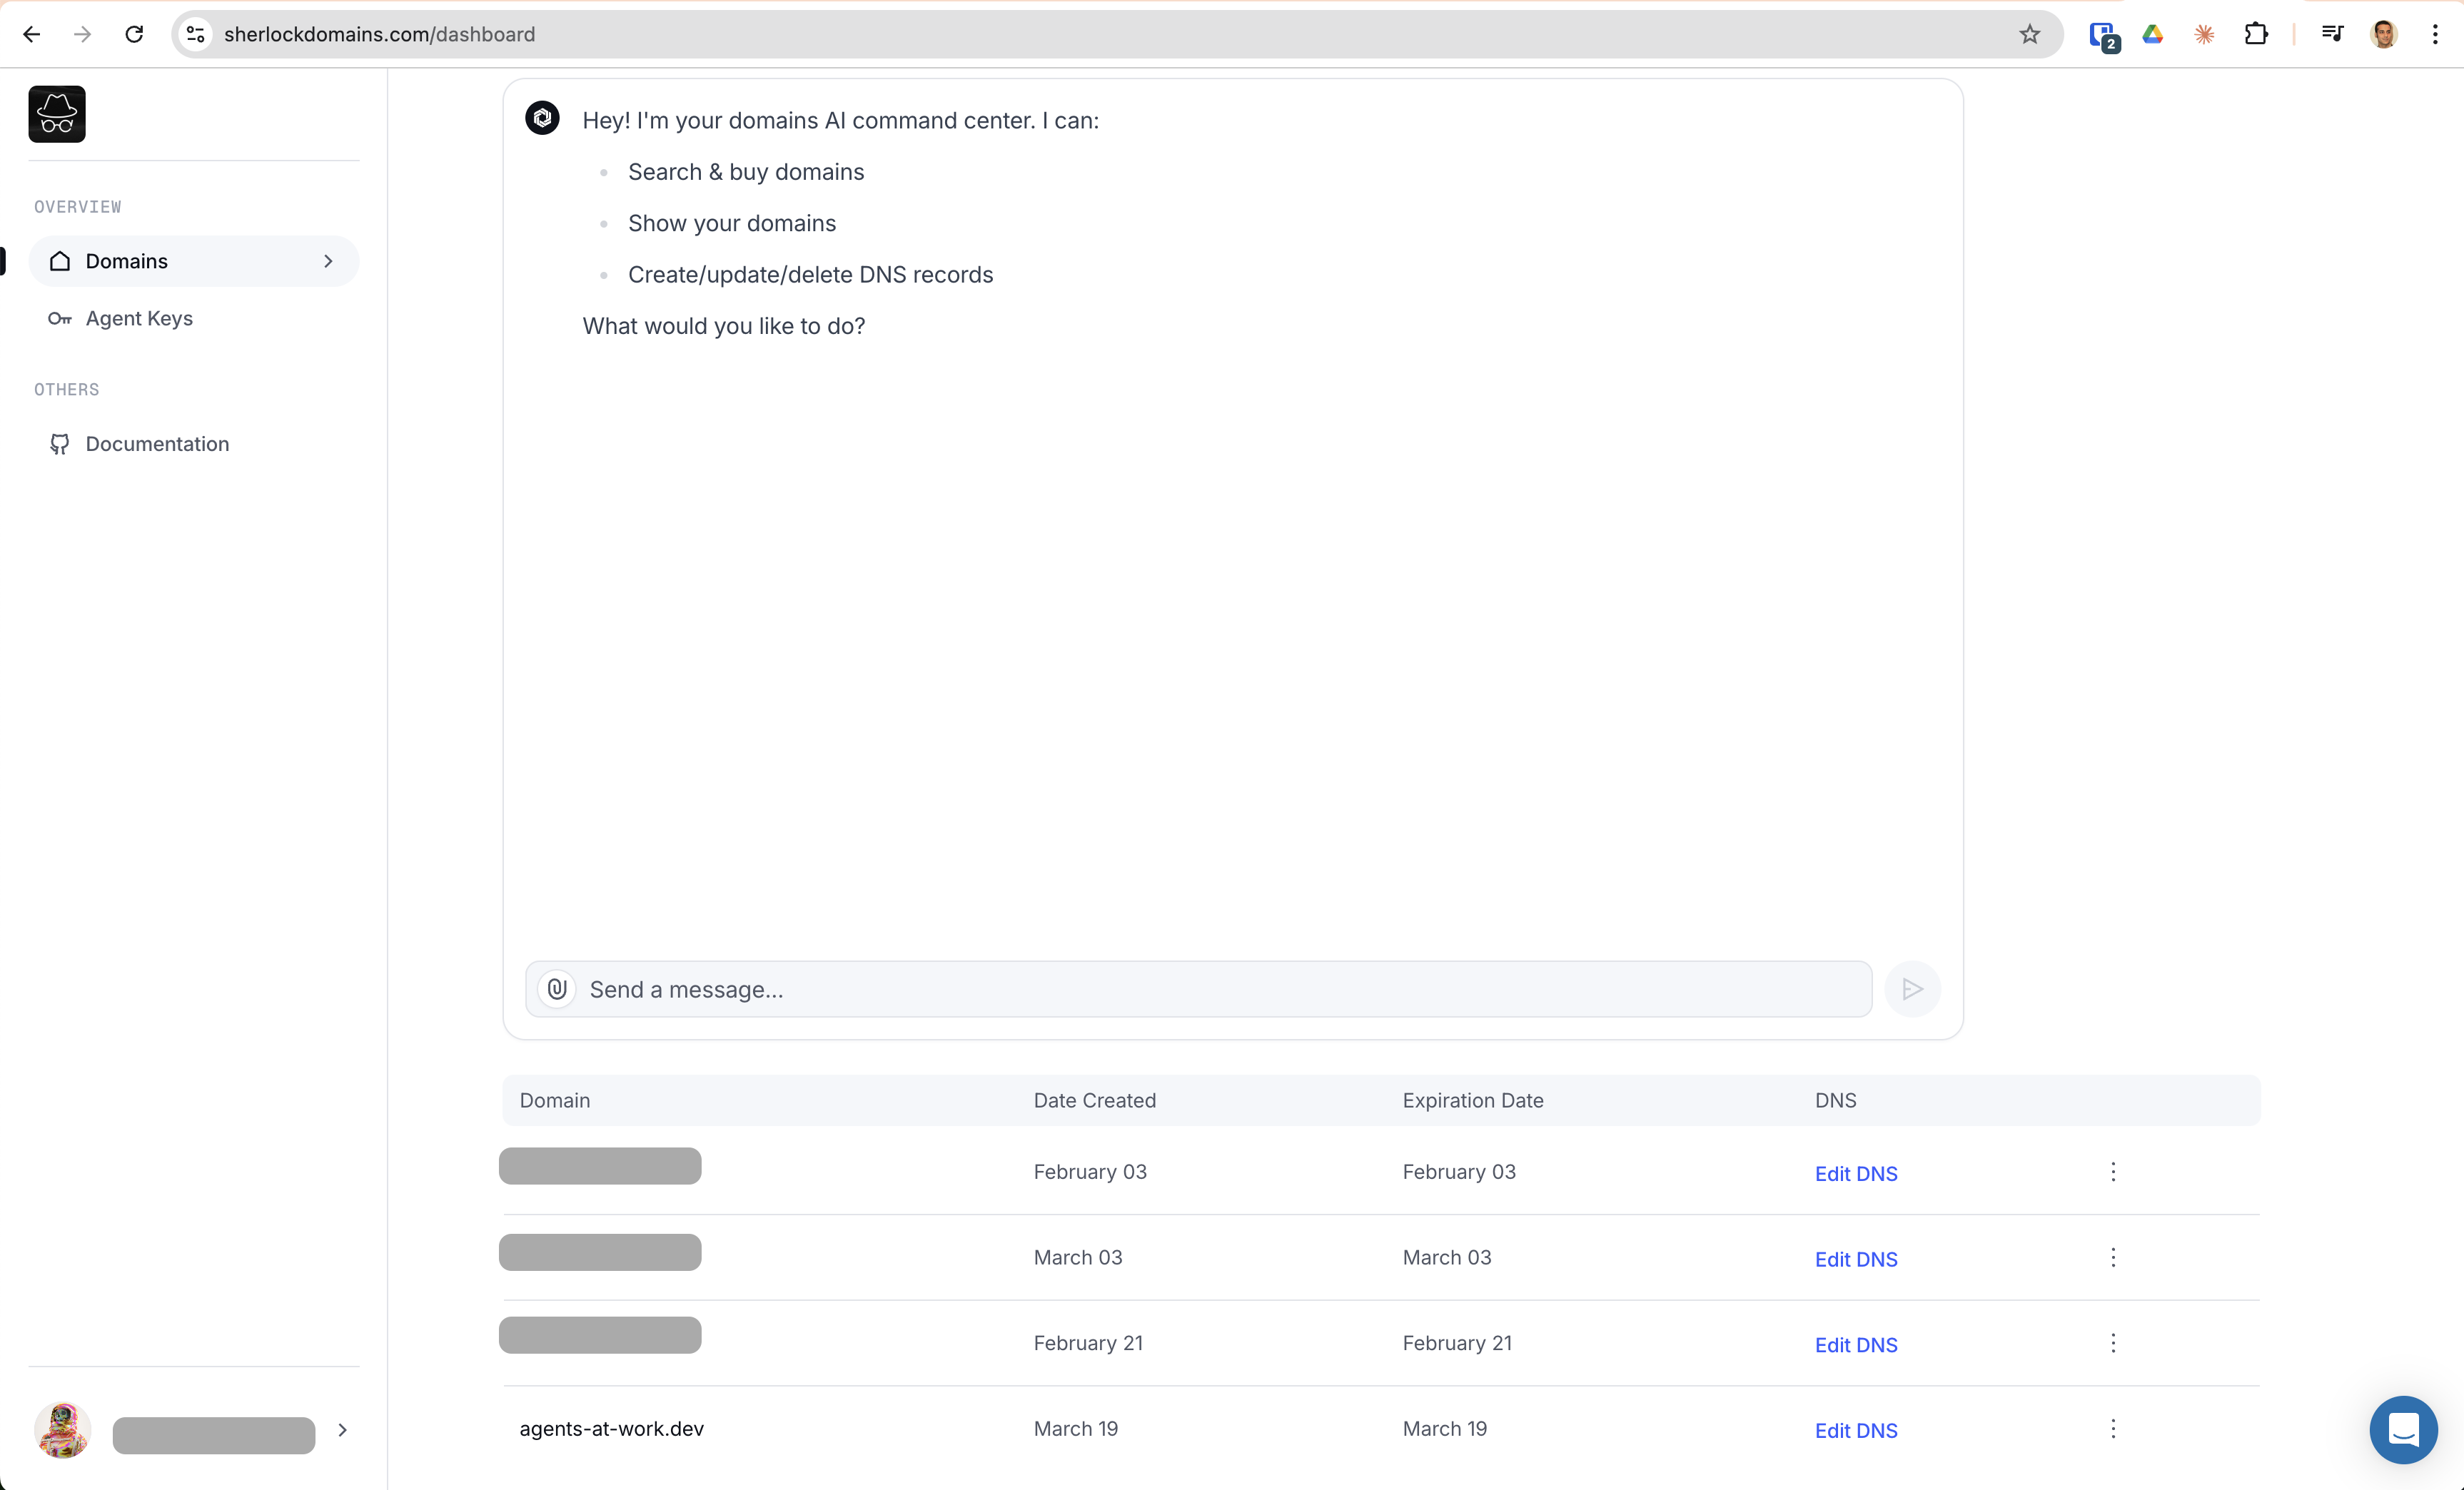
Step 8: Link your Sherlock Domains account (optional)
Sherlock Domains provide a UI to manage your domains and DNS. In order to log in, you will need to link it using MCP with your email.
Just tell Cursor Agent:
I want to link the following email [email protected] to my sherlock account.
After this you will receive an email and will be able to view your records. If you completed successfully this guide they should look like this:
Troubleshooting
- DNS propagation delays: DNS changes can take up to 24 hours. If verification fails initially, wait and retry later.
- Payment issues: Ensure your Fewsats account has sufficient funds or a valid payment method.
- Cursor MCP issues: Ensure your API keys and MCP servers are correctly configured.
Congratulations 🎉
Your website is now live with a custom domain, securely hosted on GitHub Pages!
If you have any questions or comments:
Dev Tools Supporting MCP
The following are the main code editors that support the Model Context Protocol. Click the link to visit the official website for more information.


