- Explore MCP Servers
- jupyter-mcp-server
Jupyter Mcp Server
What is Jupyter Mcp Server
Jupyter MCP Server is an implementation of the Model Context Protocol (MCP) that facilitates interaction with Jupyter notebooks running in a local JupyterLab environment.
Use cases
Use cases for Jupyter MCP Server include data analysis, geospatial analysis, and collaborative coding in Jupyter notebooks, making it suitable for data scientists and researchers.
How to use
To use Jupyter MCP Server, first install JupyterLab and its dependencies. Start JupyterLab with the specified command, ensuring to set the correct token and IP address. Then, configure your Claude Desktop settings to connect to the Jupyter MCP Server using Docker.
Key features
Key features include the ability to add and execute code cells, add markdown cells, and download Earth data granules from NASA Earth Data. The server supports real-time collaboration in JupyterLab.
Where to use
undefined
Clients Supporting MCP
The following are the main client software that supports the Model Context Protocol. Click the link to visit the official website for more information.
Overview
What is Jupyter Mcp Server
Jupyter MCP Server is an implementation of the Model Context Protocol (MCP) that facilitates interaction with Jupyter notebooks running in a local JupyterLab environment.
Use cases
Use cases for Jupyter MCP Server include data analysis, geospatial analysis, and collaborative coding in Jupyter notebooks, making it suitable for data scientists and researchers.
How to use
To use Jupyter MCP Server, first install JupyterLab and its dependencies. Start JupyterLab with the specified command, ensuring to set the correct token and IP address. Then, configure your Claude Desktop settings to connect to the Jupyter MCP Server using Docker.
Key features
Key features include the ability to add and execute code cells, add markdown cells, and download Earth data granules from NASA Earth Data. The server supports real-time collaboration in JupyterLab.
Where to use
undefined
Clients Supporting MCP
The following are the main client software that supports the Model Context Protocol. Click the link to visit the official website for more information.
Content
🪐✨ Jupyter MCP Server
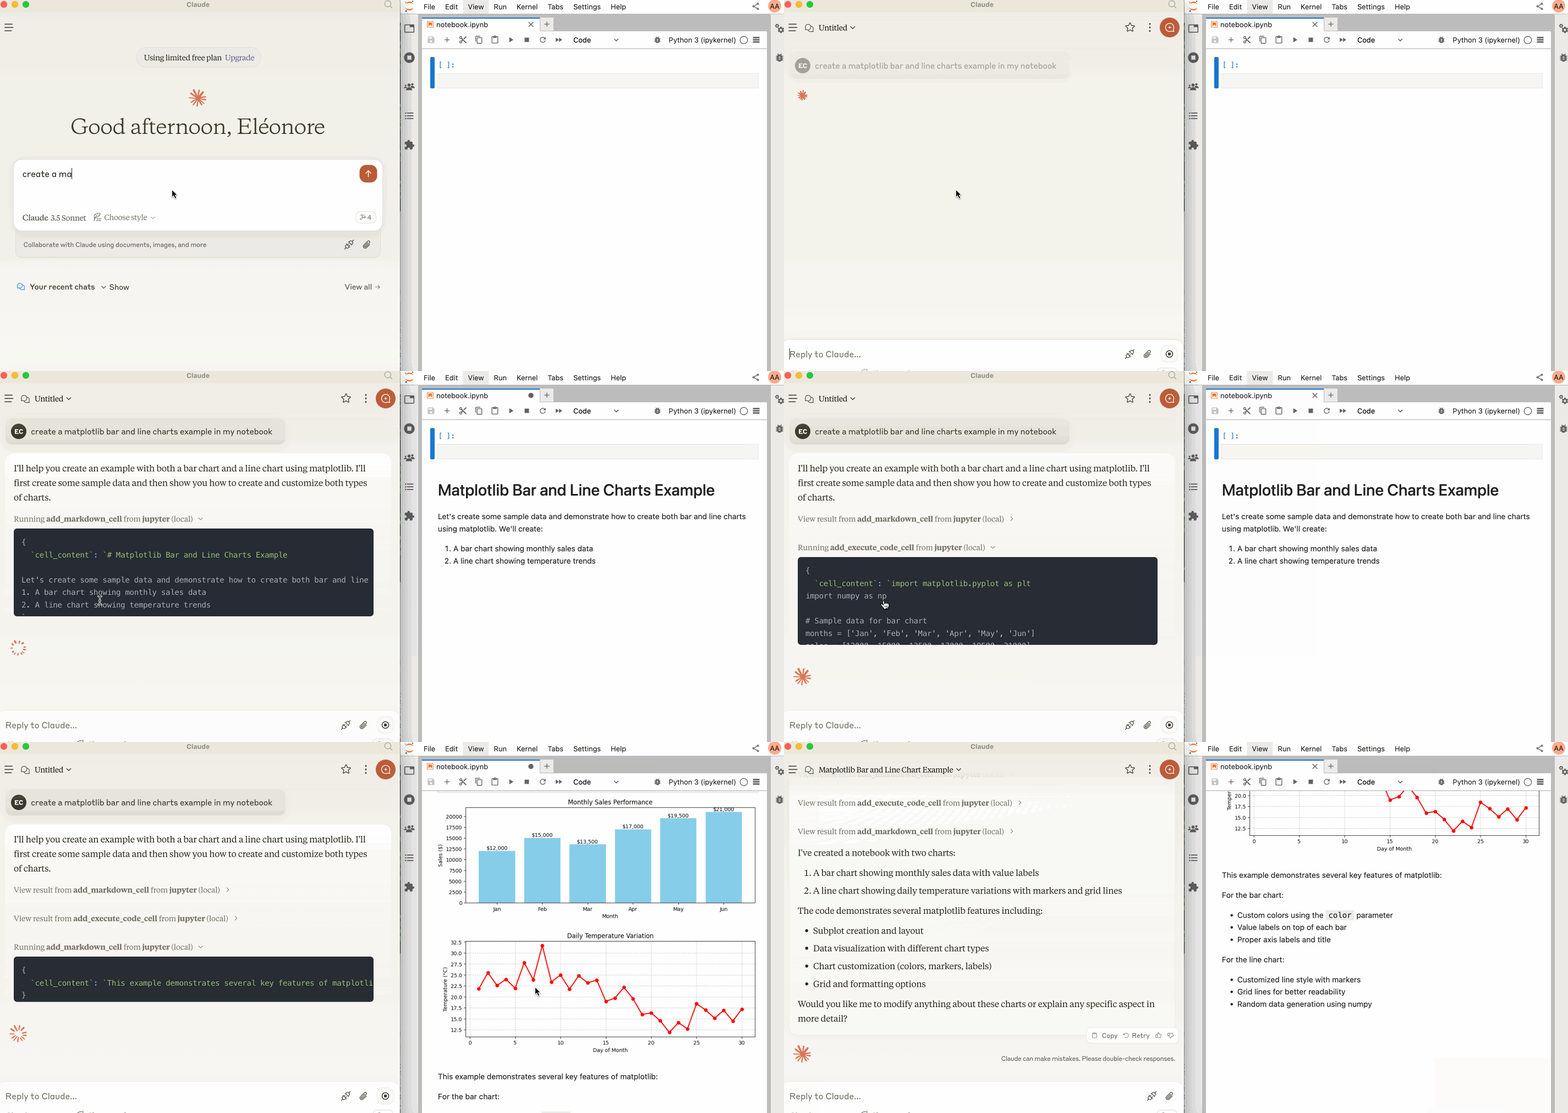
Jupyter MCP Server is a Model Context Protocol (MCP) server implementation that provides interaction with 📓 Jupyter notebooks running in any JupyterLab (works also with your 💻 local JupyterLab).
🚀 Key Features
- ⚡ Real-time control: Instantly view notebook changes as they happen.
- 🔁 Smart execution: Automatically adjusts when a cell run fails thanks to cell output feedback.
- 🤝 MCP-Compatible: Works with any MCP client, such as Claude Desktop, Cursor, Windsurf, and more.

🛠️ This MCP offers multiple tools such as insert_execute_code_cell, append_markdown_cell, get_notebook_info, read_cell, and more, enabling advanced interactions with Jupyter notebooks. Explore our Tools documentation to learn about all the tools powering Jupyter MCP Server.
🏁 Getting Started
For comprehensive setup instructions—including Streamable HTTP transport and advanced configuration—see our Setup Guide. Or, get started quickly with the stdio transport below:
1. Set Up Your Environment
pip install jupyterlab==4.4.1 jupyter-collaboration==4.0.2 ipykernel
pip uninstall -y pycrdt datalayer_pycrdt
pip install datalayer_pycrdt==0.12.17
2. Start JupyterLab
jupyter lab --port 8888 --IdentityProvider.token MY_TOKEN --ip 0.0.0.0
3. Configure Your Preferred MCP Client
MacOS and Windows
{
  "mcpServers": {
    "jupyter": {
      "command": "docker",
      "args": [
        "run",
        "-i",
        "--rm",
        "-e",
        "SERVER_URL",
        "-e",
        "TOKEN",
        "-e",
        "NOTEBOOK_PATH",
        "datalayer/jupyter-mcp-server:latest"
      ],
      "env": {
        "SERVER_URL": "http://host.docker.internal:8888",
        "TOKEN": "MY_TOKEN",
        "NOTEBOOK_PATH": "notebook.ipynb"
      }
    }
  }
}
Linux
{
  "mcpServers": {
    "jupyter": {
      "command": "docker",
      "args": [
        "run",
        "-i",
        "--rm",
        "-e",
        "SERVER_URL",
        "-e",
        "TOKEN",
        "-e",
        "NOTEBOOK_PATH",
        "--network=host",
        "datalayer/jupyter-mcp-server:latest"
      ],
      "env": {
        "SERVER_URL": "http://localhost:8888",
        "TOKEN": "MY_TOKEN",
        "NOTEBOOK_PATH": "notebook.ipynb"
      }
    }
  }
}
For detailed instructions on configuring various MCP clients—including Claude Desktop, Cursor, Cline, and Windsurf—see the Clients documentation.
📚 Resources
Looking for blog posts, videos, or other materials about Jupyter MCP Server?
👉 Visit the Resources section for more.
Dev Tools Supporting MCP
The following are the main code editors that support the Model Context Protocol. Click the link to visit the official website for more information.


