Langgraph React Mcp Chat
What is Langgraph React Mcp Chat
LangGraph ReAct MCP Chat is a project that implements a ReAct agent capable of accessing various external tools and data sources through the Model Context Protocol (MCP). Built on the LangGraph framework, it provides an interface for easy addition and configuration of MCP tools.
Use cases
The project showcases multiple use cases including engaging in real-time conversations with the ReAct agent, managing and customizing tool configurations, and tracking conversation history. It enables users to leverage external APIs and functionalities to enhance their interactions.
How to use
To use the application, clone the GitHub repository, set up a virtual environment, install dependencies, configure necessary API keys in a .env file, and create a MCP configuration file. Finally, run the application using ‘langgraph dev’ and access it via a local web address.
Key features
Key features include a LangGraph-based ReAct agent, easy management of MCP tools in Smithery JSON format, real-time streaming responses, and conversation tracking for better user experience.
Where to use
The LangGraph ReAct MCP Chat can be used in web applications, as part of customer service solutions, or integrated into platforms like TeddyFlow to create interactive conversational AI experiences.
Clients Supporting MCP
The following are the main client software that supports the Model Context Protocol. Click the link to visit the official website for more information.


Overview
What is Langgraph React Mcp Chat
LangGraph ReAct MCP Chat is a project that implements a ReAct agent capable of accessing various external tools and data sources through the Model Context Protocol (MCP). Built on the LangGraph framework, it provides an interface for easy addition and configuration of MCP tools.
Use cases
The project showcases multiple use cases including engaging in real-time conversations with the ReAct agent, managing and customizing tool configurations, and tracking conversation history. It enables users to leverage external APIs and functionalities to enhance their interactions.
How to use
To use the application, clone the GitHub repository, set up a virtual environment, install dependencies, configure necessary API keys in a .env file, and create a MCP configuration file. Finally, run the application using ‘langgraph dev’ and access it via a local web address.
Key features
Key features include a LangGraph-based ReAct agent, easy management of MCP tools in Smithery JSON format, real-time streaming responses, and conversation tracking for better user experience.
Where to use
The LangGraph ReAct MCP Chat can be used in web applications, as part of customer service solutions, or integrated into platforms like TeddyFlow to create interactive conversational AI experiences.
Clients Supporting MCP
The following are the main client software that supports the Model Context Protocol. Click the link to visit the official website for more information.
Content
LangGraph ReAct MCP Chat
![]()
![]()
![]()
![]()
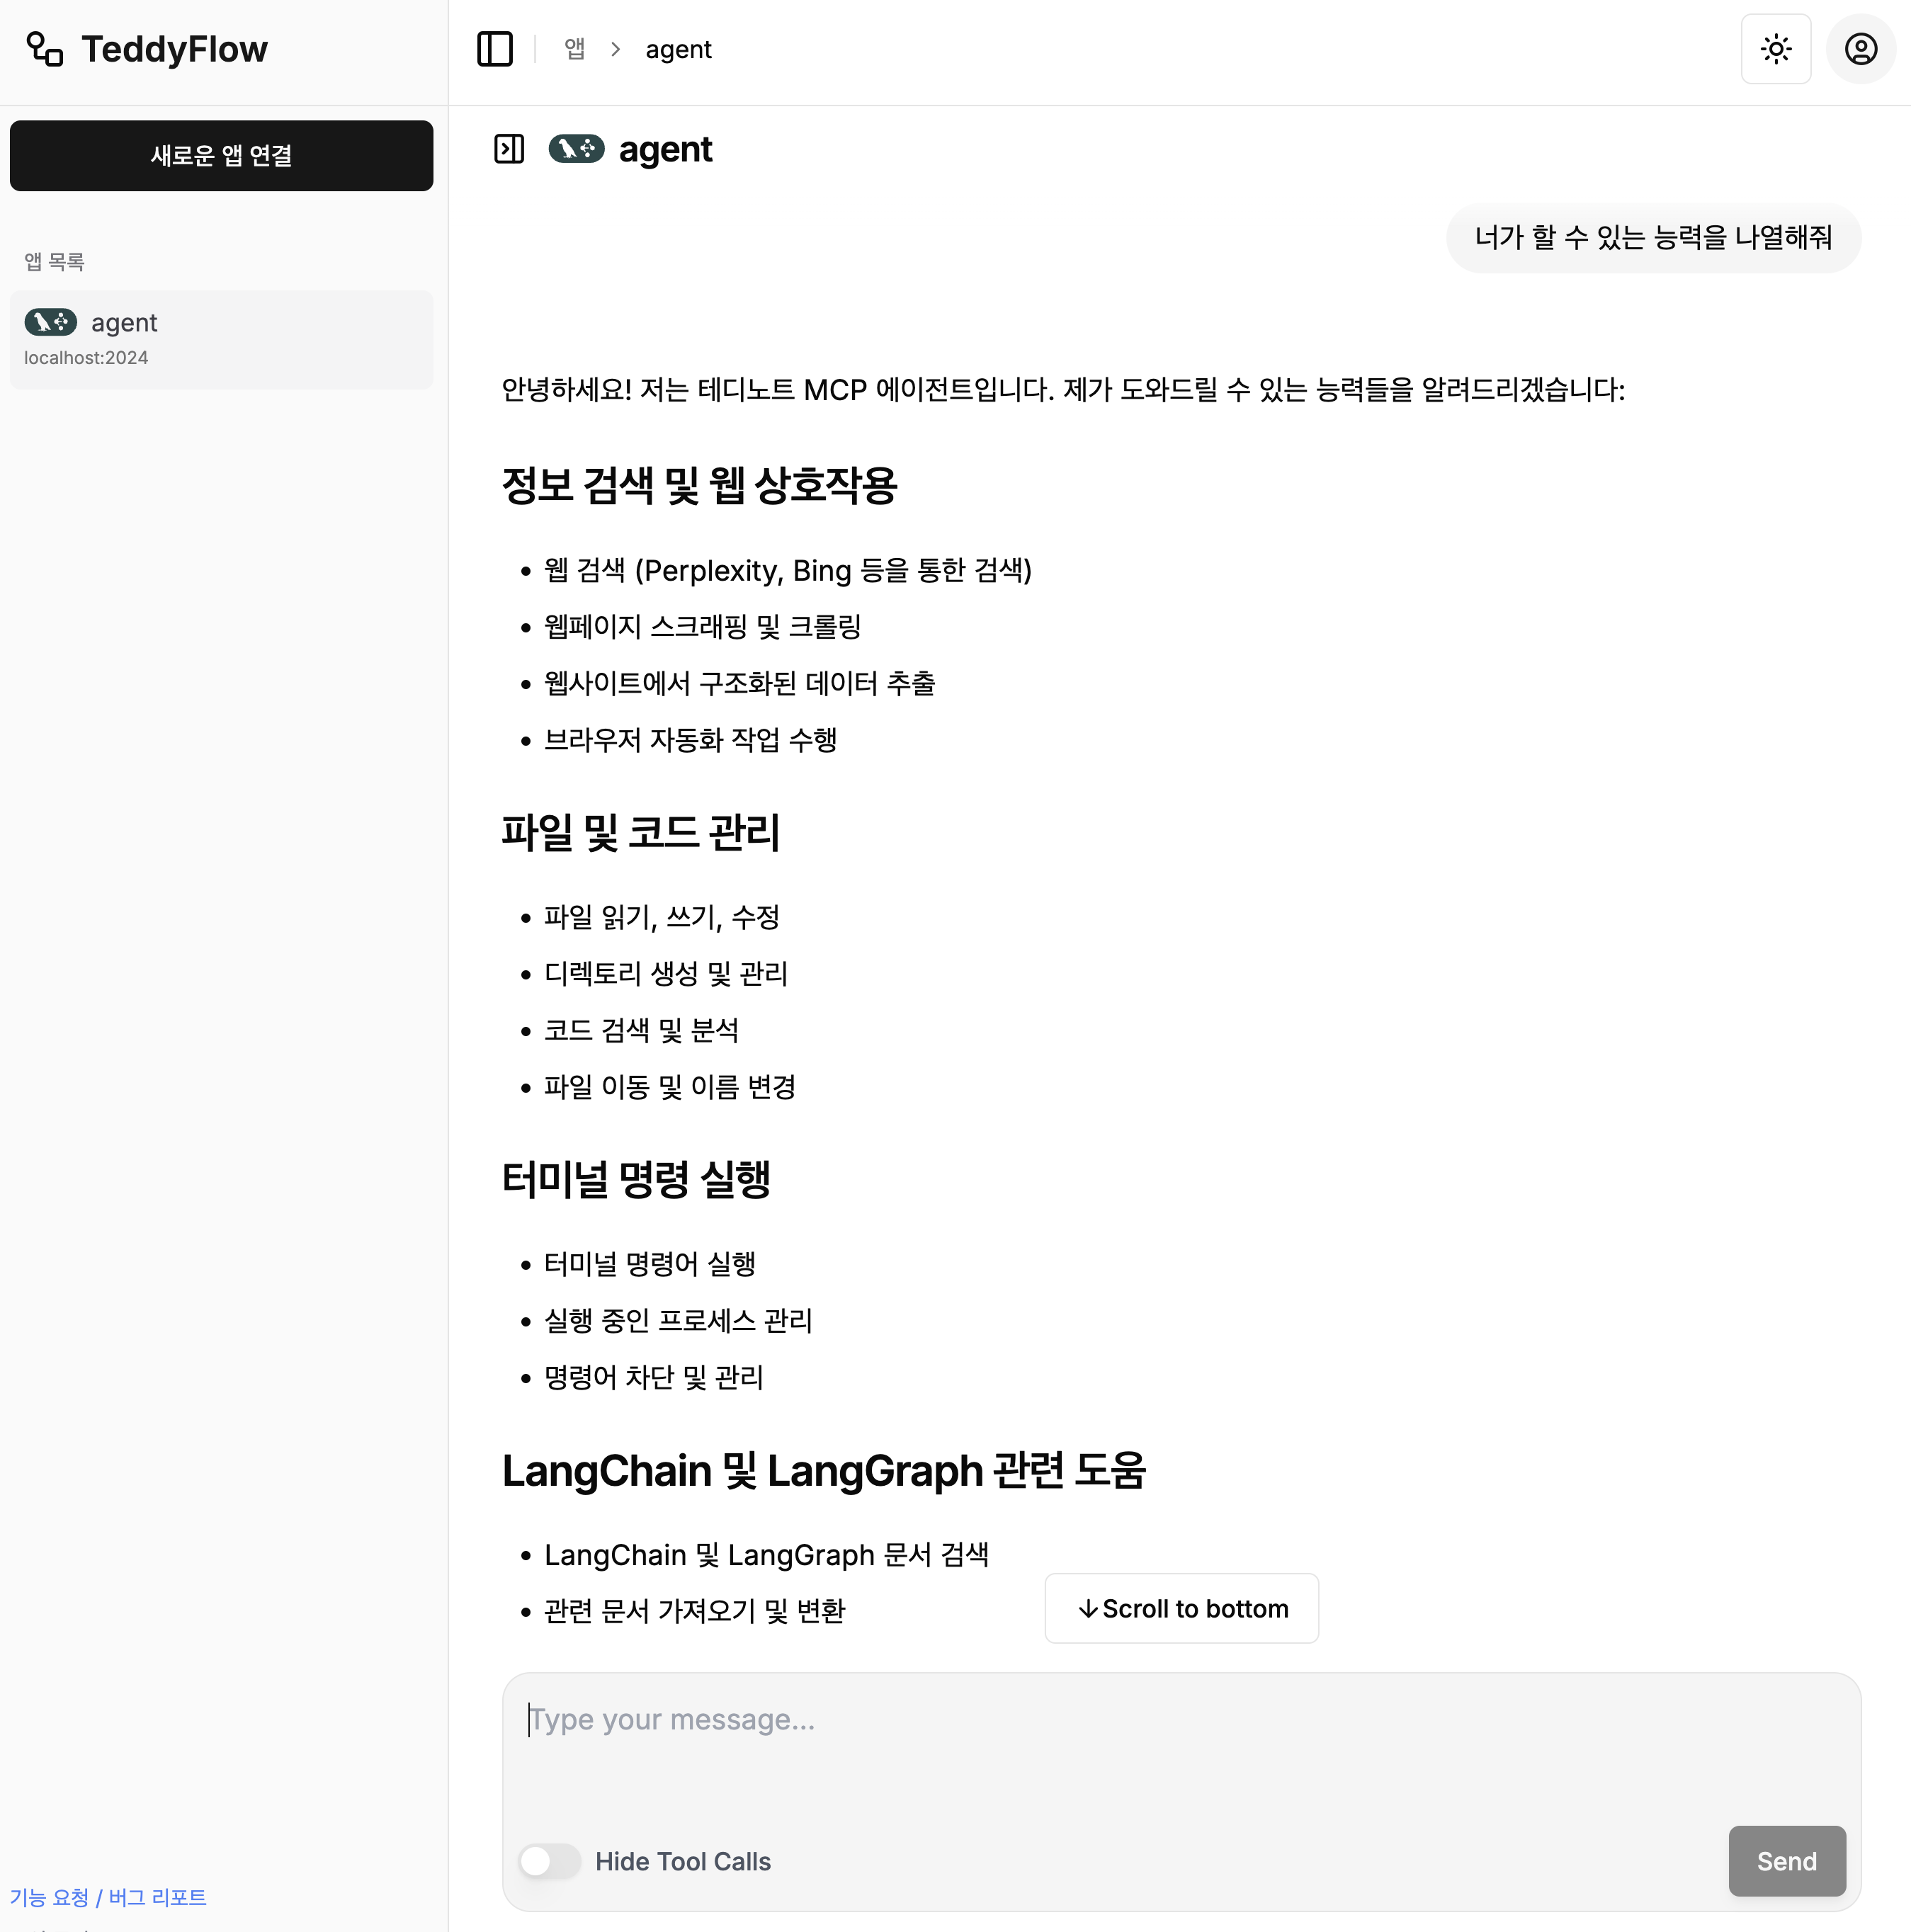
프로젝트 개요

LangGraph ReAct MCP Chat은 Model Context Protocol(MCP)을 통해 다양한 외부 도구와 데이터 소스에 접근할 수 있는 ReAct 에이전트를 구현한 프로젝트입니다. 이 프로젝트는 LangGraph를 기반으로 하며, MCP 도구를 쉽게 추가하고 구성할 수 있는 인터페이스를 제공합니다.
사용 사례
주요 기능
- LangGraph ReAct 에이전트: LangGraph를 기반으로 하는 ReAct 에이전트
- 도구 관리: MCP 도구를 쉽게 추가, 제거, 구성 가능 (Smithery JSON 형식 지원)
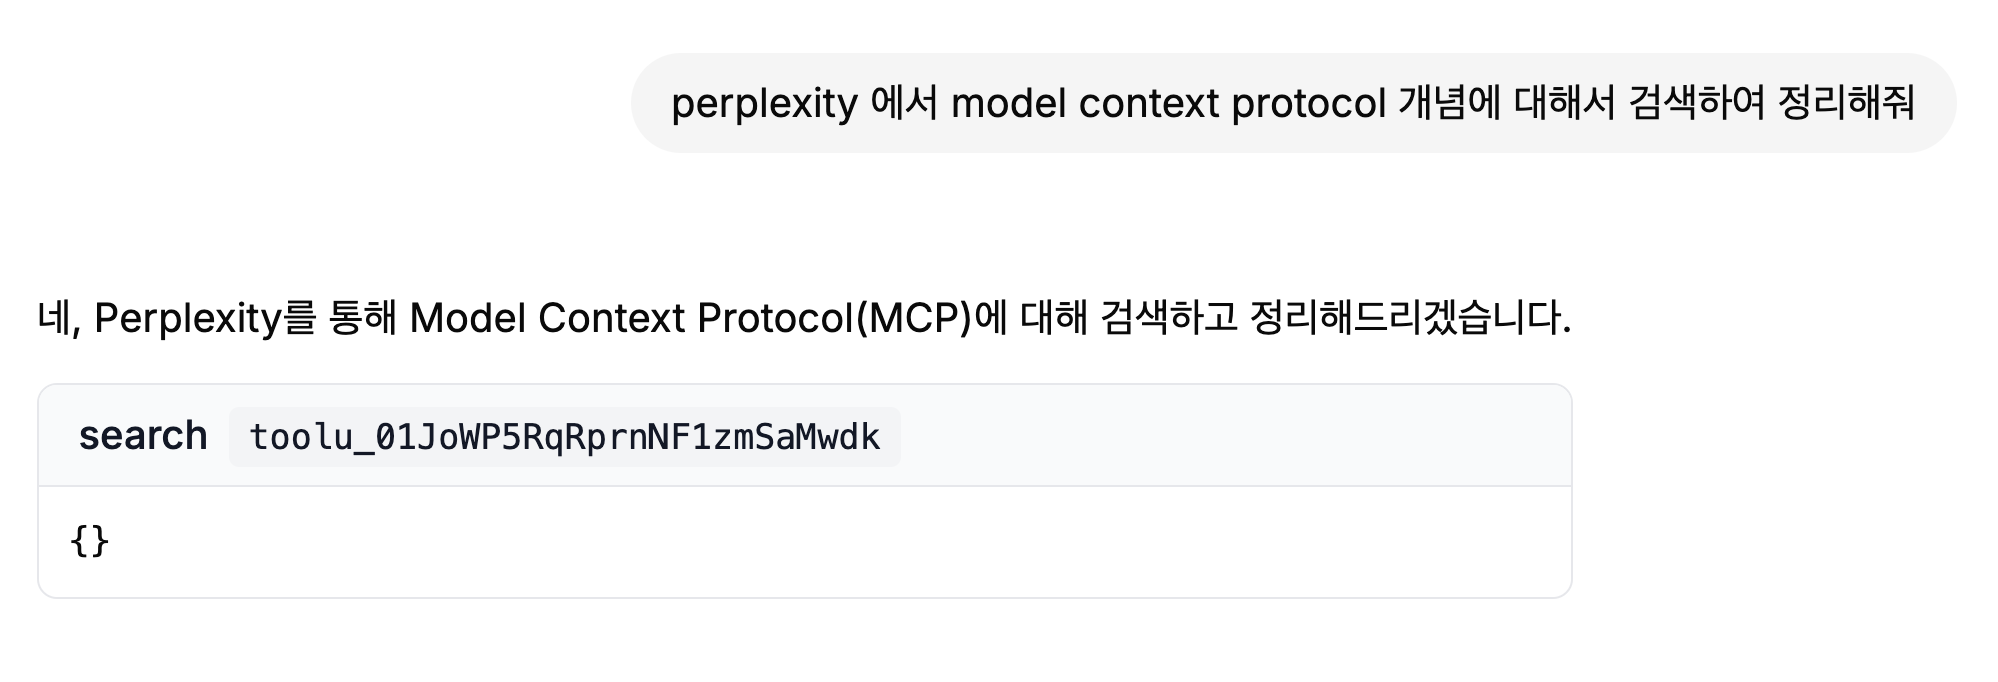
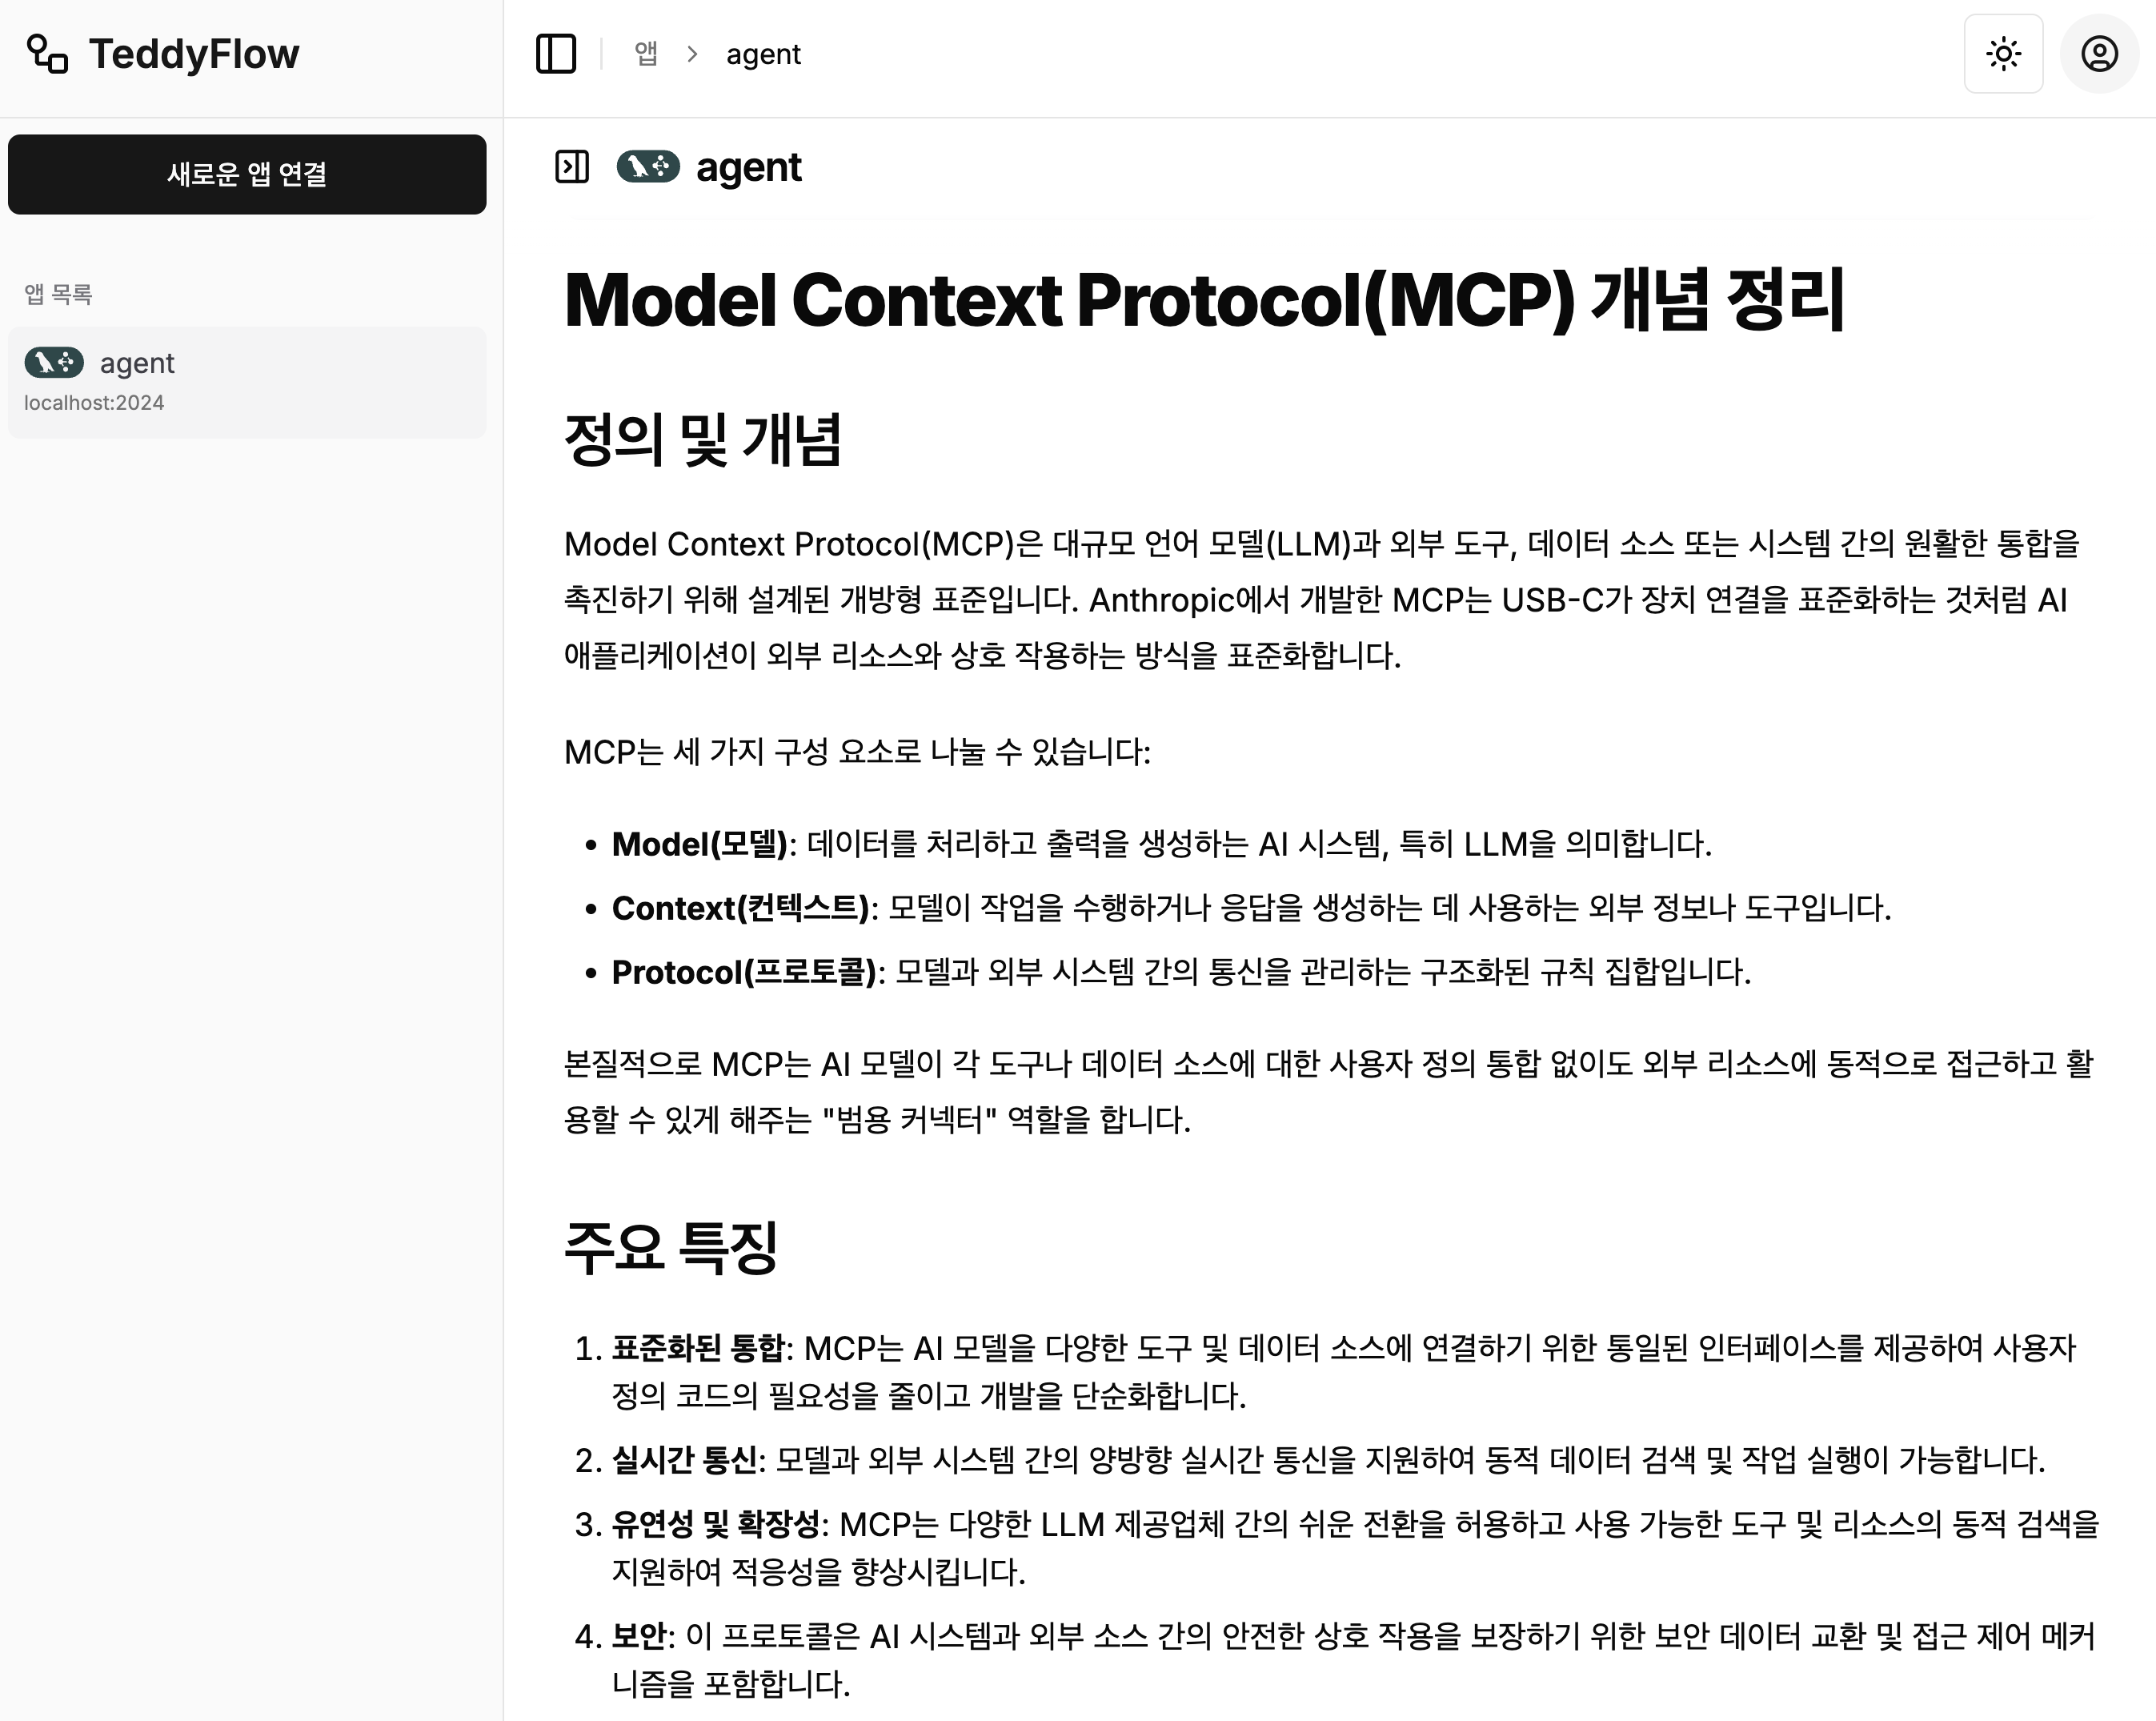
- 스트리밍 응답: 에이전트의 응답과 도구 호출을 실시간으로 확인
- 대화 기록: 에이전트와의 대화 내용 추적 및 관리
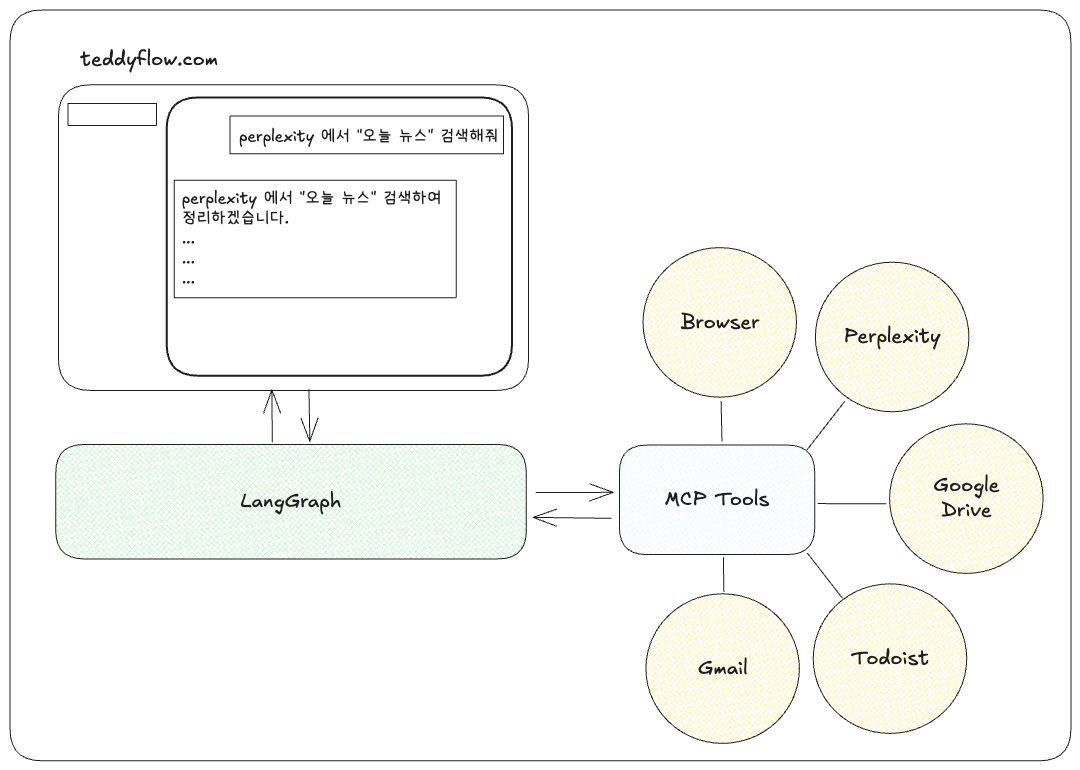
아키텍처
설치 방법
- 저장소 복제하기
git clone https://github.com/teddynote-lab/langgraph-react-mcp-chat.git
cd langgraph-react-mcp-chat
- uv를 사용하여 가상 환경 생성 및 의존성 설치
uv venv
source .venv/bin/activate  # Windows의 경우: .venv\Scripts\activate
uv pip install -r requirements.txt
.env파일 설정하기
.env.example 파일을 .env로 복사하고 필요한 API 키를 추가합니다:
cp .env.example .env
아래는 필요한 API 키 목록입니다:
ANTHROPIC_API_KEY=your_anthropic_api_key
OPENAI_API_KEY=your_openai_api_key
LANGSMITH_TRACING=true
LANGSMITH_ENDPOINT=https://api.smith.langchain.com
LANGSMITH_API_KEY=your_langsmith_api_key
LANGSMITH_PROJECT=your_langsmith_project
- MCP 도구 구성하기
먼저, 예시로 작성한 mcp_config_sample.json 파일을 mcp_config.json 파일로 파일명을 변경합니다.
아래는 샘플로 작성된 예시입니다.
{
  "mcpServers": {
    "desktop-commander": {
      "command": "npx",
      "args": [
        "-y",
        "@smithery/cli@latest",
        "run",
        "@wonderwhy-er/desktop-commander",
        "--key",
        "Smithery API_KEY 입력"
      ]
    },
    "perplexity-search": {
      "command": "npx",
      "args": [
        "-y",
        "@smithery/cli@latest",
        "run",
        "@arjunkmrm/perplexity-search",
        "--config",
        "{\"perplexityApiKey\":\"Perplexity API_KEY 입력\"}"
      ]
    },
    "hyperbrowser": {
      "command": "npx",
      "args": [
        "-y",
        "@smithery/cli@latest",
        "run",
        "@hyperbrowserai/mcp",
        "--key",
        "Smithery API_KEY 입력"
      ]
    },
    "todoist-mcp": {
      "command": "npx",
      "args": [
        "-y",
        "@smithery/cli@latest",
        "run",
        "@miottid/todoist-mcp",
        "--key",
        "Smithery API_KEY 입력"
      ]
    }
  }
}
Smithery 에서 사용할 MCP 도구의 JSON 구성을 가져와 mcp_config.json 파일에 추가해야 합니다
- Smithery 웹사이트를 방문하여 사용하고 싶은 도구를 선택합니다.
- 도구 페이지에서 오른쪽의 ‘COPY’ 버튼을 클릭하여 JSON 구성을 복사합니다.
mcp_config.json파일을 열고 복사한 JSON을 추가합니다.
중요: 파일 이름은 반드시 mcp_config.json으로 저장해야 합니다. 다른 이름을 사용할 경우 프로그램이 올바르게 작동하지 않습니다.
애플리케이션 실행
모든 설정이 완료되었다면, 다음 명령어로 LangGraph 개발 서버를 실행할 수 있습니다:
langgraph dev
서버가 성공적으로 시작되면 웹 브라우저에서 로컬 주소(일반적으로 http://localhost:3000)를 통해 애플리케이션에 접속할 수 있습니다.
teddyflow.com 연결 방법
- 먼저, 터미널에서
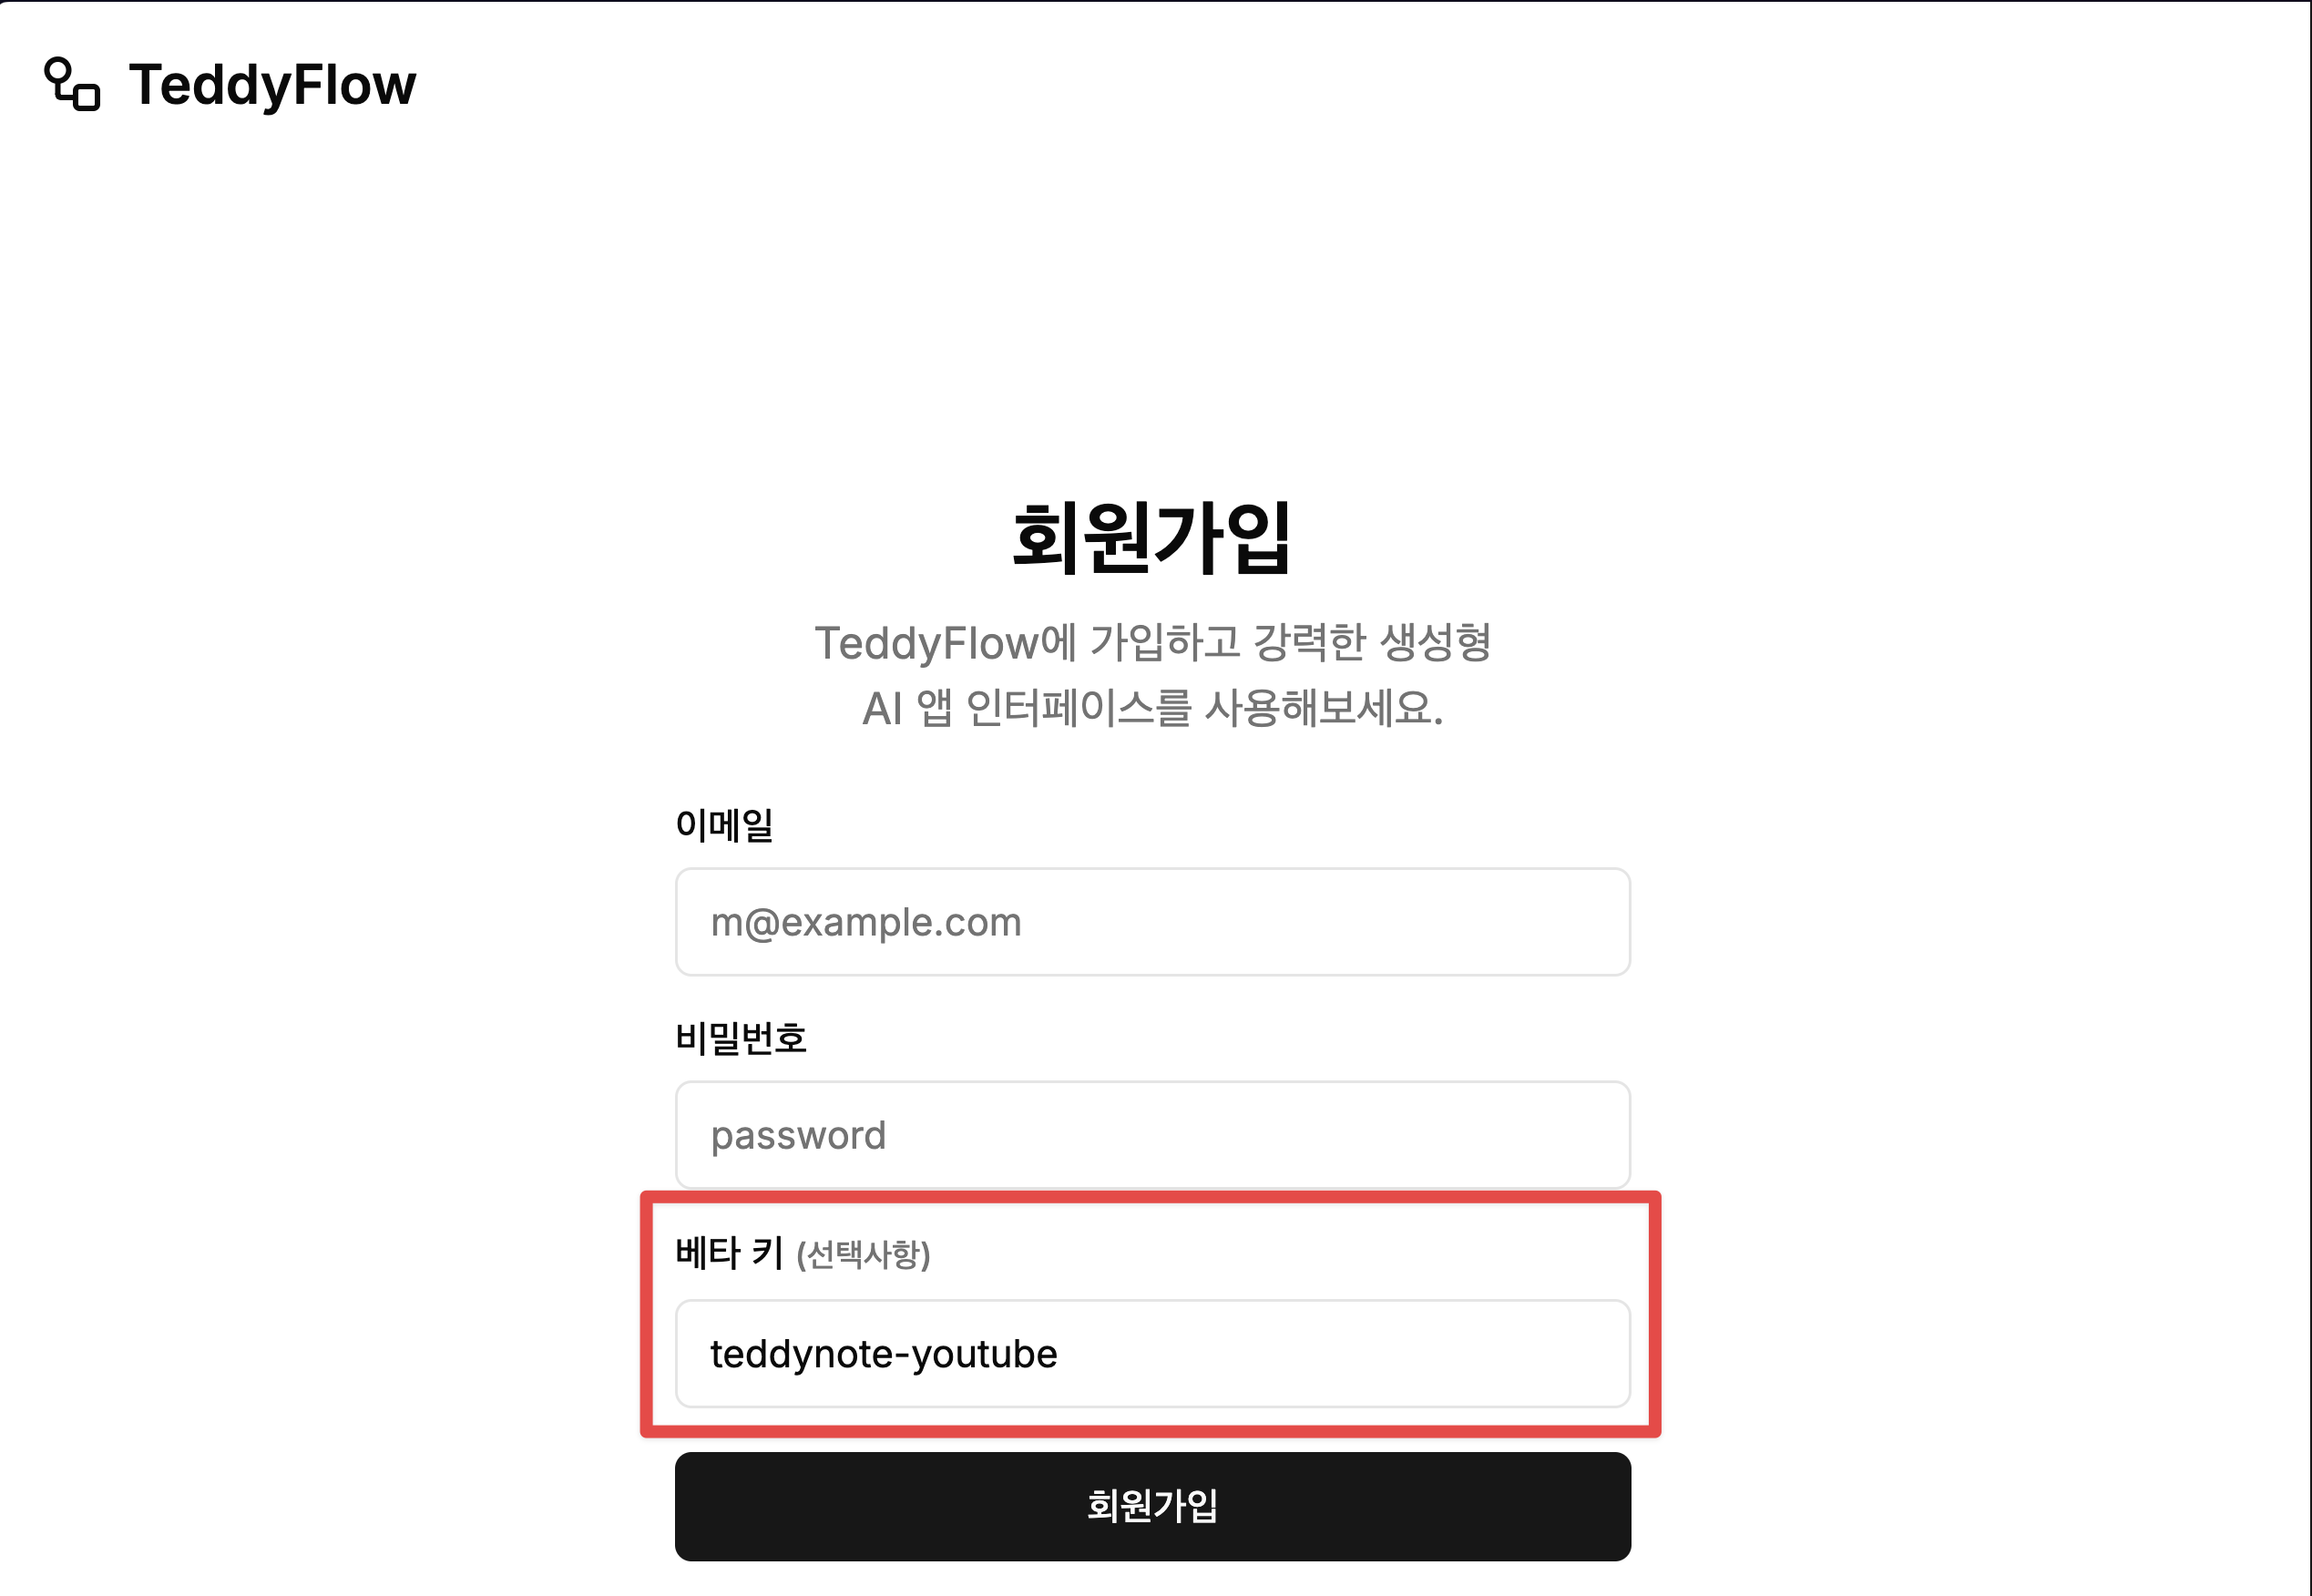
langgraph dev명령어를 실행하여 개발 서버를 시작합니다. - teddyflow.com 에서 회원가입을 합니다.
회원가입시 “베타 키” 에 teddynote-youtube 를 입력하면 승인 없이 바로 가입이 가능합니다.
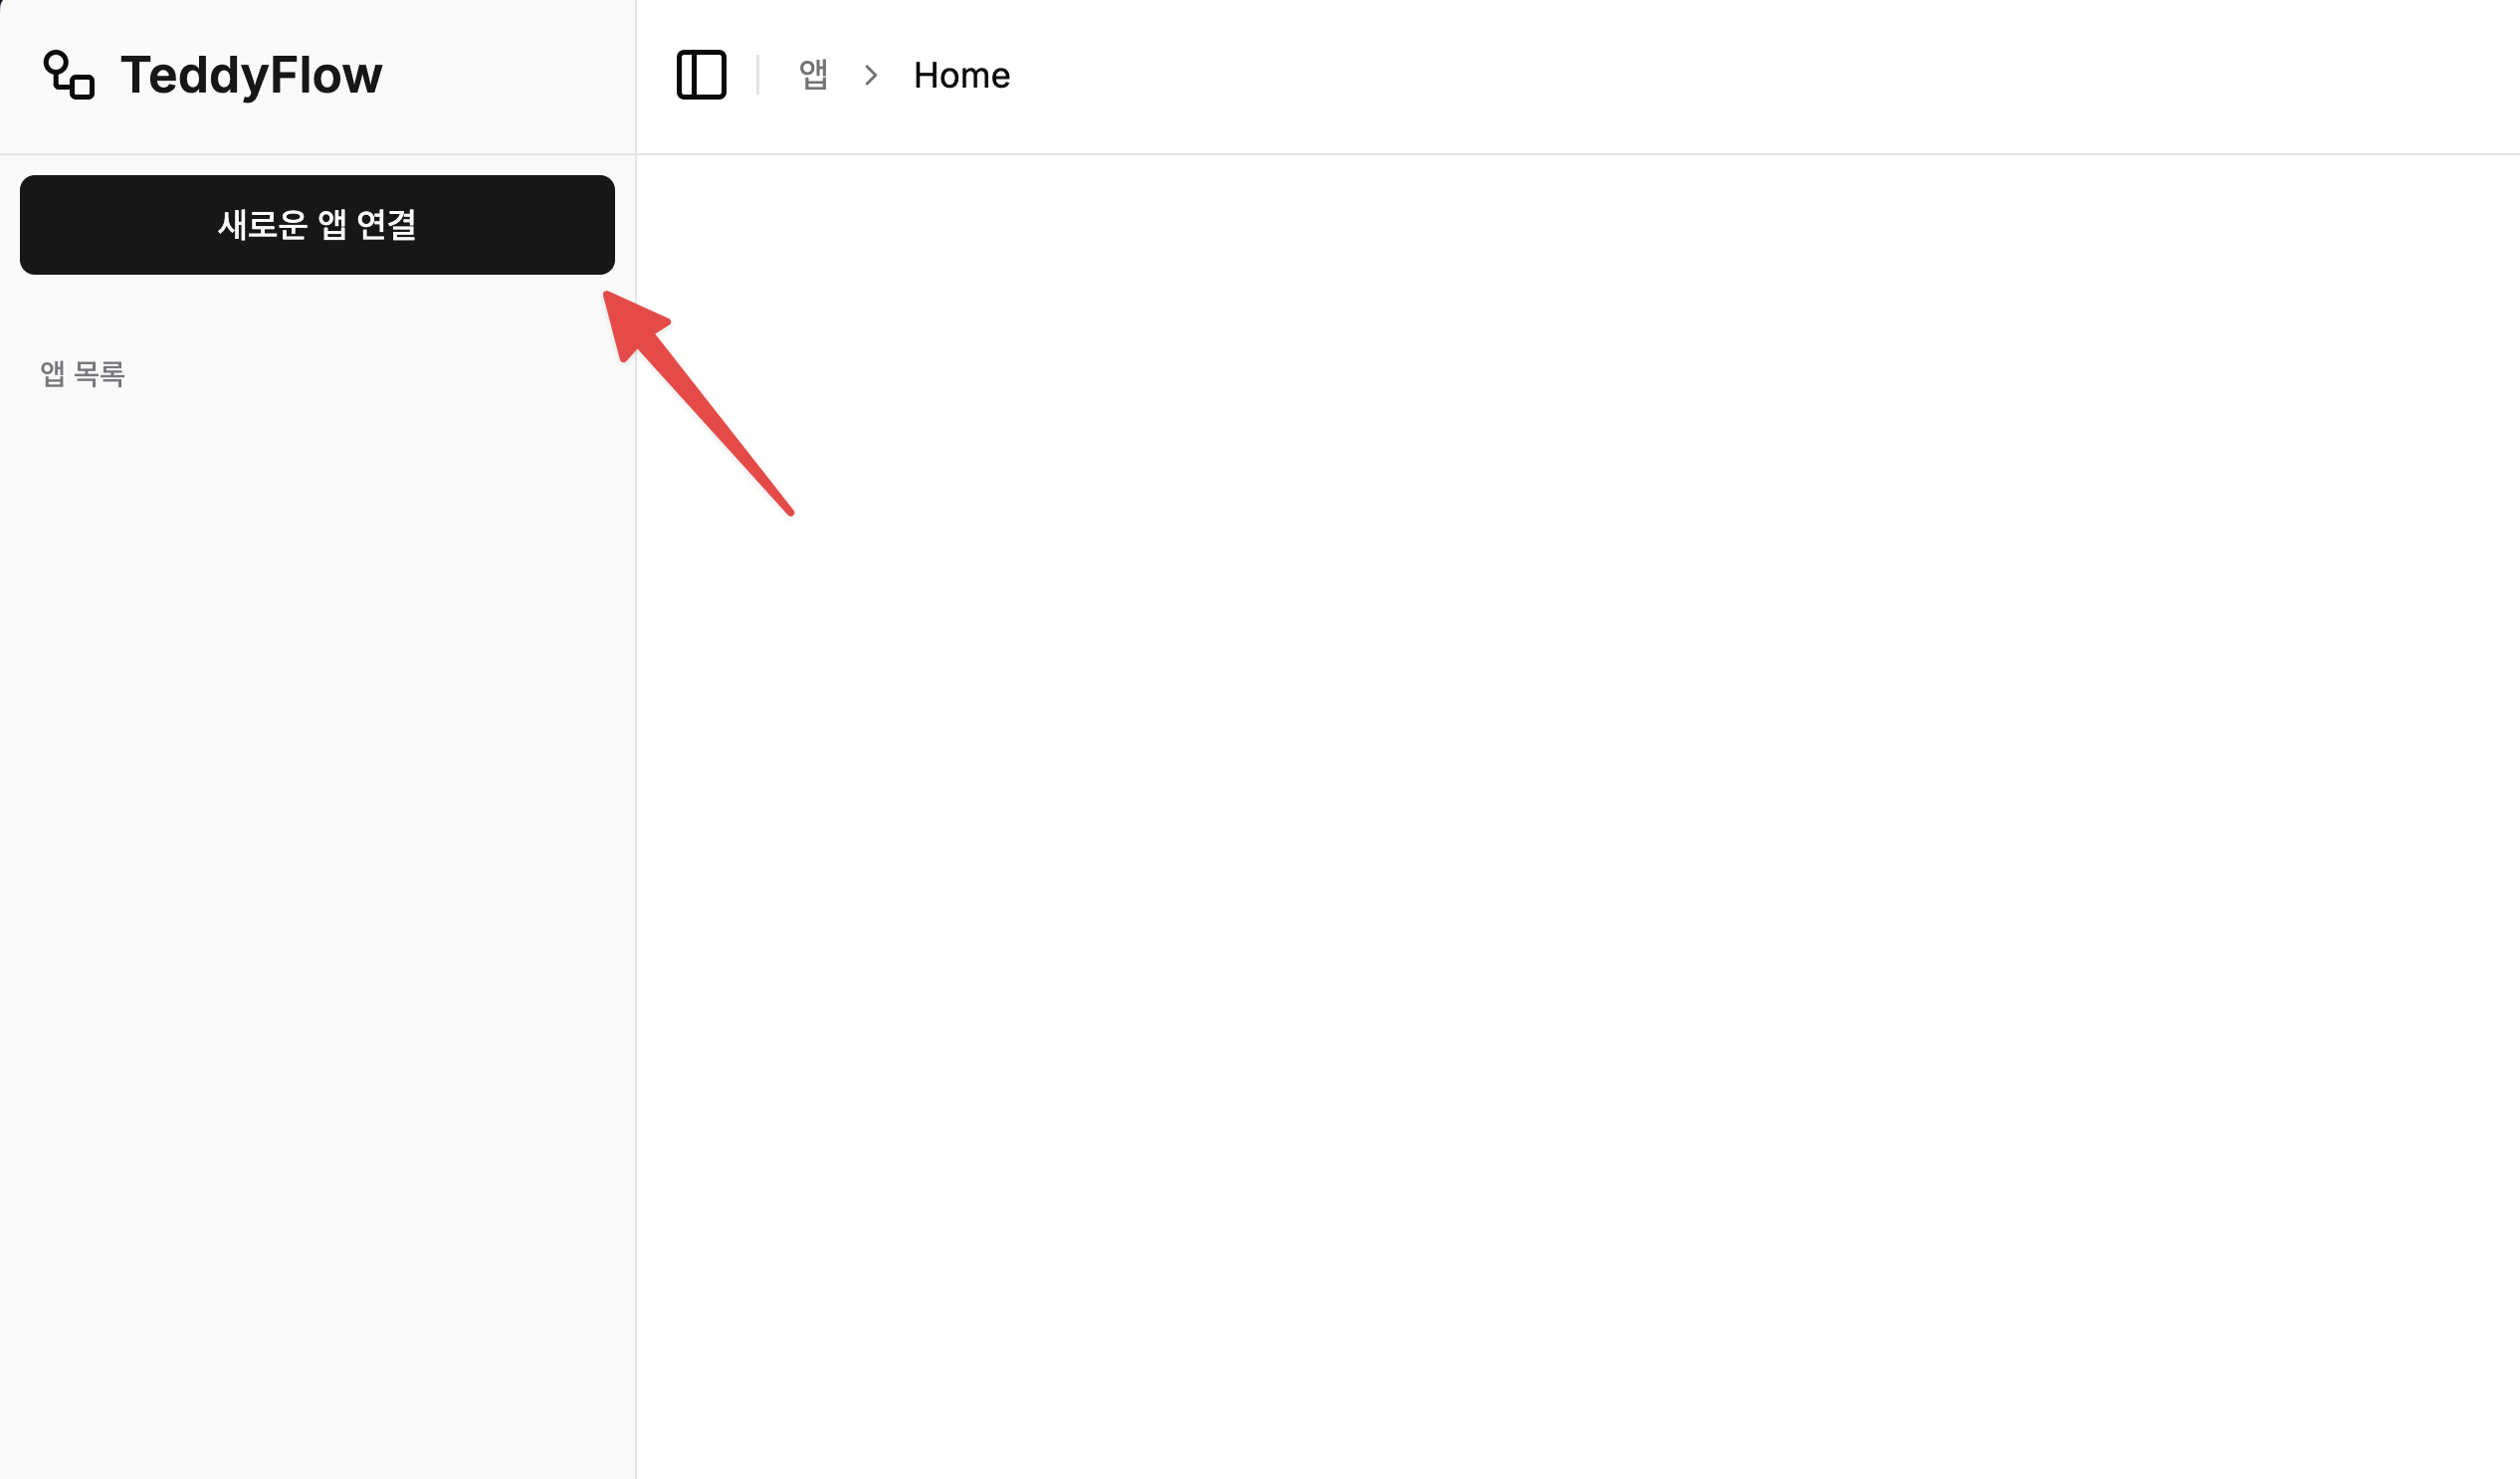
- 로그인 후 “새로운 앱 연결” 버튼을 클릭합니다.
- 앱 이름을 입력하고 “연결” 버튼을 클릭합니다.
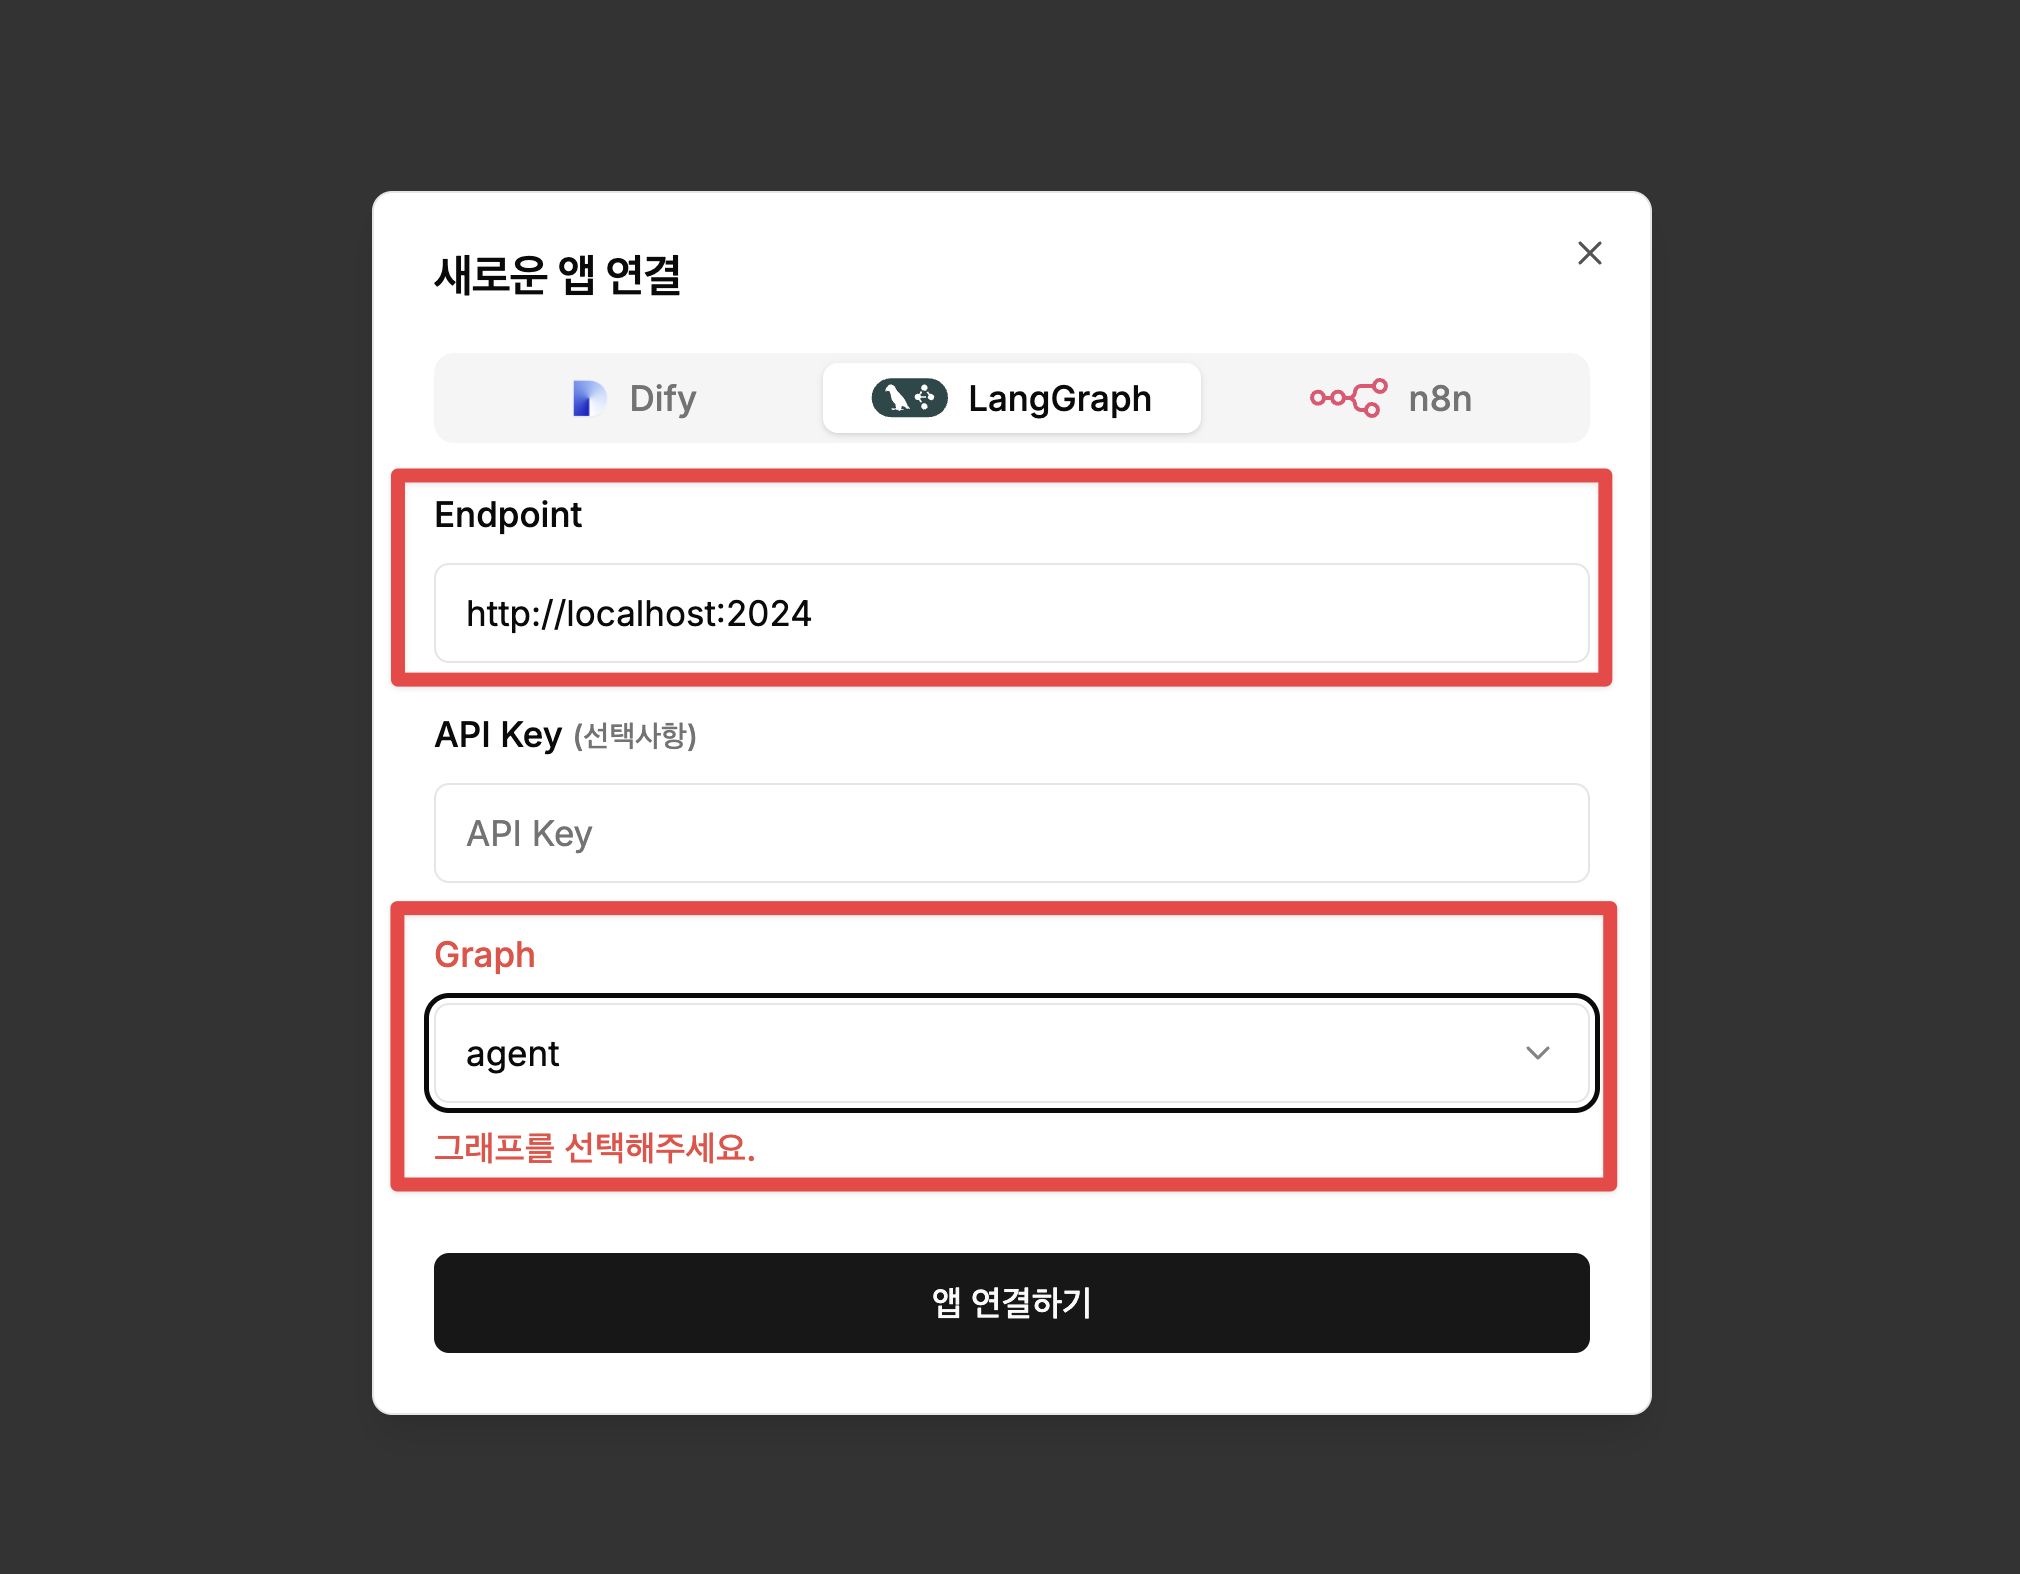
- 탭에서 “LangGraph” 를 선택한 뒤 다음의 정보를 입력합니다.
- Endpoint:
http://localhost:2024 - Graph:
agent
-
연결 설정이 완료되면 “저장” 버튼을 클릭합니다.
-
“앱 연결하기” 버튼을 눌러 저장합니다.
회사명 / 커뮤니티 로고 및 브랜딩 적용
회사명 / 커뮤니티를 위한 커스텀 기능을 출시하였습니다.
![]()
도입을 희망하신다면 [email protected] 으로 문의주시면 도움을 드리겠습니다.
라이센스
Apache License 2.0 (LICENSE)
Dev Tools Supporting MCP
The following are the main code editors that support the Model Context Protocol. Click the link to visit the official website for more information.


