Mcp Stytch B2b Okr Manager
What is Mcp Stytch B2b Okr Manager
mcp-stytch-b2b-okr-manager is a Workers server that integrates a static website, a REST API, and a Model Context Protocol server, all built on Cloudflare Workers. It leverages Stytch for managing member, tenant, and client identities, specifically tailored for B2B SaaS authentication needs.
Use cases
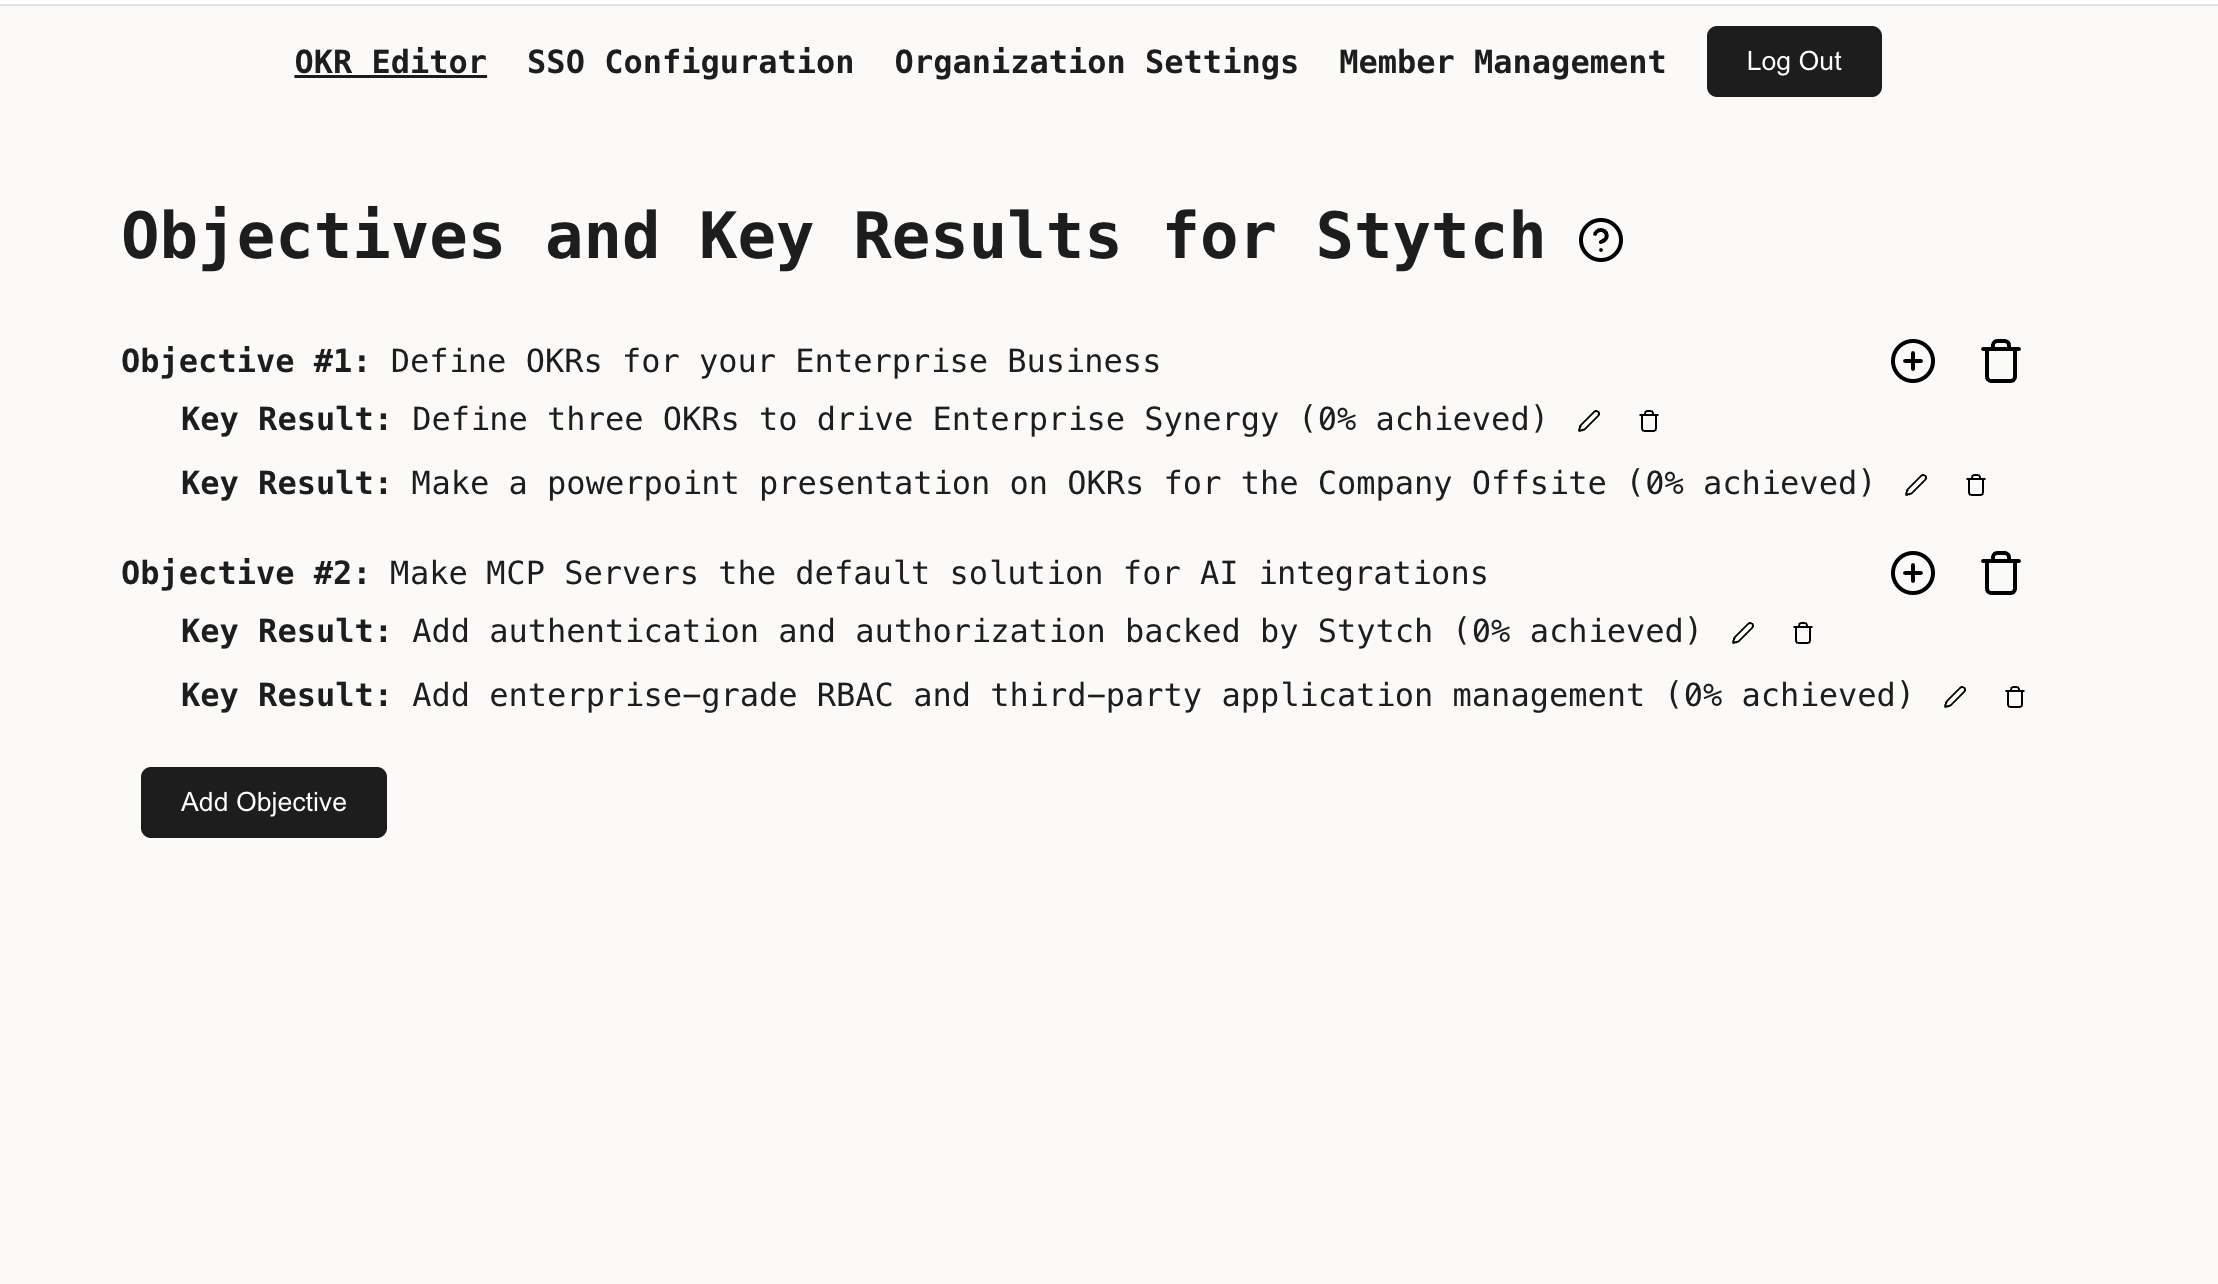
Use cases include managing organizational objectives and key results, facilitating role-based access control for different user personas, and integrating third-party applications with specific user permissions.
How to use
To use mcp-stytch-b2b-okr-manager, set up the application by following the provided instructions to integrate your Stytch credentials. Create roles with specific access levels, such as ‘stytch_admin’, ‘manager’, and ‘stytch_user’, to manage objectives and key results effectively.
Key features
Key features include a static website built with React and Vite, a REST API using Hono, and a Model Context Protocol server utilizing Workers Durable Objects. It supports complex RBAC policies and multi-tenancy, MFA, and RBAC through Stytch’s B2B product.
Where to use
mcp-stytch-b2b-okr-manager is suitable for B2B SaaS applications that require robust authentication and authorization mechanisms, particularly in environments where multiple tenants and user roles need to be managed.
Clients Supporting MCP
The following are the main client software that supports the Model Context Protocol. Click the link to visit the official website for more information.


Overview
What is Mcp Stytch B2b Okr Manager
mcp-stytch-b2b-okr-manager is a Workers server that integrates a static website, a REST API, and a Model Context Protocol server, all built on Cloudflare Workers. It leverages Stytch for managing member, tenant, and client identities, specifically tailored for B2B SaaS authentication needs.
Use cases
Use cases include managing organizational objectives and key results, facilitating role-based access control for different user personas, and integrating third-party applications with specific user permissions.
How to use
To use mcp-stytch-b2b-okr-manager, set up the application by following the provided instructions to integrate your Stytch credentials. Create roles with specific access levels, such as ‘stytch_admin’, ‘manager’, and ‘stytch_user’, to manage objectives and key results effectively.
Key features
Key features include a static website built with React and Vite, a REST API using Hono, and a Model Context Protocol server utilizing Workers Durable Objects. It supports complex RBAC policies and multi-tenancy, MFA, and RBAC through Stytch’s B2B product.
Where to use
mcp-stytch-b2b-okr-manager is suitable for B2B SaaS applications that require robust authentication and authorization mechanisms, particularly in environments where multiple tenants and user roles need to be managed.
Clients Supporting MCP
The following are the main client software that supports the Model Context Protocol. Click the link to visit the official website for more information.
Content
Workers + Stytch OKR Manager MCP Server
This is a Workers server that composes three functions:
- A static website built using React and Vite on top of Worker Assets
- A REST API built using Hono on top of Workers KV
- A Model Context Protocol Server built using on top of Workers Durable Objects
Member, Tenant, and client identity is managed using Stytch. Put together, these three features show how to extend a traditional full-stack CRUD application for use by an AI agent.
This demo uses the Stytch B2B product, which is purpose-built for B2B SaaS authentication requirements like multi-tenancy, MFA, and RBAC.
If you are more interested in Stytch’s Consumer product, see this demo instead.
Set up
Follow the steps below to get this application fully functional and running using your own Stytch credentials.
We will be creating a complex RBAC policy with 3 personas that interacts with both Stytch-defined resources and custom resources managed by the application.
At the end we will have:
- A
stytch_adminrole with universal access to all resources within an organization. They will have control overobjectives,key_results, and all predefined Stytch resources like members, authentication settings, and SSO configuration. - A
managerrole with partial access to most resources - they may invite new members and managekey_results, but cannot set top-level companyobjectives - A
stytch_memberrole with limited access to most resources - they may viewobjectivesand update their progress on achievingkey_results
We will also create a set of scopes that our users can grant to third-party applications. In order for a user to grant a scope to an application, they must have all of the permissions that scope encompasses. For example
- The
read:okrsscope requests onlyreadaccess on resources, and is grantable by all members - The
manage:krsscope requests write access to thekey_resultsresource, and is grantable by members with themanagerorstytch_adminrole, but not members with thestytch_userrole - The
manage:objectivesscope requests write access to theobjectives, and is only grantable by members with thestytch_adminrole
In the Stytch Dashboard
-
Create a Stytch account. Within the sign up flow select B2B Authentication as the authentication type you are interested in. Once your account is set up a Project called “My first project” will be automatically created for you.
-
Navigate to Frontend SDKs to enable the Frontend SDK in Test
-
Navigate to Connected Apps to enable Dynamic Client Registration
-
Navigate to Project Settings to view your Project ID and API keys. You will need these values later.
-
Navigate to Management API and create a new workspace management key. Copy the Key ID and Secret, you will need these values later.
On your machine
- In your terminal, clone the project, make sure we’re using a minimum supported version of
node, and install dependencies:
git clone https://github.com/stytchauth/mcp-stytch-b2b-okr-manager.git
cd mcp-stytch-b2b-okr-manager
nvm use
npm i
- Create an
.env.localfile by running the command below which copies the contents of.env.template.
cp .env.template .env.local
- Open
.env.localin the text editor of your choice, and set the environment variables using thepublic_tokenfound on Project Settings.
# This is what a completed .env.local file will look like
VITE_STYTCH_PUBLIC_TOKEN=public-token-test-abc123-abcde-1234-0987-0000-abcd1234
- Open
.dev.varsin the text editor of your choice, and set the environment variables using theProject IDandSecretfound on Project Settings.
// This is what a completed .dev.vars file will look like
STYTCH_PROJECT_ID=project-test-6c20cd16-73d5-44f7-852c-9a7e7b2ccf62
STYTCH_PROJECT_SECRET=secret-test-.....
- Update your Stytch RBAC Policy by running the following command, using the workspace management
Key IDandSecretyou created earlier, and theProject IDfound on Project Settings. You can view and edit the created RBAC Roles, Resources and Scopes in Roles & Permissions.
// Using example credentials, replace with your own
npm run update-policy -- --key-id "workspace-key-prod-4881b817-6336-410a-a953-6eceabaf5xc9" --secret "6ZcNGH7v9Oxxxxxxxxxx" --project-id "project-test-6c20cd16-73d5-44f7-852c-9a7e7b2ccf62"
Running locally
After completing all the setup steps above the application can be run with the command:
npm run dev
The application will be available at http://localhost:3000 and the MCP server will be available at http://localhost:3000/sse.
Test your MCP server using the MCP Inspector
npx @modelcontextprotocol/inspector@latest
Navigate to the URL where the Inspector is running, and input the following values:
- Transport Type:
SSE - URL:
http://localhost:3000/sse
Click Connect to test the authorization flow and interacting with the Objectives and Key Results via your MCP Server!
Deploy to Cloudflare Workers
Click the button - you’ll need to configure environment variables after the initial deployment.
Or, if you want to follow the steps by hand:
- Create a KV namespace for the OKR Manager app to use
npx wrangler kv namespace create OKRManagerKV
- Update the KV namespace ID in
wrangler.jsoncwith the ID you received:
"kv_namespaces": [
   {
      "binding": "OKRManagerKV",
      "id": "your-kv-namespace-id"
   }
]
- Upload your Stytch Project ID and Secret Env Vars for use by the worker
npx wrangler secret bulk .dev.vars
- Deploy the worker
npm run deploy
- Grant your deployment access to your Stytch project. Assuming your Stytch project was deployed at
https://mcp-stytch-b2b-okr-manager.$YOUR_ACCOUNT_NAME.workers.dev:- Add
https://mcp-stytch-b2b-okr-manager.$YOUR_ACCOUNT_NAME.workers.dev/authenticateas an allowed Redirect URL - Add
https://mcp-stytch-b2b-okr-manager.$YOUR_ACCOUNT_NAME.workers.devas an allowed Authorized Application in the Frontend SDKs configuration
- Add
Get help and join the community
:speech_balloon: Stytch community Slack
Join the discussion, ask questions, and suggest new features in our Slack community!
Dev Tools Supporting MCP
The following are the main code editors that support the Model Context Protocol. Click the link to visit the official website for more information.


